Taking the perfect screenshot in Valheim can be a challenge if you don’t know the best way to do it. There are a few tricks we’ll discuss in our guide below that you can take advantage of. Such as how to remove the HUD, how to fly, preventing enemies from attacking you, and more. With certain updates made to Valheim, this has become a little more difficult than when it first launched.
| How to Take Screenshots in Valheim |
| Valheim Photo Mode Hotkeys |
| How to Find the Valheim Screenshot Folder |
How to Take Screenshots in Valheim
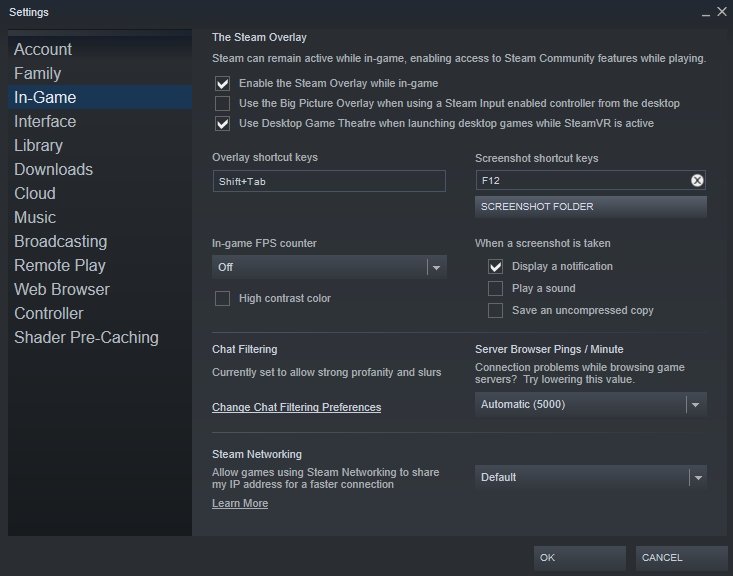
Before we get into how you can create your own photo mode, let’s discuss how to actually take screenshots. First, by default, you can take screenshots through Steam by pressing the F12 key. This will immediately take a picture of what’s visible on your screen. If you’d like to change this hotkey button, you can do so by going to the Steam settings. These are reachable from either the Steam overlay or launcher by clicking Steam at the top-left corner. After doing so, enter the Settings, then “In-Game” section, and tweak the “Screenshot Shortcut Keys”.
Continue to the next section for how to remove the hud, how to fly, and a neat trick for taking great pictures.
Valheim Photo Mode Hotkeys
While Valheim doesn’t have an actual photo mode, you can essentially create your own version of one. The first trick is to remove the hud by pressing ctrl and F3 at the same time. This will remove the entire hud so you don’t have anything like item overlays or health bars visible. If you want your environment or base to truly shine, this is a great way to put the focus on it.
The next photo mode trick is learning how to fly in Valheim so you can get the perfect angle. Originally, you could easily enter the console and type a command to enable cheats for flying. However, the developer later made this slightly more difficult and changed the command most people know for cheating. It was originally, “imacheater”. Instead, as explained in our guide on How to Spawn Items they’ve hidden the console too. Follow these steps to enable the console for using cheats to fly.
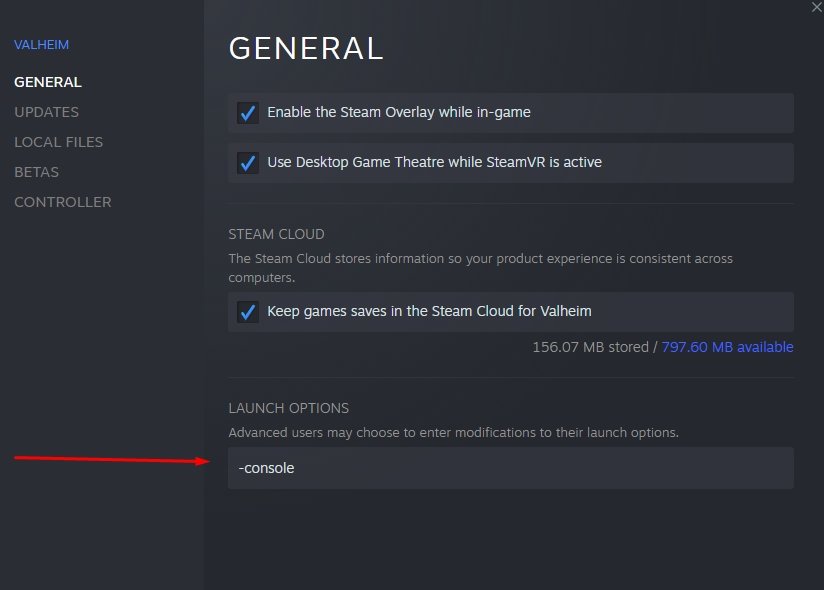
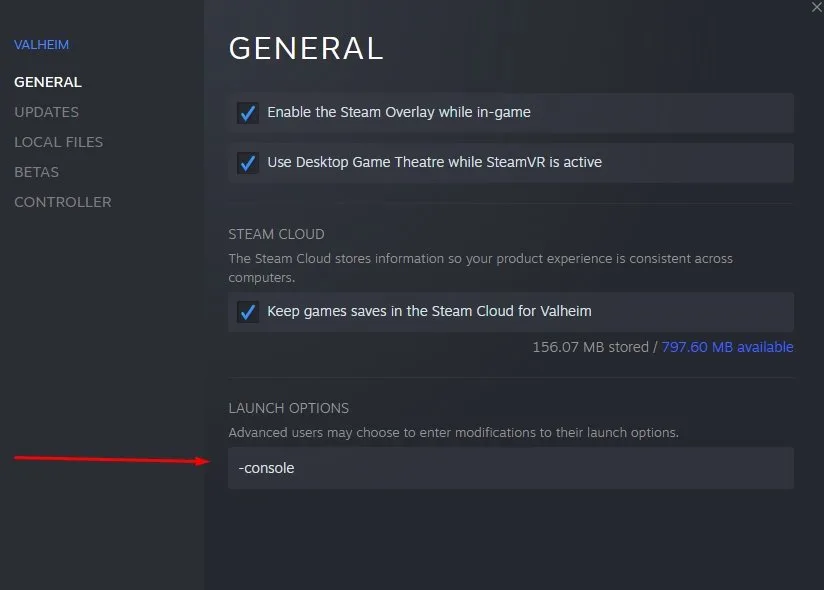
- Find Valheim in your Steam Library games list and then right-click it. Click “Properties” under the dropdown menu that appears.
- This will make a menu appear under the General section with an area called, “Launch Options”. Type “-console” into this area to enable the console in-game. You’ll need to restart Valheim if you do this while it’s running. This doesn’t impact anything else, so don’t worry about issues arising.
Now that you can enter the console, tap F5 when in-game to make it appear. Type “devcommands” in the console as the new command for replacing “imacheater”. This enables all sorts of useful cheats, but we’re primarily using it for screenshots. Now type the command “freefly” so you can fly around your character. While this command is active, you can move using wasd, ctrl to descend, and spacebar to ascend.
Typing the command again will leave the mode, returning you to your character. If you’re wondering how to make your character fly instead of entering this mode, there’s a trick for that too. Type “debugmode” in the console and then press Z to start flying. Also, while flying, even if you’re along the ground, enemies won’t target you.
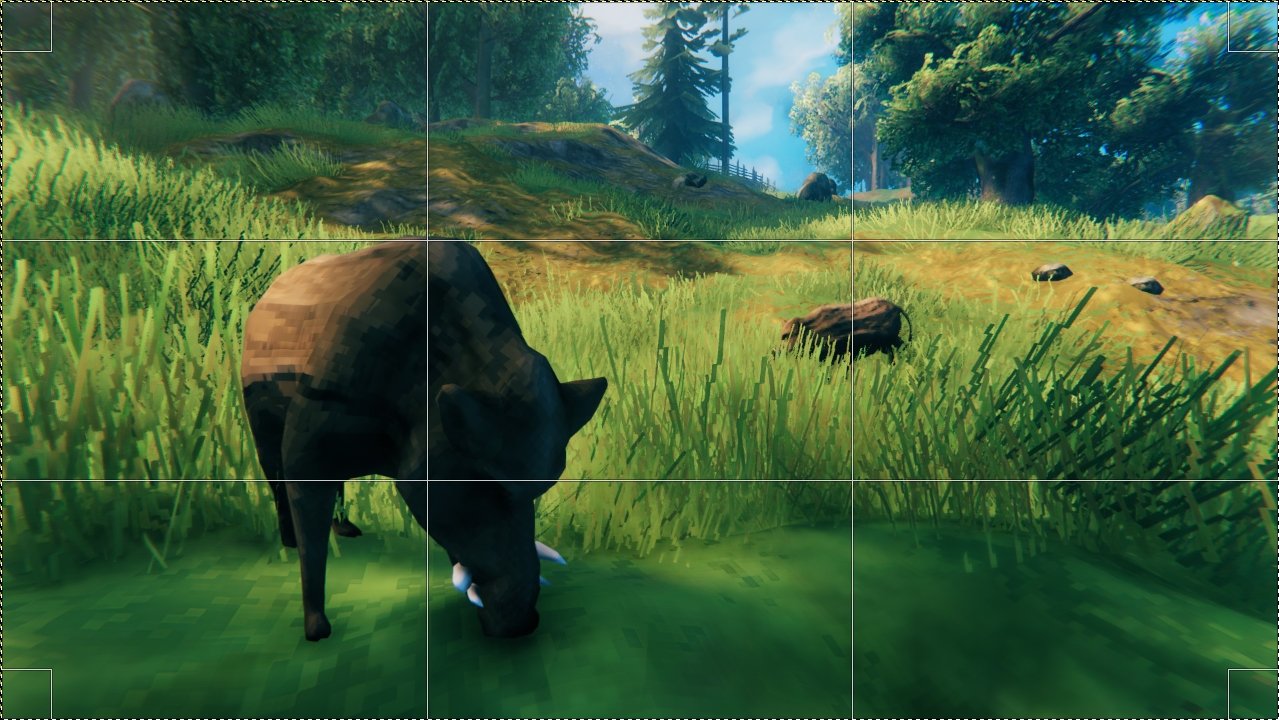
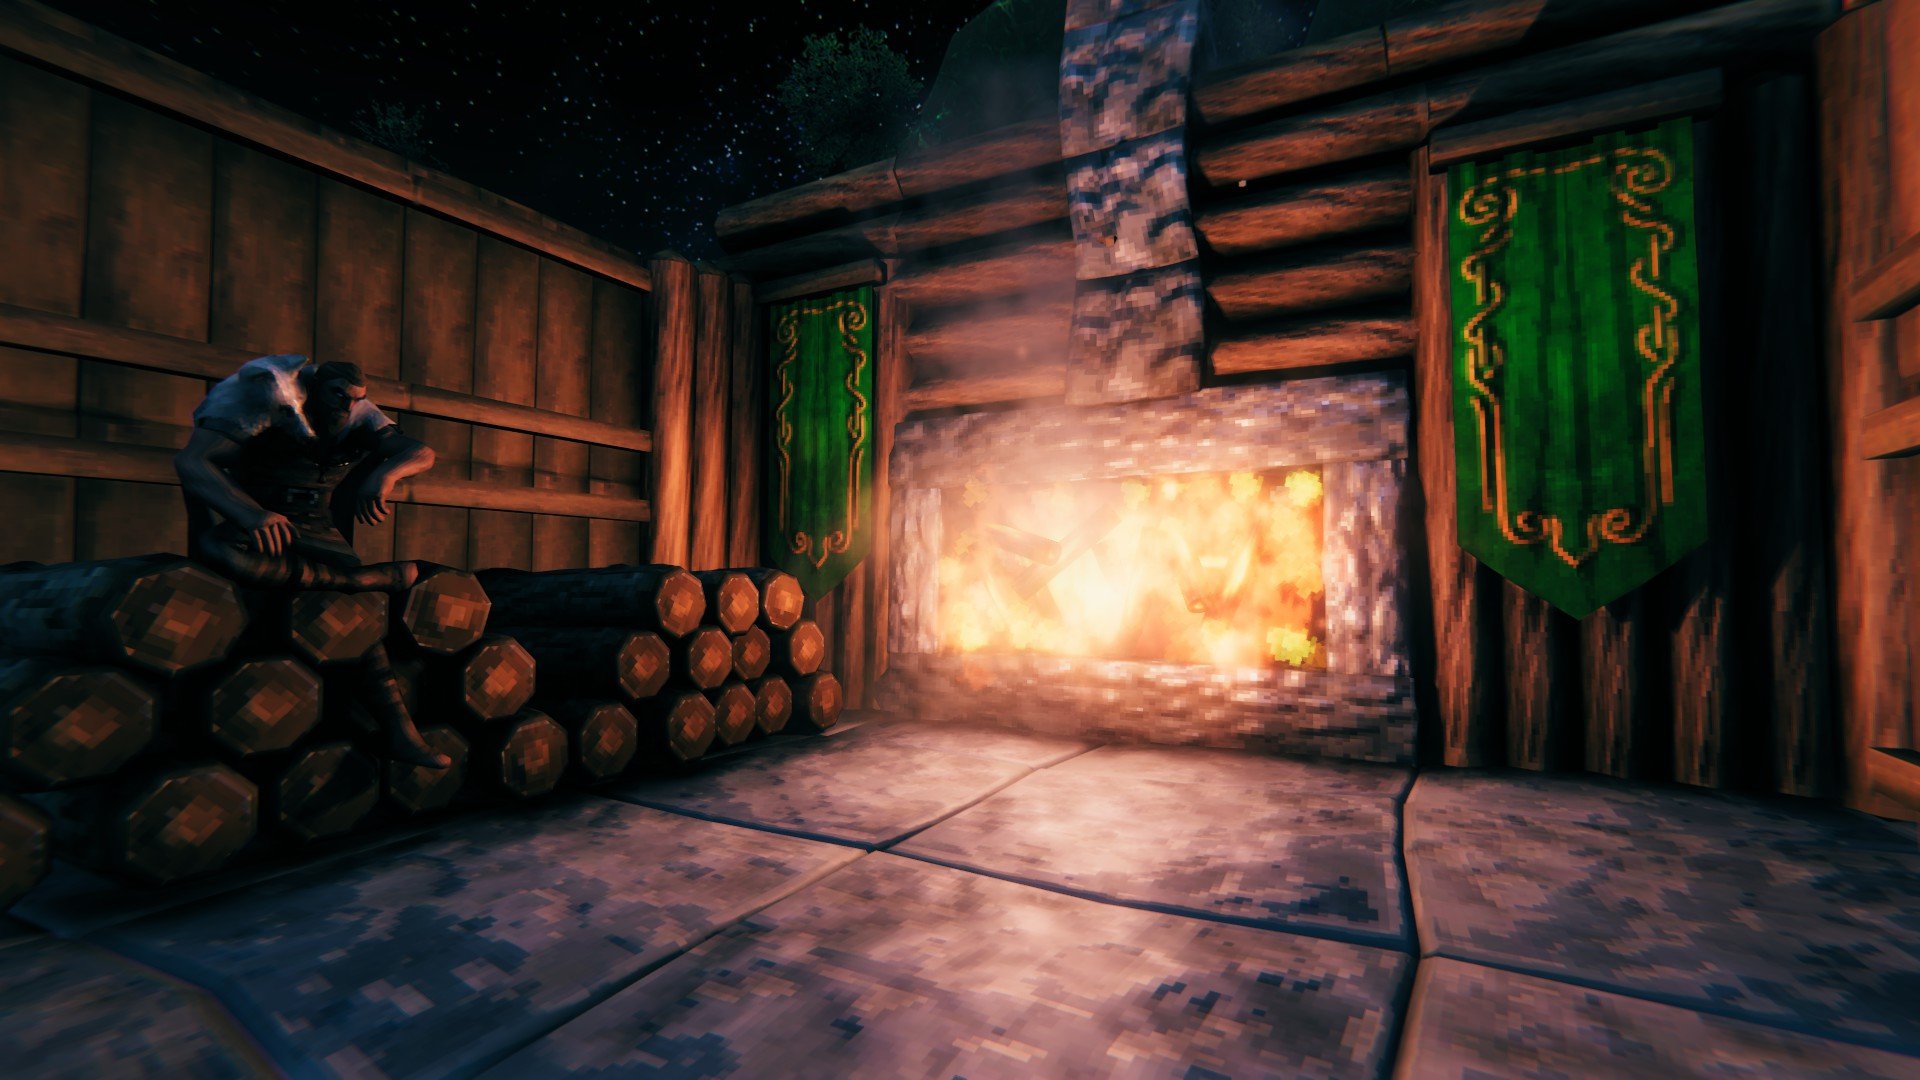
Now that you know how to take Valheim screenshots using this makeshift photo mode, there’s another useful tip worth knowing. A common trick photographers use to get great pictures is called the rule of thirds. Looking at the screenshot above, you can see the grid laid over the picture. The goal is to have whatever you’re focusing on in the picture meet at one of the spots where the lines intersect.
How to Find the Screenshot Folder
- Head to the Steam library and left-click Valheim in your game list.
- Scroll down until you notice an area that says “Screenshots” and has a few of yours visible as shown in the picture below.

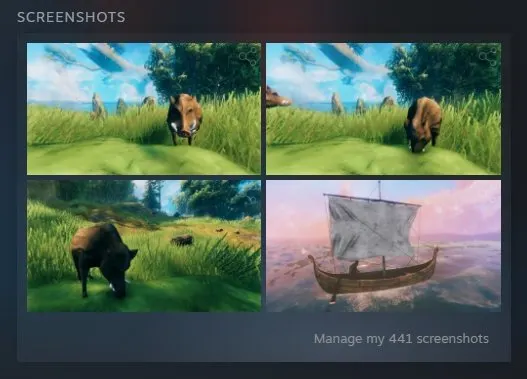
- Click “Manage my # screenshots” in this area. A window will open up with a new button you can click that’s labeled, “Show on Disk”.
- The folder where your screenshots are stored for this game will now open up.
If you’d like to see more useful Valheim guides, you can either visit our guide hub here or take a look below. We’ve listed a couple of guides that may be of interest to you. And if you’re still struggling with understanding something, feel free to ask in the comments for help. We’ll try to get back to you when possible.
- 10 Best Valheim Tips and Tricks For Beginners
- 9 Best Valheim Mods to Install
- Every Boss and Their Rewards in Valheim


Jeff is a journalist with over 10 years of experience writing, streaming, and making content about video games. With an associate degree in journalism, he’s a sucker for RPGs, survival games, roguelikes, and more.