Going Medieval is a city builder that stands out from similar games by letting you build higher and underground too. There are huge advantages to building in either direction to make your colony survive a little more easily. Continue reading our guide below on how to build underground and all the tips and tricks that go with it.
How to Build Underground in Going Medieval
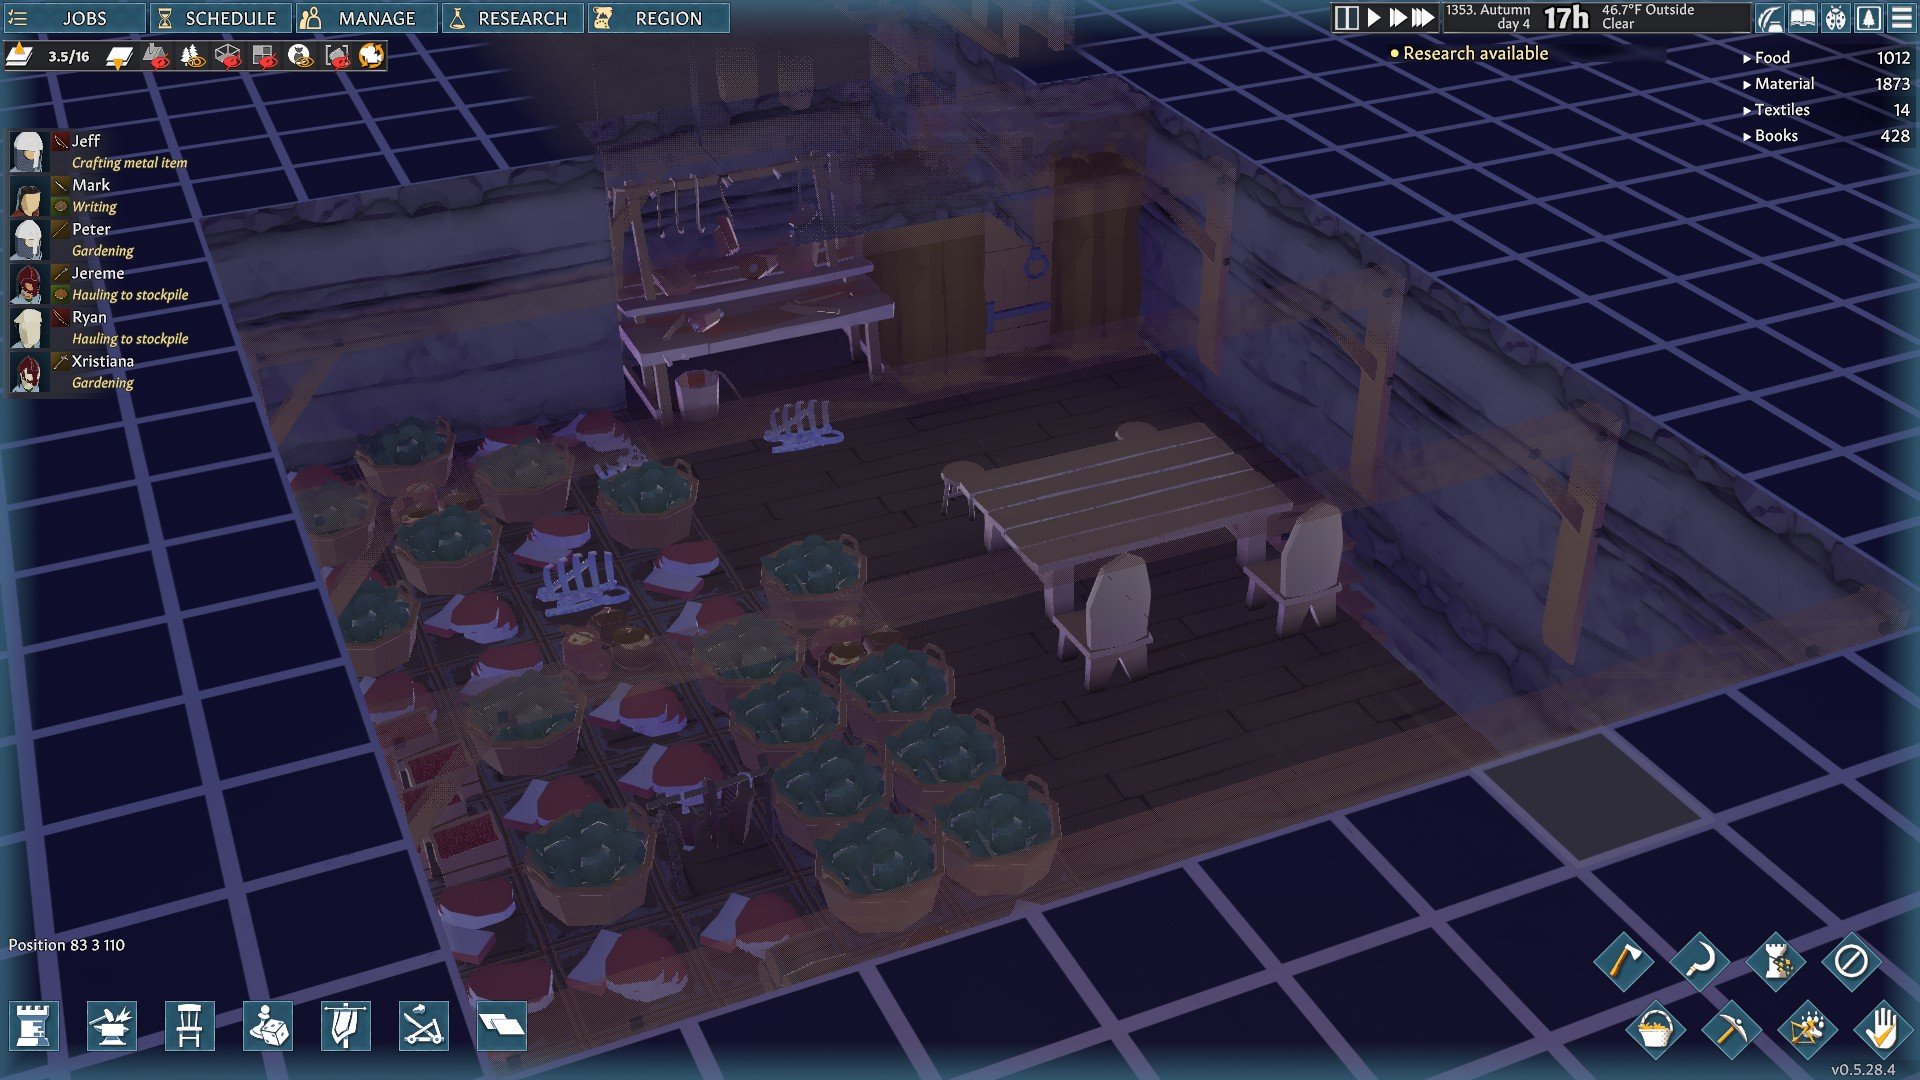
Before you start building underground, you’ll probably want to get a small base going above ground first. This will help keep your settlers alive while it takes time to mine everything out. With that said, you can definitely make an entire base underground in Going Medieval. The only time you’ll need to go back up to the surface is for food and certain materials like wood. Fortunately, building underground doesn’t require any fancy resources or tools.
Mine the Floor For Stairs
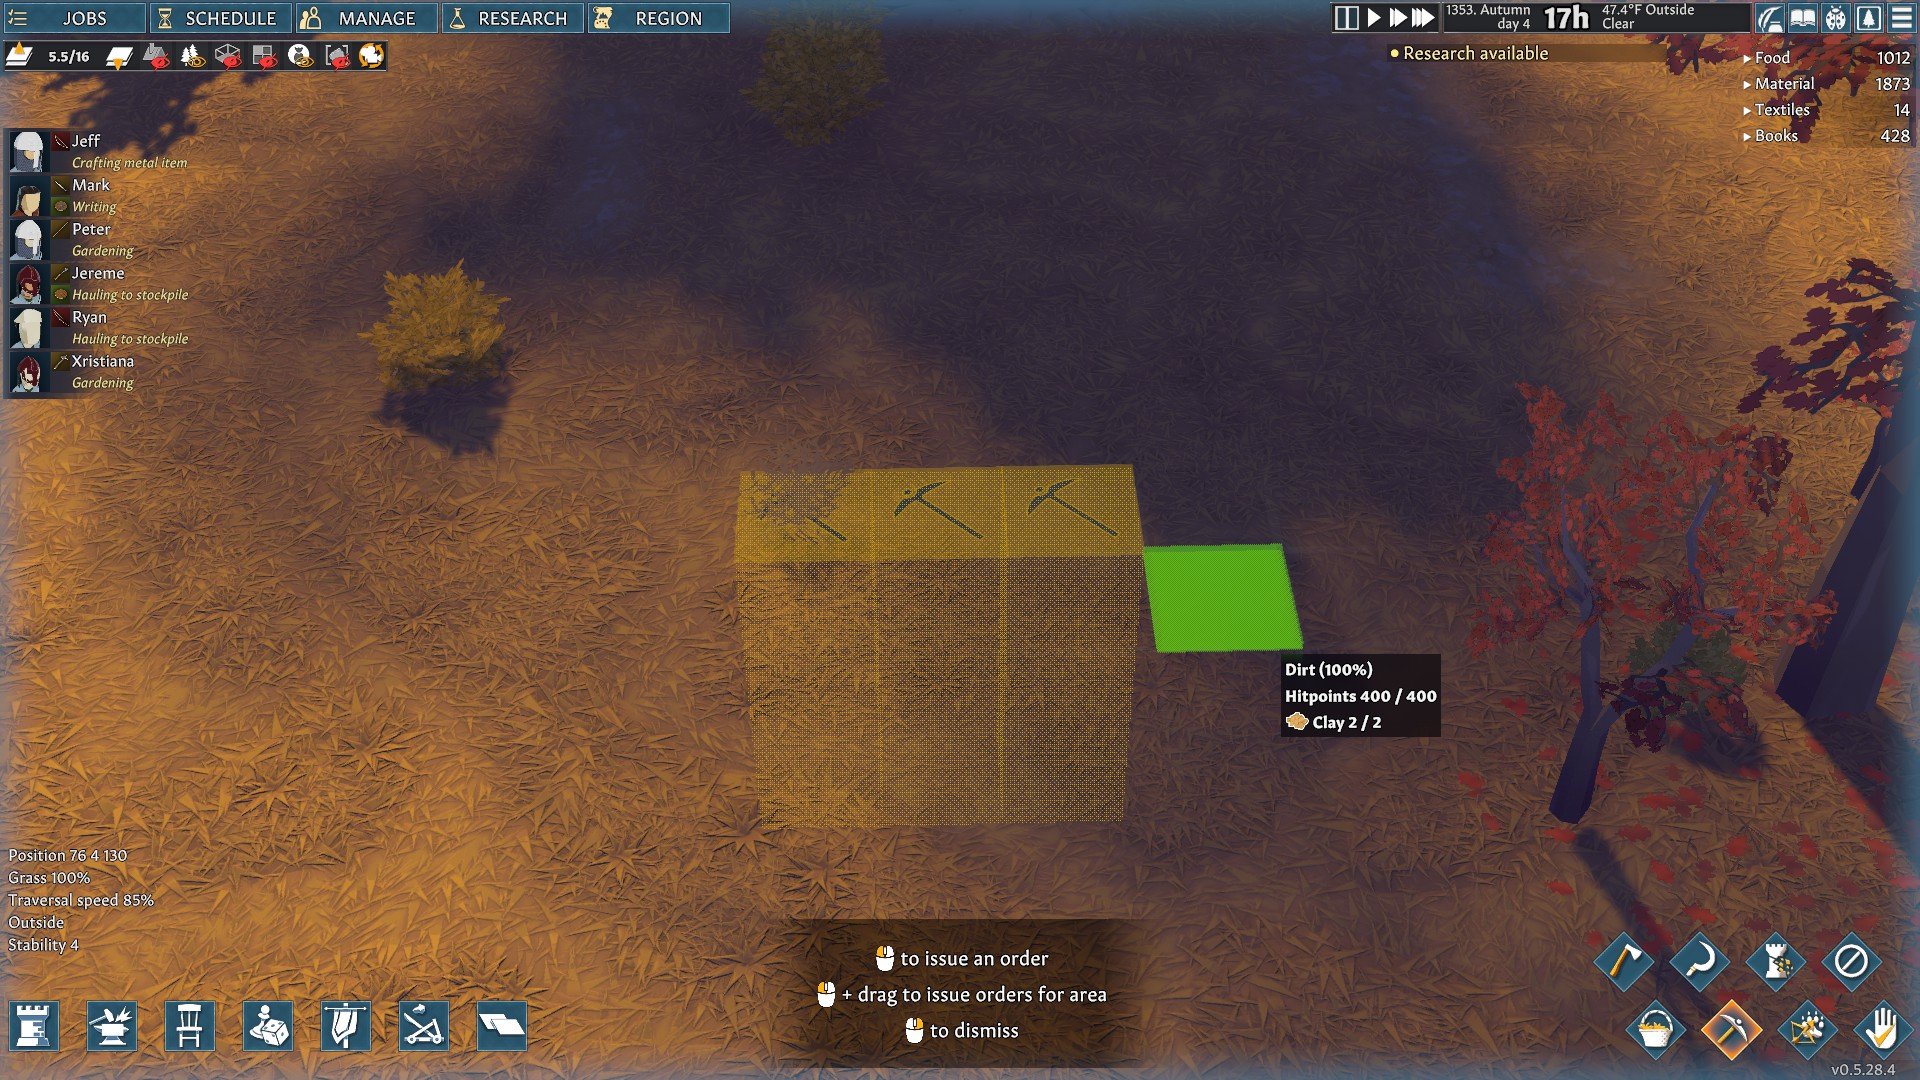
It all starts with mining the floor beneath you to begin heading down.
If you want to build a base underground, you’ll need to mine out the floor. Once you’ve mined out at least three block tiles in a line, you can then build a set of wooden stairs in that area. Your settlers can reach the stairs from above and complete them for descending later. Depending on how you want to make your underground base, you may want to go another layer down.
This makes it so you’ll have a ground layer above your head. Otherwise, you can still replace the ceiling with wooden or wicker floors. We’re not positive how thermal insulation works with ground tiles, so the ground may be more efficient at keeping things cool. With that said, you can still take advantage of other wall types such as Clay for better insulation. This will help keep it cool underground for freezing food.
For those that don’t know how to mine: All you need to do is click the pickaxe button near the bottom right corner and click where you want to mine. Otherwise, you can press the N hotkey to mine as well. Once you’ve clicked the floor or a clay wall, for example, your settlers will mine it. Unless they have other jobs with higher priority.
Controls For Viewing Each Layer
Make sure to take advantage of the camera viewing options for each layer.
Once you’ve begun digging out rooms underground, you’ll want to use the feature for viewing different layers. This can be a little bit of a pain with the camera jumping around at times, but you get better at using it. Here are the different controls that the tutorial explains for viewing each layer either below or above ground.
- Z raises the currently visible layer .5
- X lowers the currently visible layer .5
- Holding the CTRL button and scrolling your mouse wheel will change the elevation in .5 intervals. This is useful for tweaking what’s visible quickly.
- Holding the CTRL button and clicking an object will snap to that object’s layer. This only works for certain situations.
Prevent Cave-ins From Destroying Your Base
Wooden Beams are worth building to prevent the ceiling from collapsing.
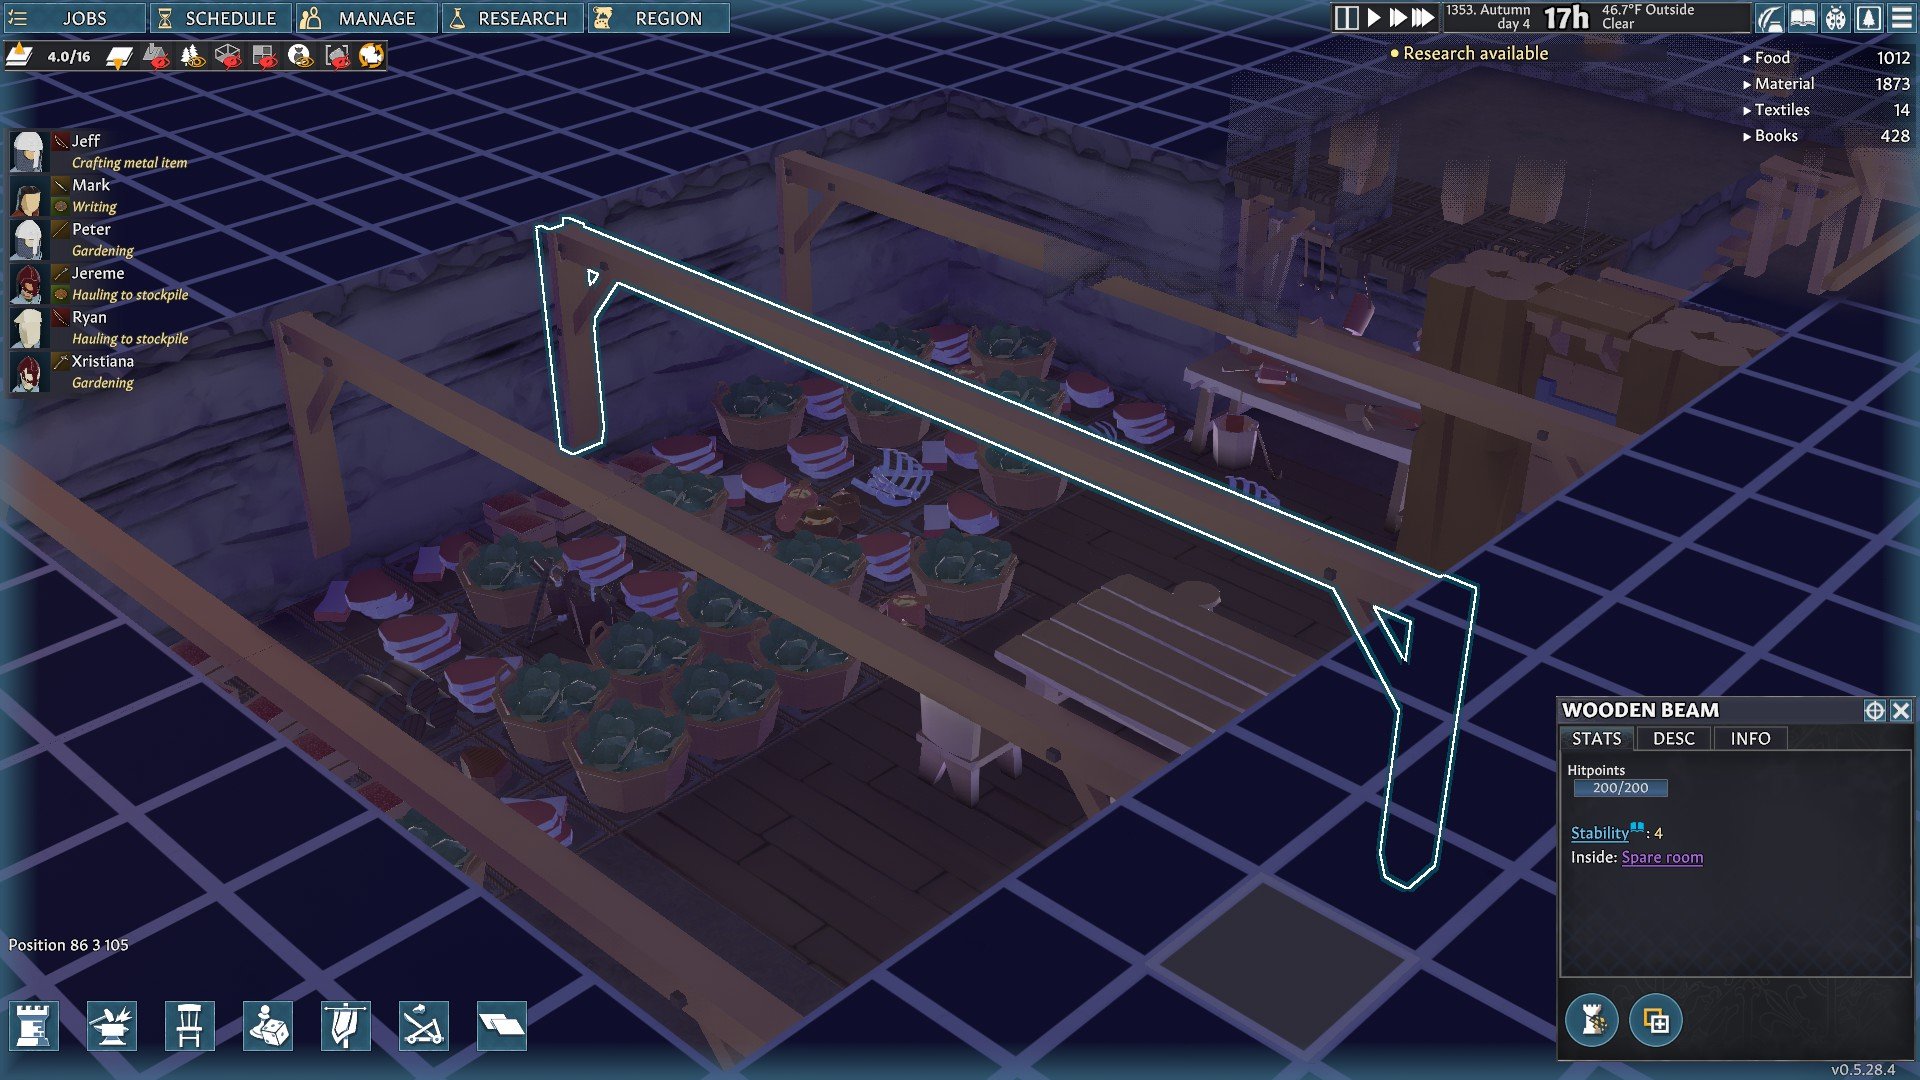
Regardless of whether you’re building down or up, you’ll need to keep structural integrity in mind. If you skip making a strong foundation, you’ll have cave-ins destroying your potential base. Nobody wants to lose their hard-earned work.
The simple fix for building a strong foundation is taking advantage of Wooden Beams. You can find these under the first building tab for your base (F1). All you need to do is keep a straight line unblocked between two walls and place a Wooden Beam there. This will support the ground/floor above it, preventing a cave-in. Otherwise, the ground will start collapsing before you can even get your base started.
One nice point to make about Wooden Beams is that they always cost only 15 wood. It doesn’t matter how far apart each wall is from the other. This helps with keeping resource costs down, especially when you’re starting out and using a lot of wood. Don’t be afraid to switch some of your wooden walls for clay ones after getting a bunch from digging.
Quick Underground Base Tips and Tricks
The main reason building underground is likely appealing to most players is that the temperature drops. You’ll get a tooltip recommending doing this once the summer season starts. This is so you can keep your settlers cool and prevent food from spoiling. However, you still need to build correctly to prevent the hot air from seeping in. Here are some quick tips for underground dwellers.
- Once you have an underground layer you want to build on, make sure to place a door. This will prevent your floor from being considered the outside. Unless you have a cave-in creating an open hole to the outside. Then, you’ll need to replace it with a floor or roof.
- 3.0 is low enough for your food to never spoil if you can keep the temperature around 35 degrees Fahrenheit. I’m not positive what the freezing temperature is, but my food won’t spoil at 34.5 Fahrenheit.
- Once you reach 1.0, you can’t dig any deeper. When trying to do so, the game will tell you that you’ve reached bedrock.
- You can place stairs directly in line with each other so settlers can continue running down in a straight line.
- Be careful that you don’t keep your settlers in an area that’s too cold for too long. They’ll gain negative mood modifiers. This is especially the case for those with perks against the cold.
- It’s tough to measure the structural integrity of ground ceilings, but I aim for Wooden Beams three tiles apart.
If you have any other Going Medieval questions for us, feel free to comment below the article. Building underground can be a difficult challenge when you’re first starting out if you don’t know what you’re doing. That’s why we put together this guide to make it a little easier to understand. More Going Medieval guides are currently in the works.
A Going Medieval key was provided by a PR company for coverage purposes.


Jeff is a journalist with over 10 years of experience writing, streaming, and making content about video games. With an associate degree in journalism, he’s a sucker for RPGs, survival games, roguelikes, and more.