If you need help completing the Everspace 2 mission, Spares & Scrap, continue reading below for our walkthrough. This guide contains in-detail steps on what you need to do for each objective alongside some tips and tricks. If you’re still struggling with something, comment below the article to get some help.
Spares & Scrap Walkthrough
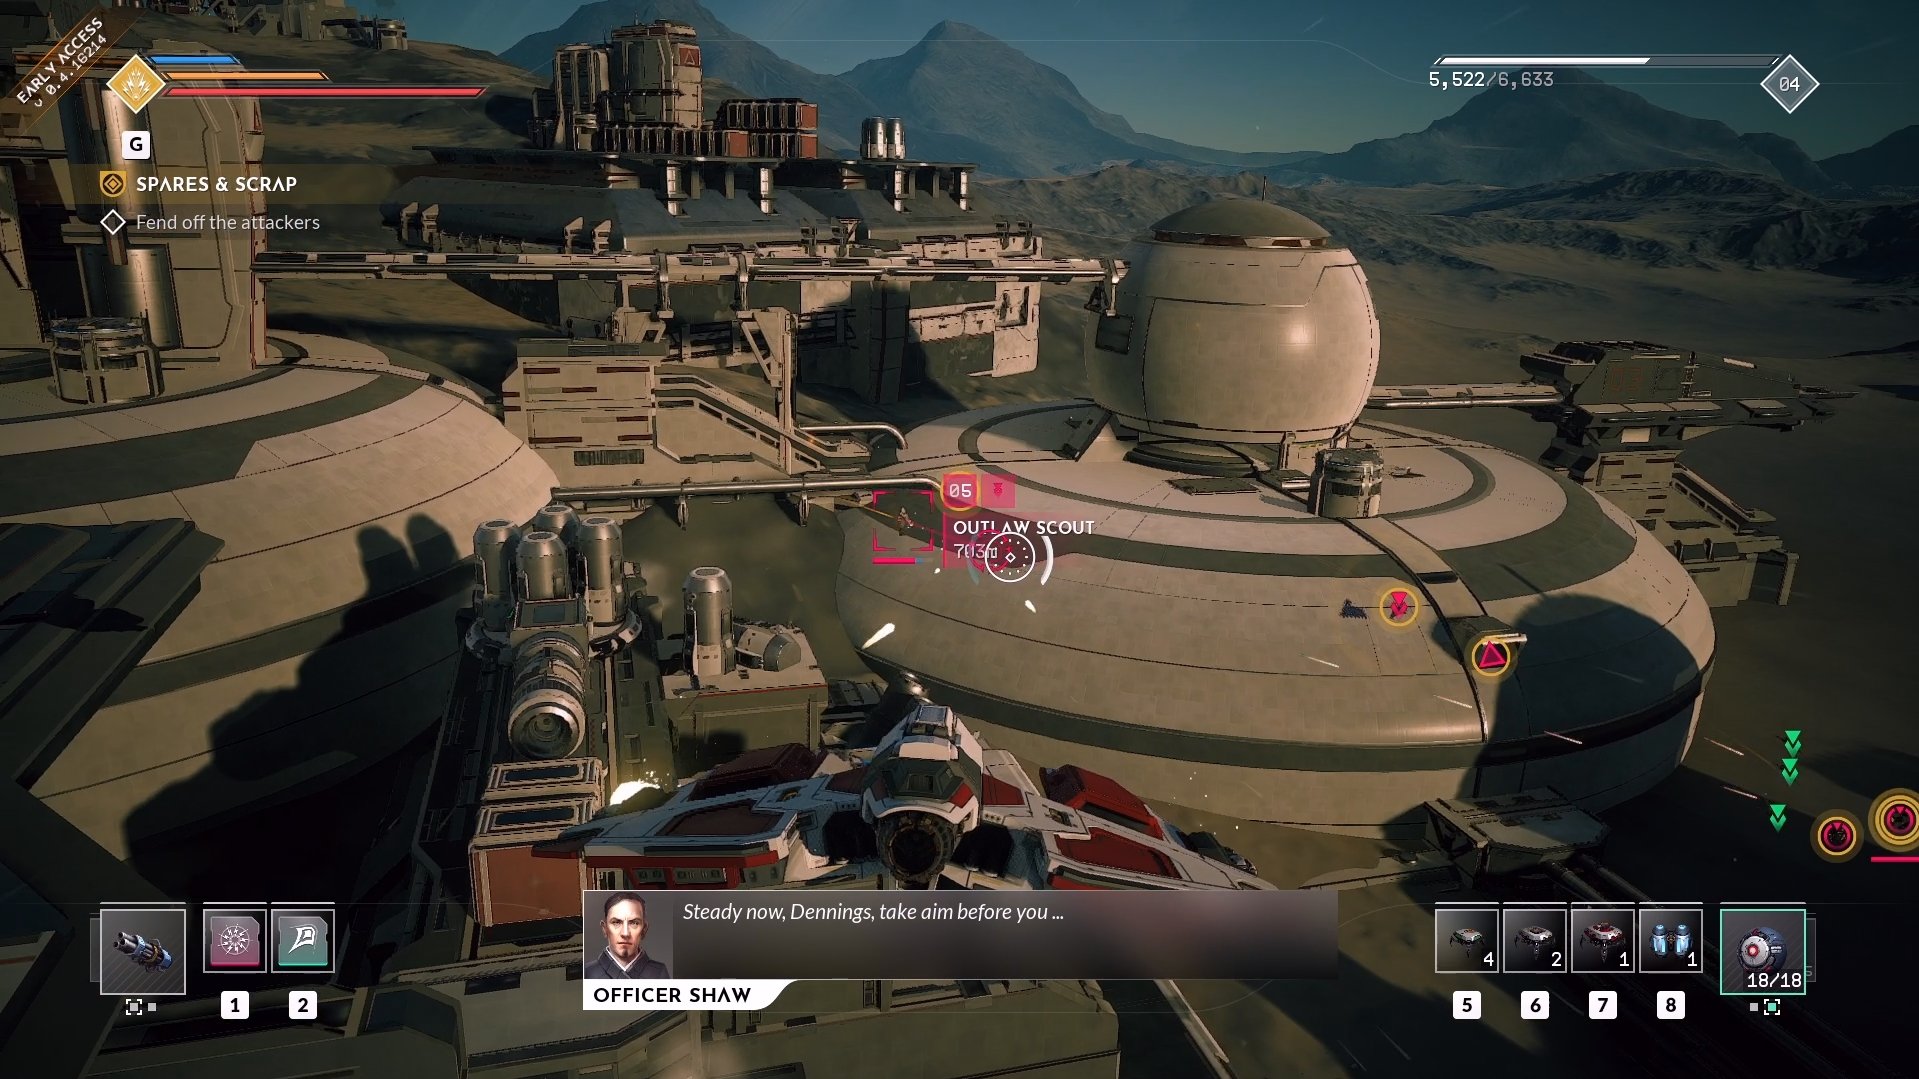
After completing the mission, In Transit, Dax will send you to Nephtys Plains for jump keys. Use your Jump Drive to reach the new location where you’ll run into some outlaws attacking a G&B outpost. This is where you’ll first get an opportunity to buy new ships in Everspace 2. Once all the outlaw ships are destroyed, dock at the Nephtys Plains Station to speak with Officer Shaw. Before continuing the Spares & Scrap mission, you can also grab jobs here. These appear to be side missions for gaining standing with factions alongside rewards.
Deal With the Mine Raiders
Now head out of the station to deal with some outlaws nearby. Officer Shaw mentions potentially giving you some jump keys if you can get rid of these outlaws. Since you’re low to the ground, you can use your Cruise Drive to fly up high and more easily see your objectives. Fly over to the crystal cavern to deal with a group of raiders defending the entrance. Afterward, make your way inside to deal with any remaining outlaws.
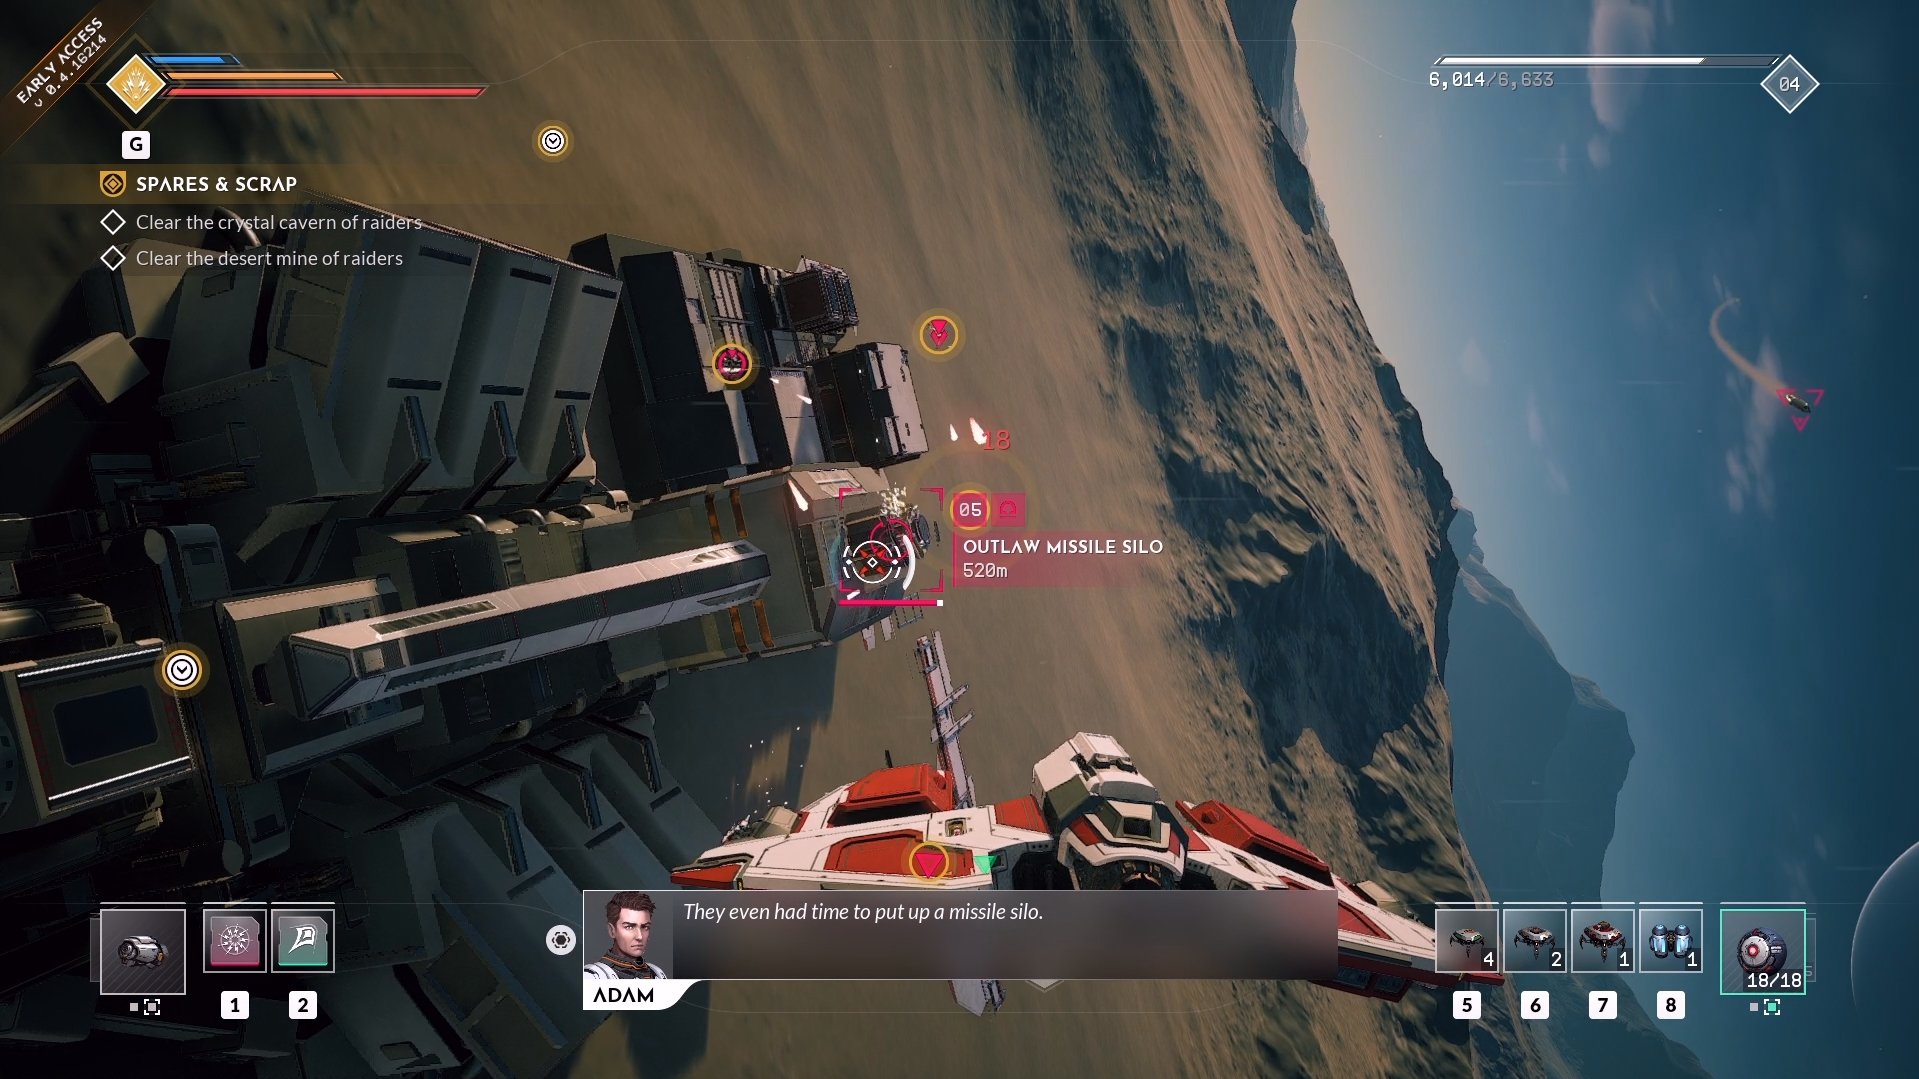
Now fly over to the desert mine entrancee and head inside. Be prepared for suicide bombing drones named, Outlaw Detonator Drones. Continue exploring the desert mine until you’ve killed every outlaw ship inside. Once you have, the mission objective will update telling you to return to the surface. Here you’ll need to kill an Elite Outlaw Scout with a good chunk of armor. Make sure to use weapons with high kinetic damage against them. After the leader is dead, return to the Nephtys Plains Station where Officer Shaw is.
Jump to Charybdis Bowl For Jump Keys
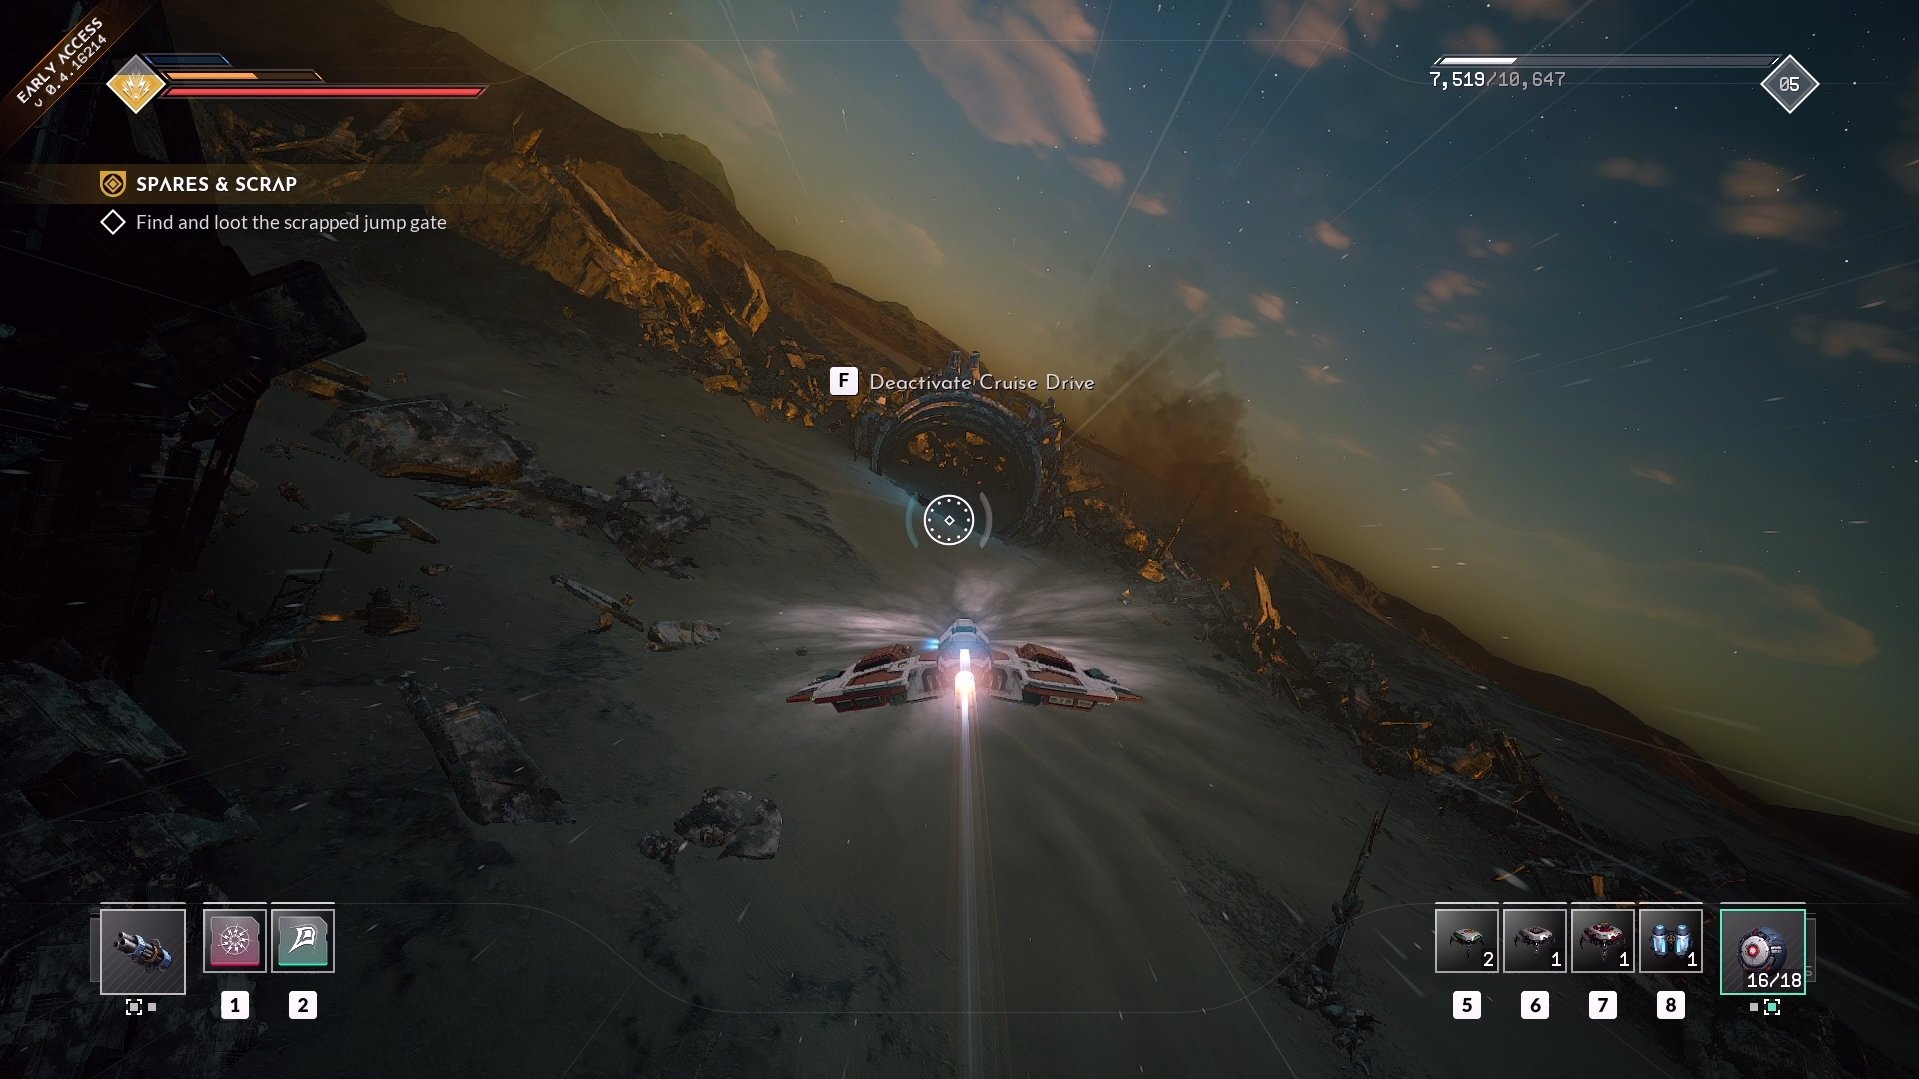
Continuing your Spares & Scrap goal of finding jump keys, head to Charybdis Bowl where a junkyard is. A scrapped jump gate is on the surface with tons of wreckage all over the place. If you thoroughly search the area, you’ll come across some hidden containers. The container you need to find is near a large jump gate ring shown in the screenshot above. When you get close, a container named, “Jump Gate Module” will appear. Loot this to advance the mission forward. Before you can jump out, a Jump Suppressor signal appears.
Finding the Jump Suppressor Signal
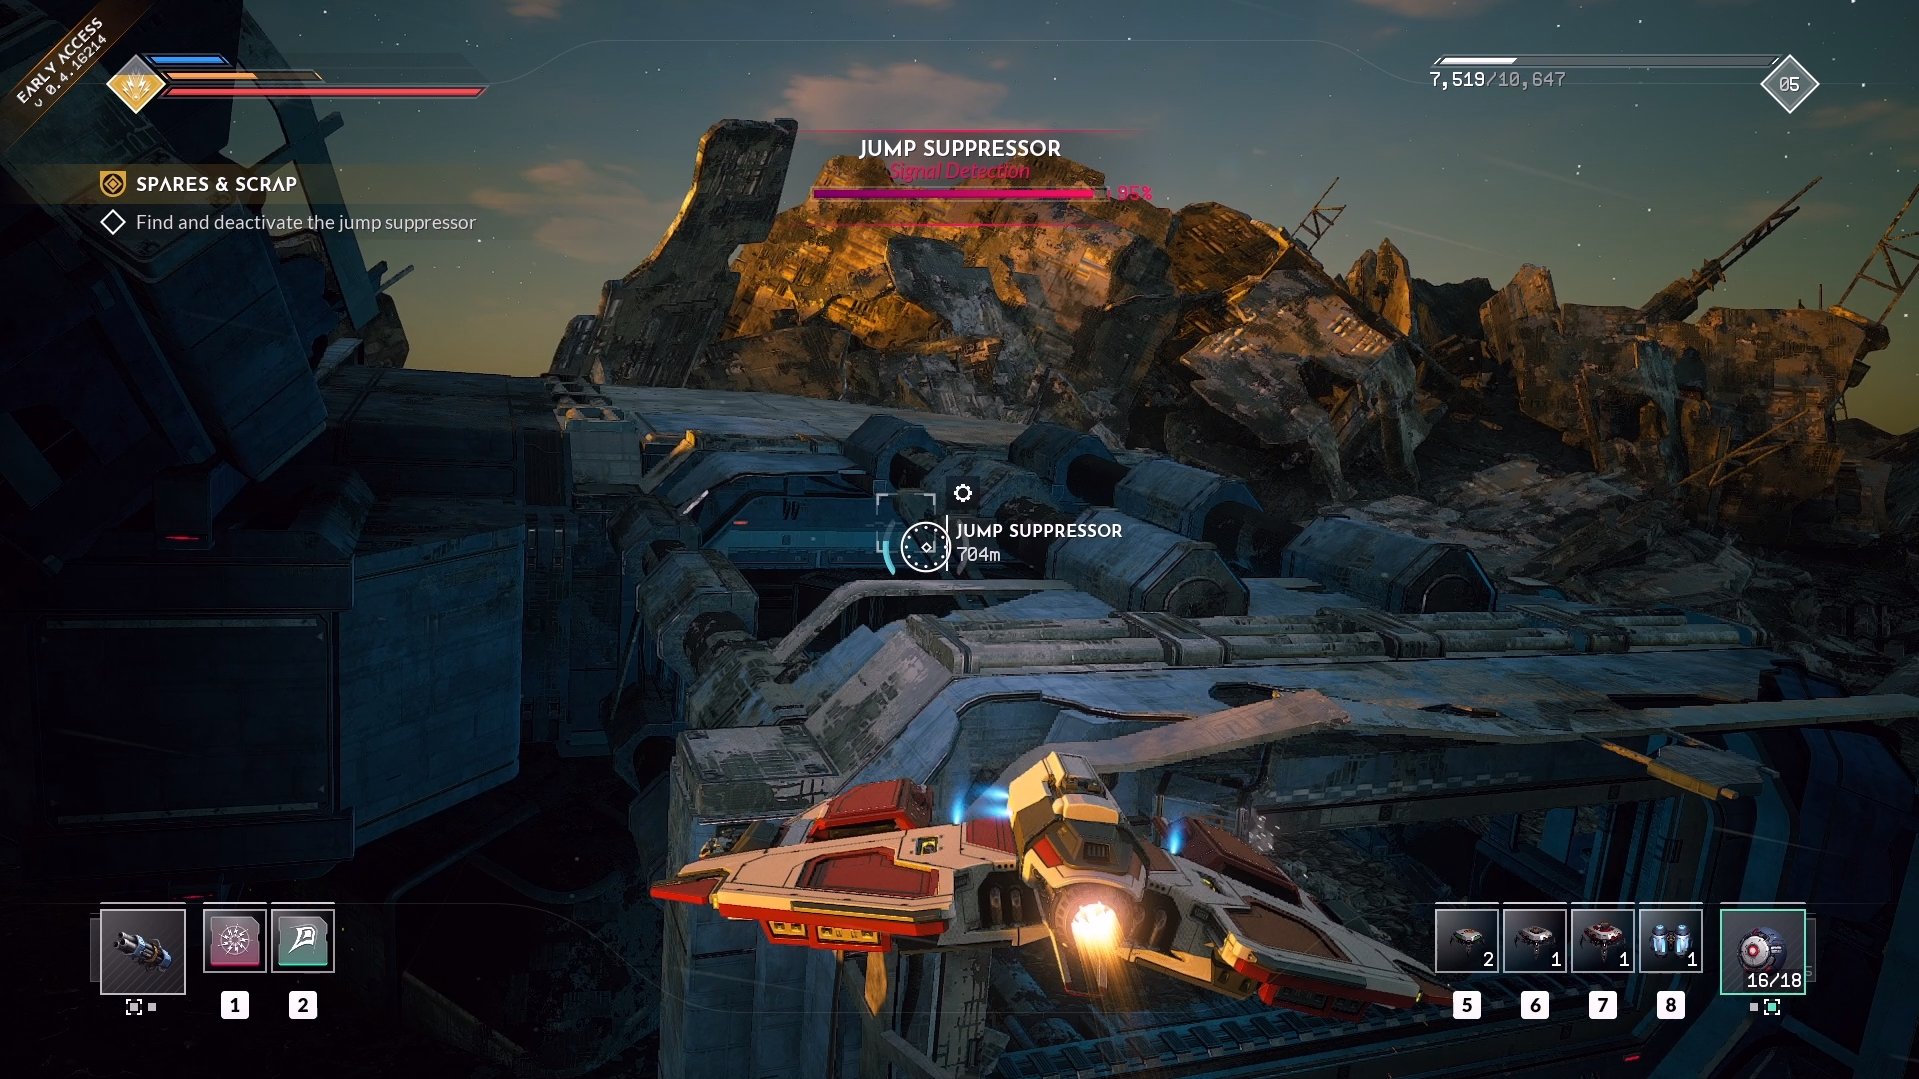
Use Cruise Drive in a direction as you try and get closer to the suppressor. If the percentage rises, you’re going the right way. It’s in more wreckage that you’ll eventually get trapped inside. Continue deeper inside while avoiding laser traps and closing doors. If you’re struggling, just wait for an opportunity and use your boost through the moving doors. Eventually, you’ll reach a blue forcefield that you need to disable.
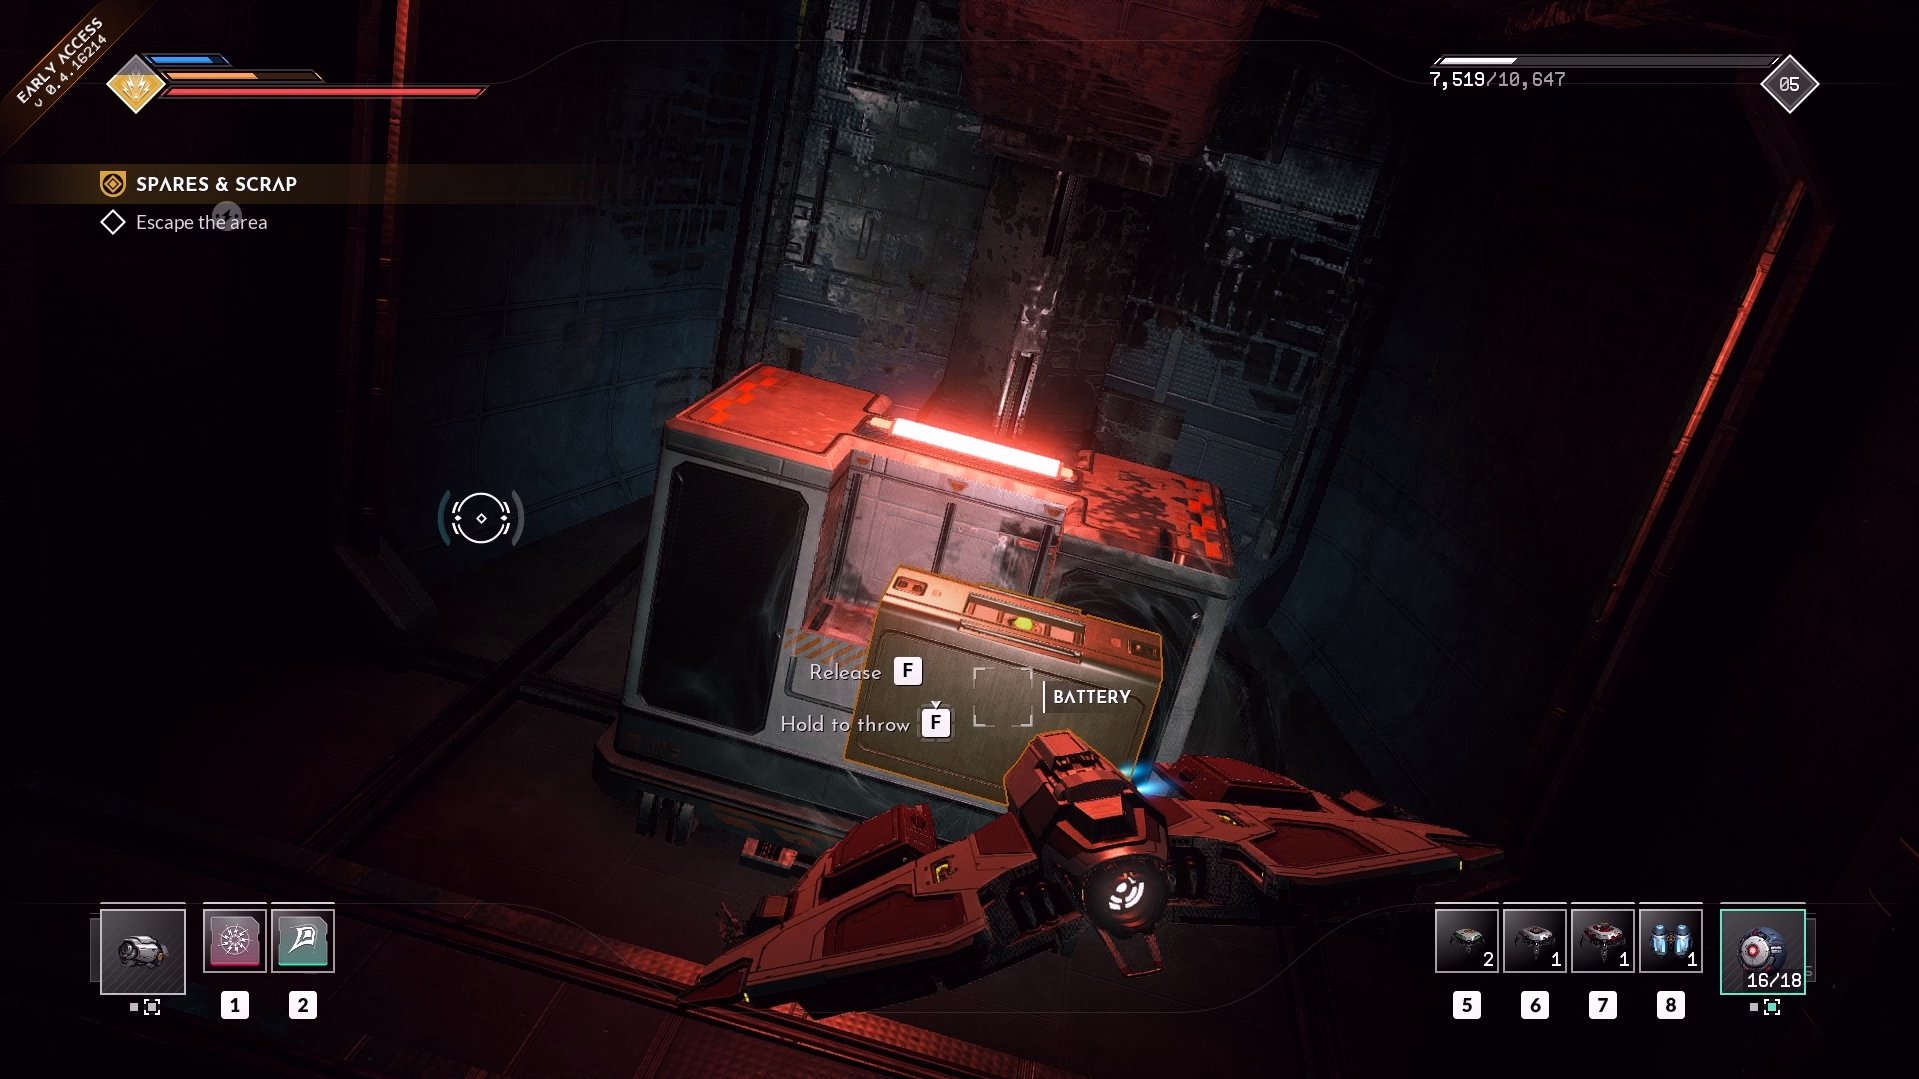
Find the nearby battery that you can grab and insert into an empty generator by the shield. This will reveal a closed area with two Shield Generators that you can destroy. Return to the surface by heading through the now disabled forcefield. Upon leaving the facility, an AI named Banjack will ask that you don’t leave. Finish speaking with Banjack and then dock at a nearby station called, G&B Scrapyard.
Returning to the Rhodia II Homebase
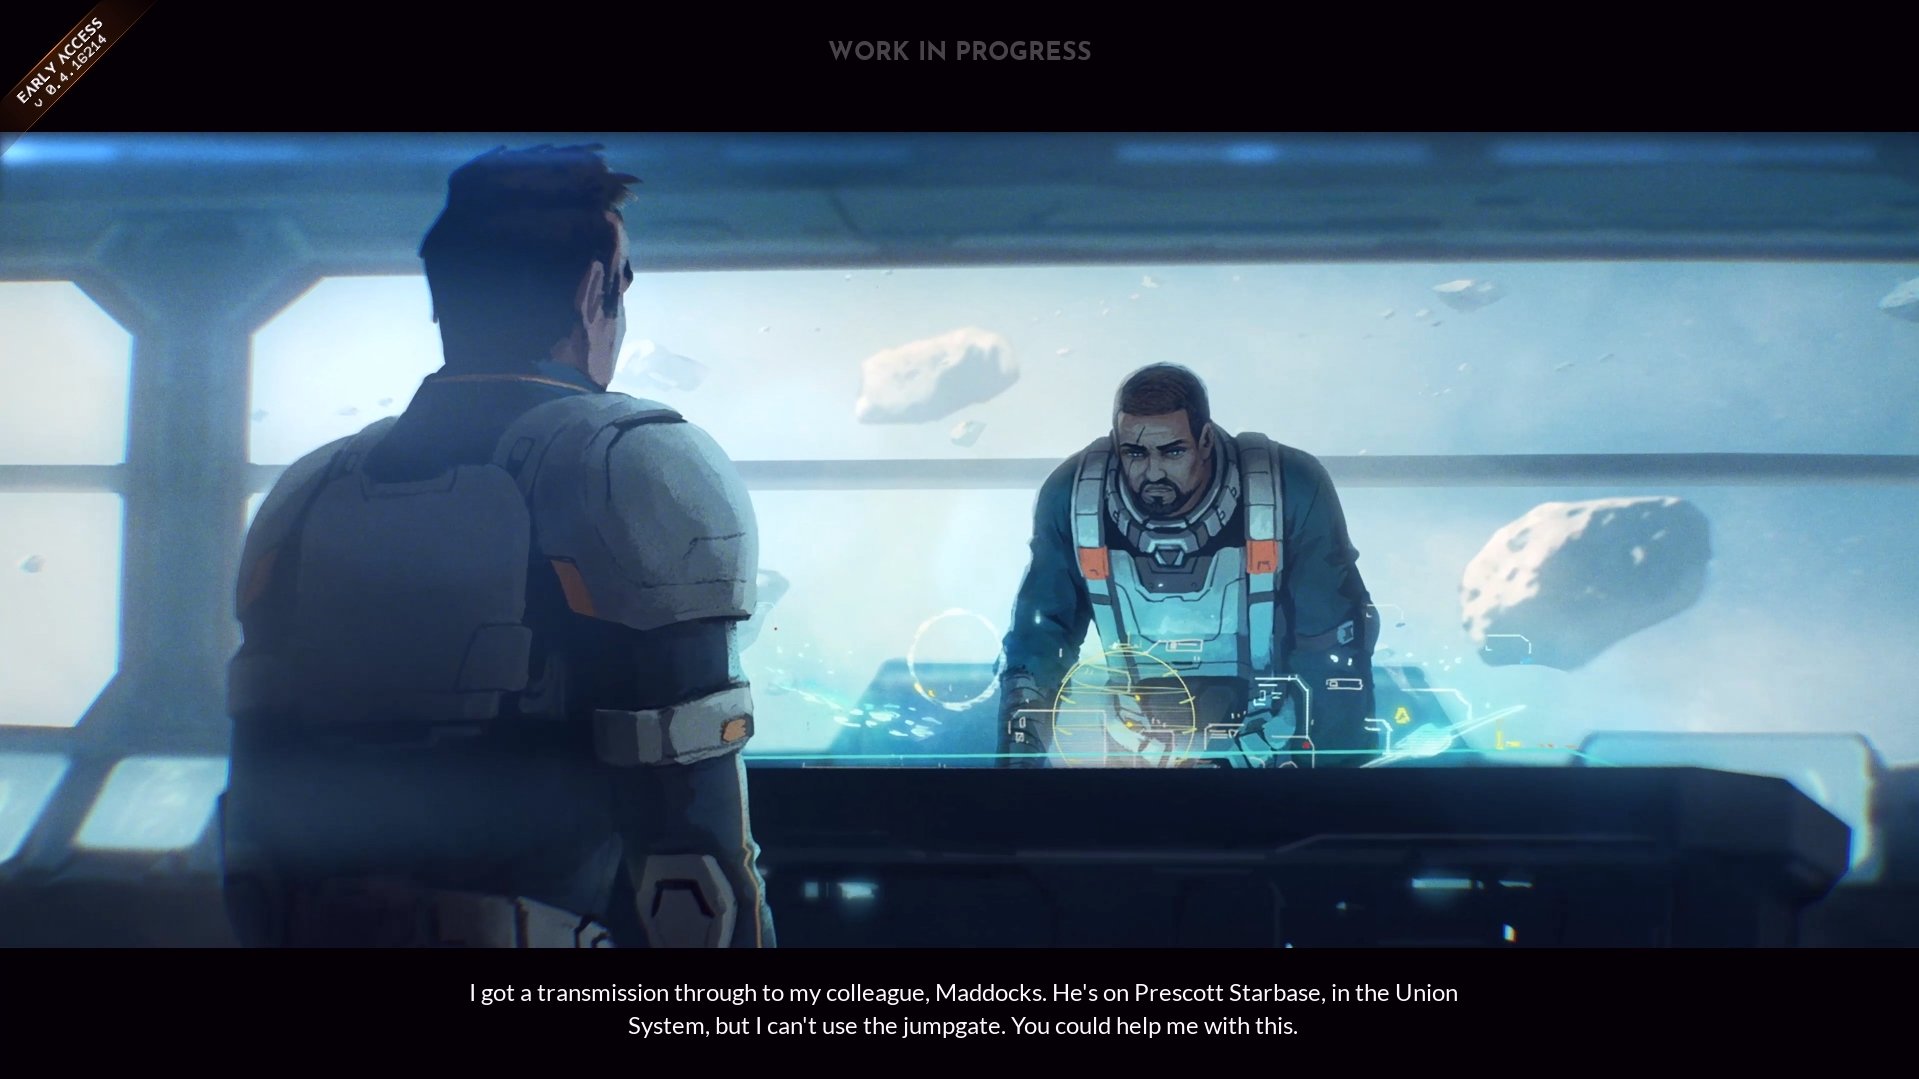
Having no luck getting jump keys, return home to Rhodia II. Dax mentions that the doctor inside the medical pod has woken up. Once you enter the homebase, a cutscene will trigger that seems to not have voice acting yet. This is likely why it’s narrated for now. After the cutscene ends, the Spares & Scraps mission is complete. This leads to the next mission, Ceto Ghost Hunt.


Jeff is a journalist with over 10 years of experience writing, streaming, and making content about video games. With an associate degree in journalism, he’s a sucker for RPGs, survival games, roguelikes, and more.