Prepare for the tough extraction looter that is Zero Sievert with our best tips and tricks. As goes with any game in this genre, they can be intimidating and especially difficult at first. Fortunately, this is a rare case where an extraction looter is single-player which can ease some of the tension.
As someone who has played many extraction looters and shooters, I jumped at the opportunity to check out Zero Sievert. I wrote this guide initially after putting in about 20 hours and completing the main questline currently available.
Tip 1 – Most Difficulties Won’t Drop Gear on Death
Zero Sievert has three preset difficulties and only one of them leads to dropping gear on death. This is a generous change compared to other extraction looters. However, if you still want that constant on-edge feeling where you can lose everything, that is an option too.
The first two difficulties Rookie and Survivor have you keep your gear and inventory you go in with on dying. In an effort to not make it too broken, you will lose whatever items you looted during the raid. This is a good balance in my opinion that still lets you experiment with different gear.
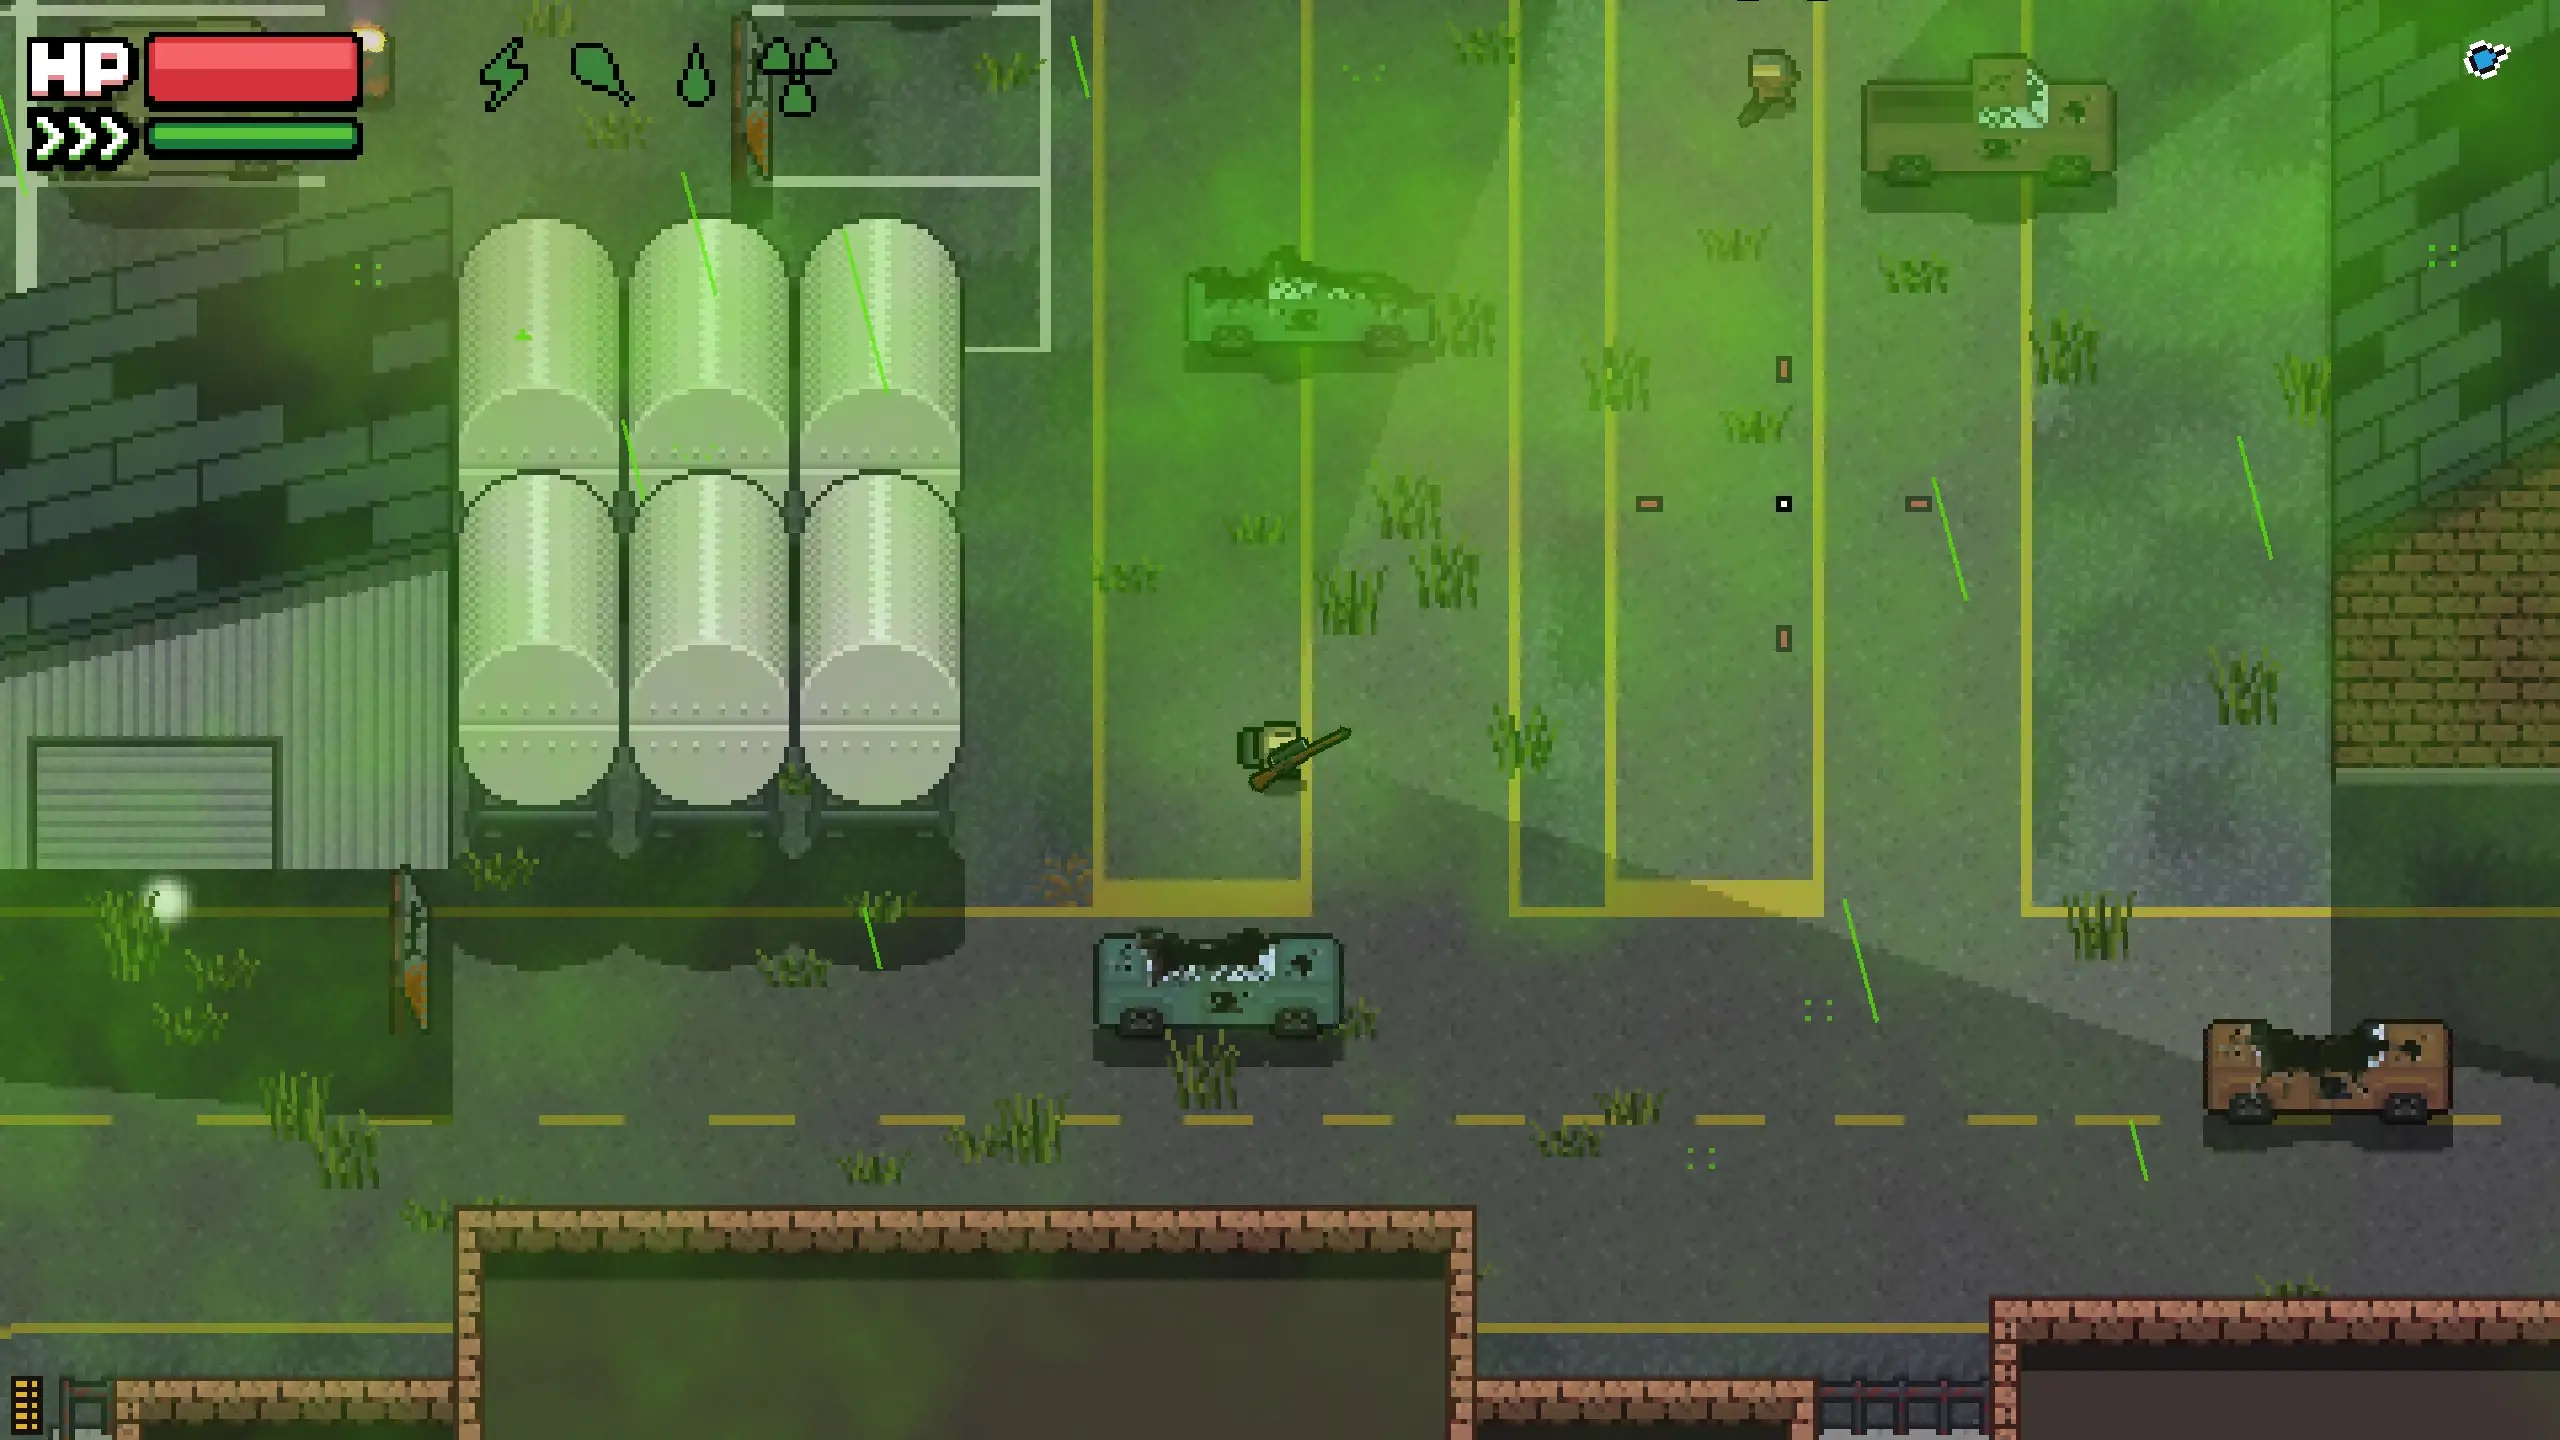
Tip 2 – Understand How Line of Sight Works

Regardless of whether you’re playing at night or during the day, line of sight is an important mechanic to understand. For example, you may see a building to your left while looking to the right with your character. But if there’s a bandit at the building, you won’t see them.
This is why it’s important to not assume an area is safe if you’re not looking directly at it. Alongside not seeing NPCs, you also won’t see containers like boxes to loot. So this can make it easy to miss valuable loot.
Tip 3 – Learn the Different Med Types
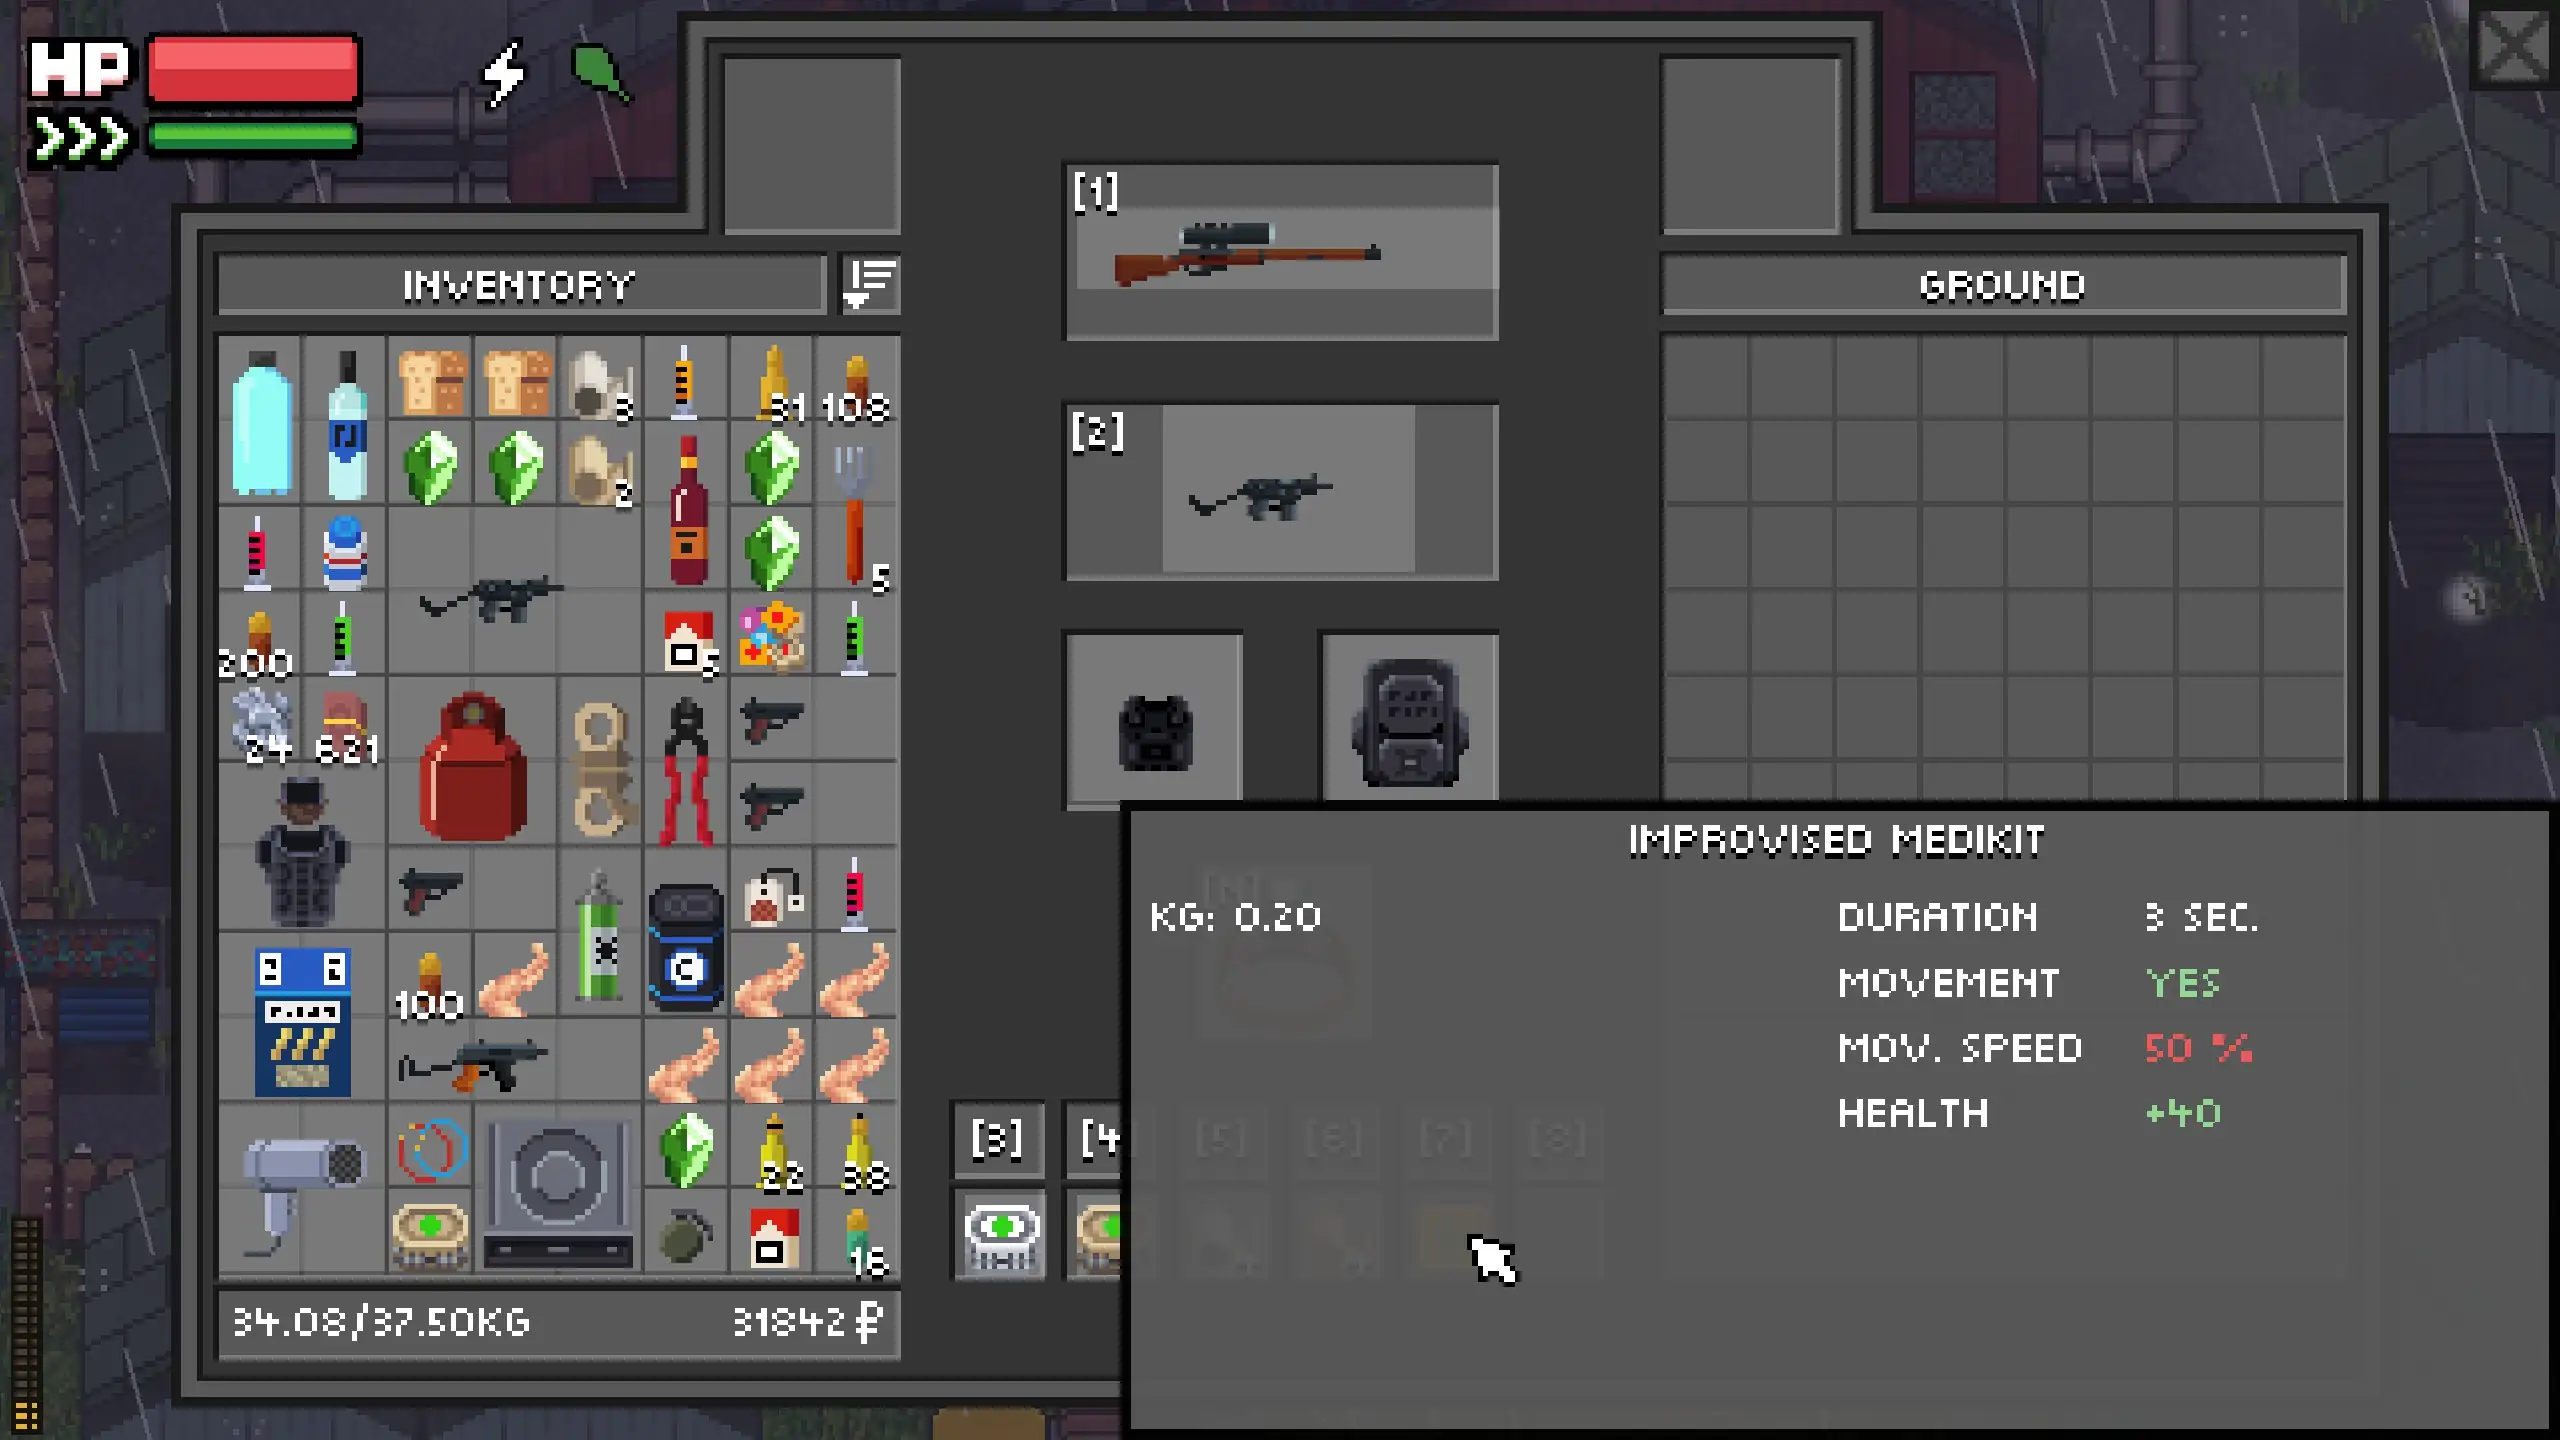
Zero Sievert has a more casual healing system than Escape from Tarkov but it’s still complicated. This is because there are items for healing your soft health, your max health, and dealing with status effects like bleeding. Fortunately, you don’t have to worry about broken limbs like in Tarkov.
Make sure you read a medical item before using it. For example, a Medikit T-100 heals 50 soft health but you can’t move while using it. So you have to make sure you’re safe when trying to use it. Even though you can cancel it if you end up in a bad spot. Unlike the Medikit T-100, the First Aid Medikit heals wounds. A wound represents missing max health that you can’t heal with something like the Medikit T-100. Outside of those two, bandages and some first aid kits will remove bleeding.
Tip 4 – Teleport Around the Bunker
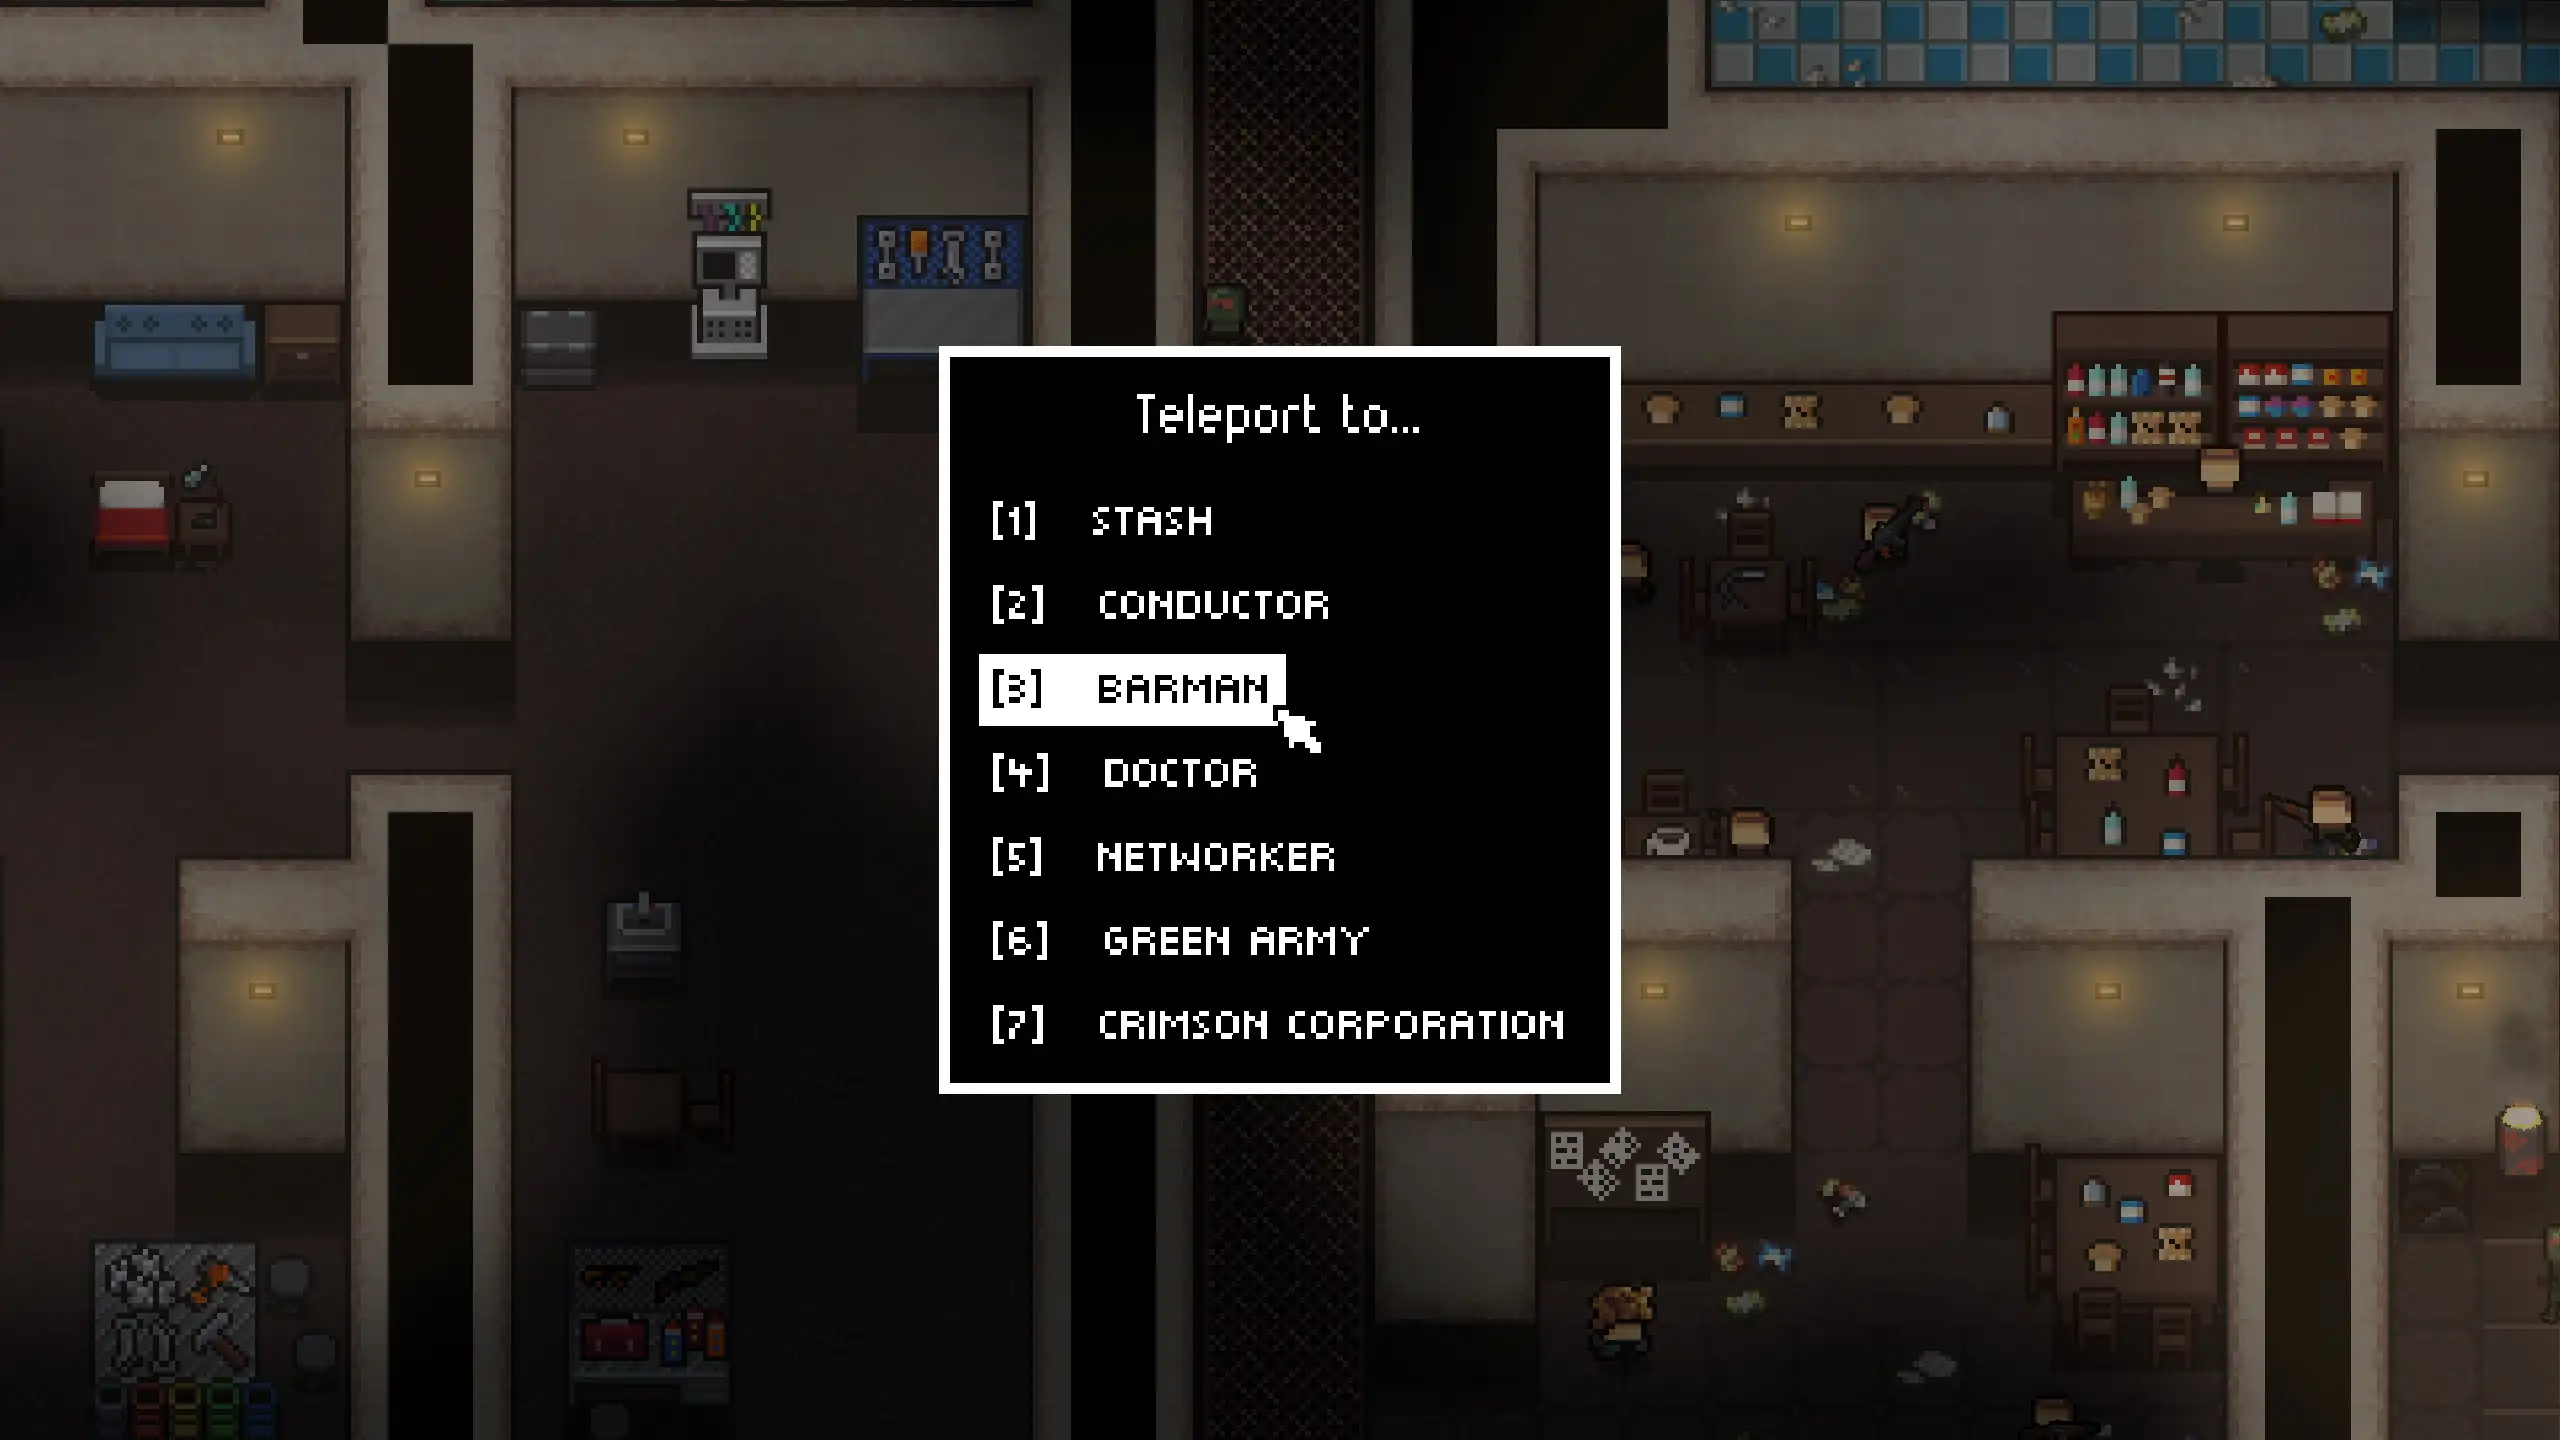
While looking through the Zero Sievert keybinds I realized you can press H to pull up a teleport menu. This is specifically for when you’re in the main base bunker. And it’s a useful way to jump between NPCs quickly instead of running around to each one.
I tend to take advantage of it when I’m storing items in my stash, selling stuff to the Barman, or buying meds from the Doctor. Even though there are other NPCs and bunker areas you’ll unlock as you progress the questline.
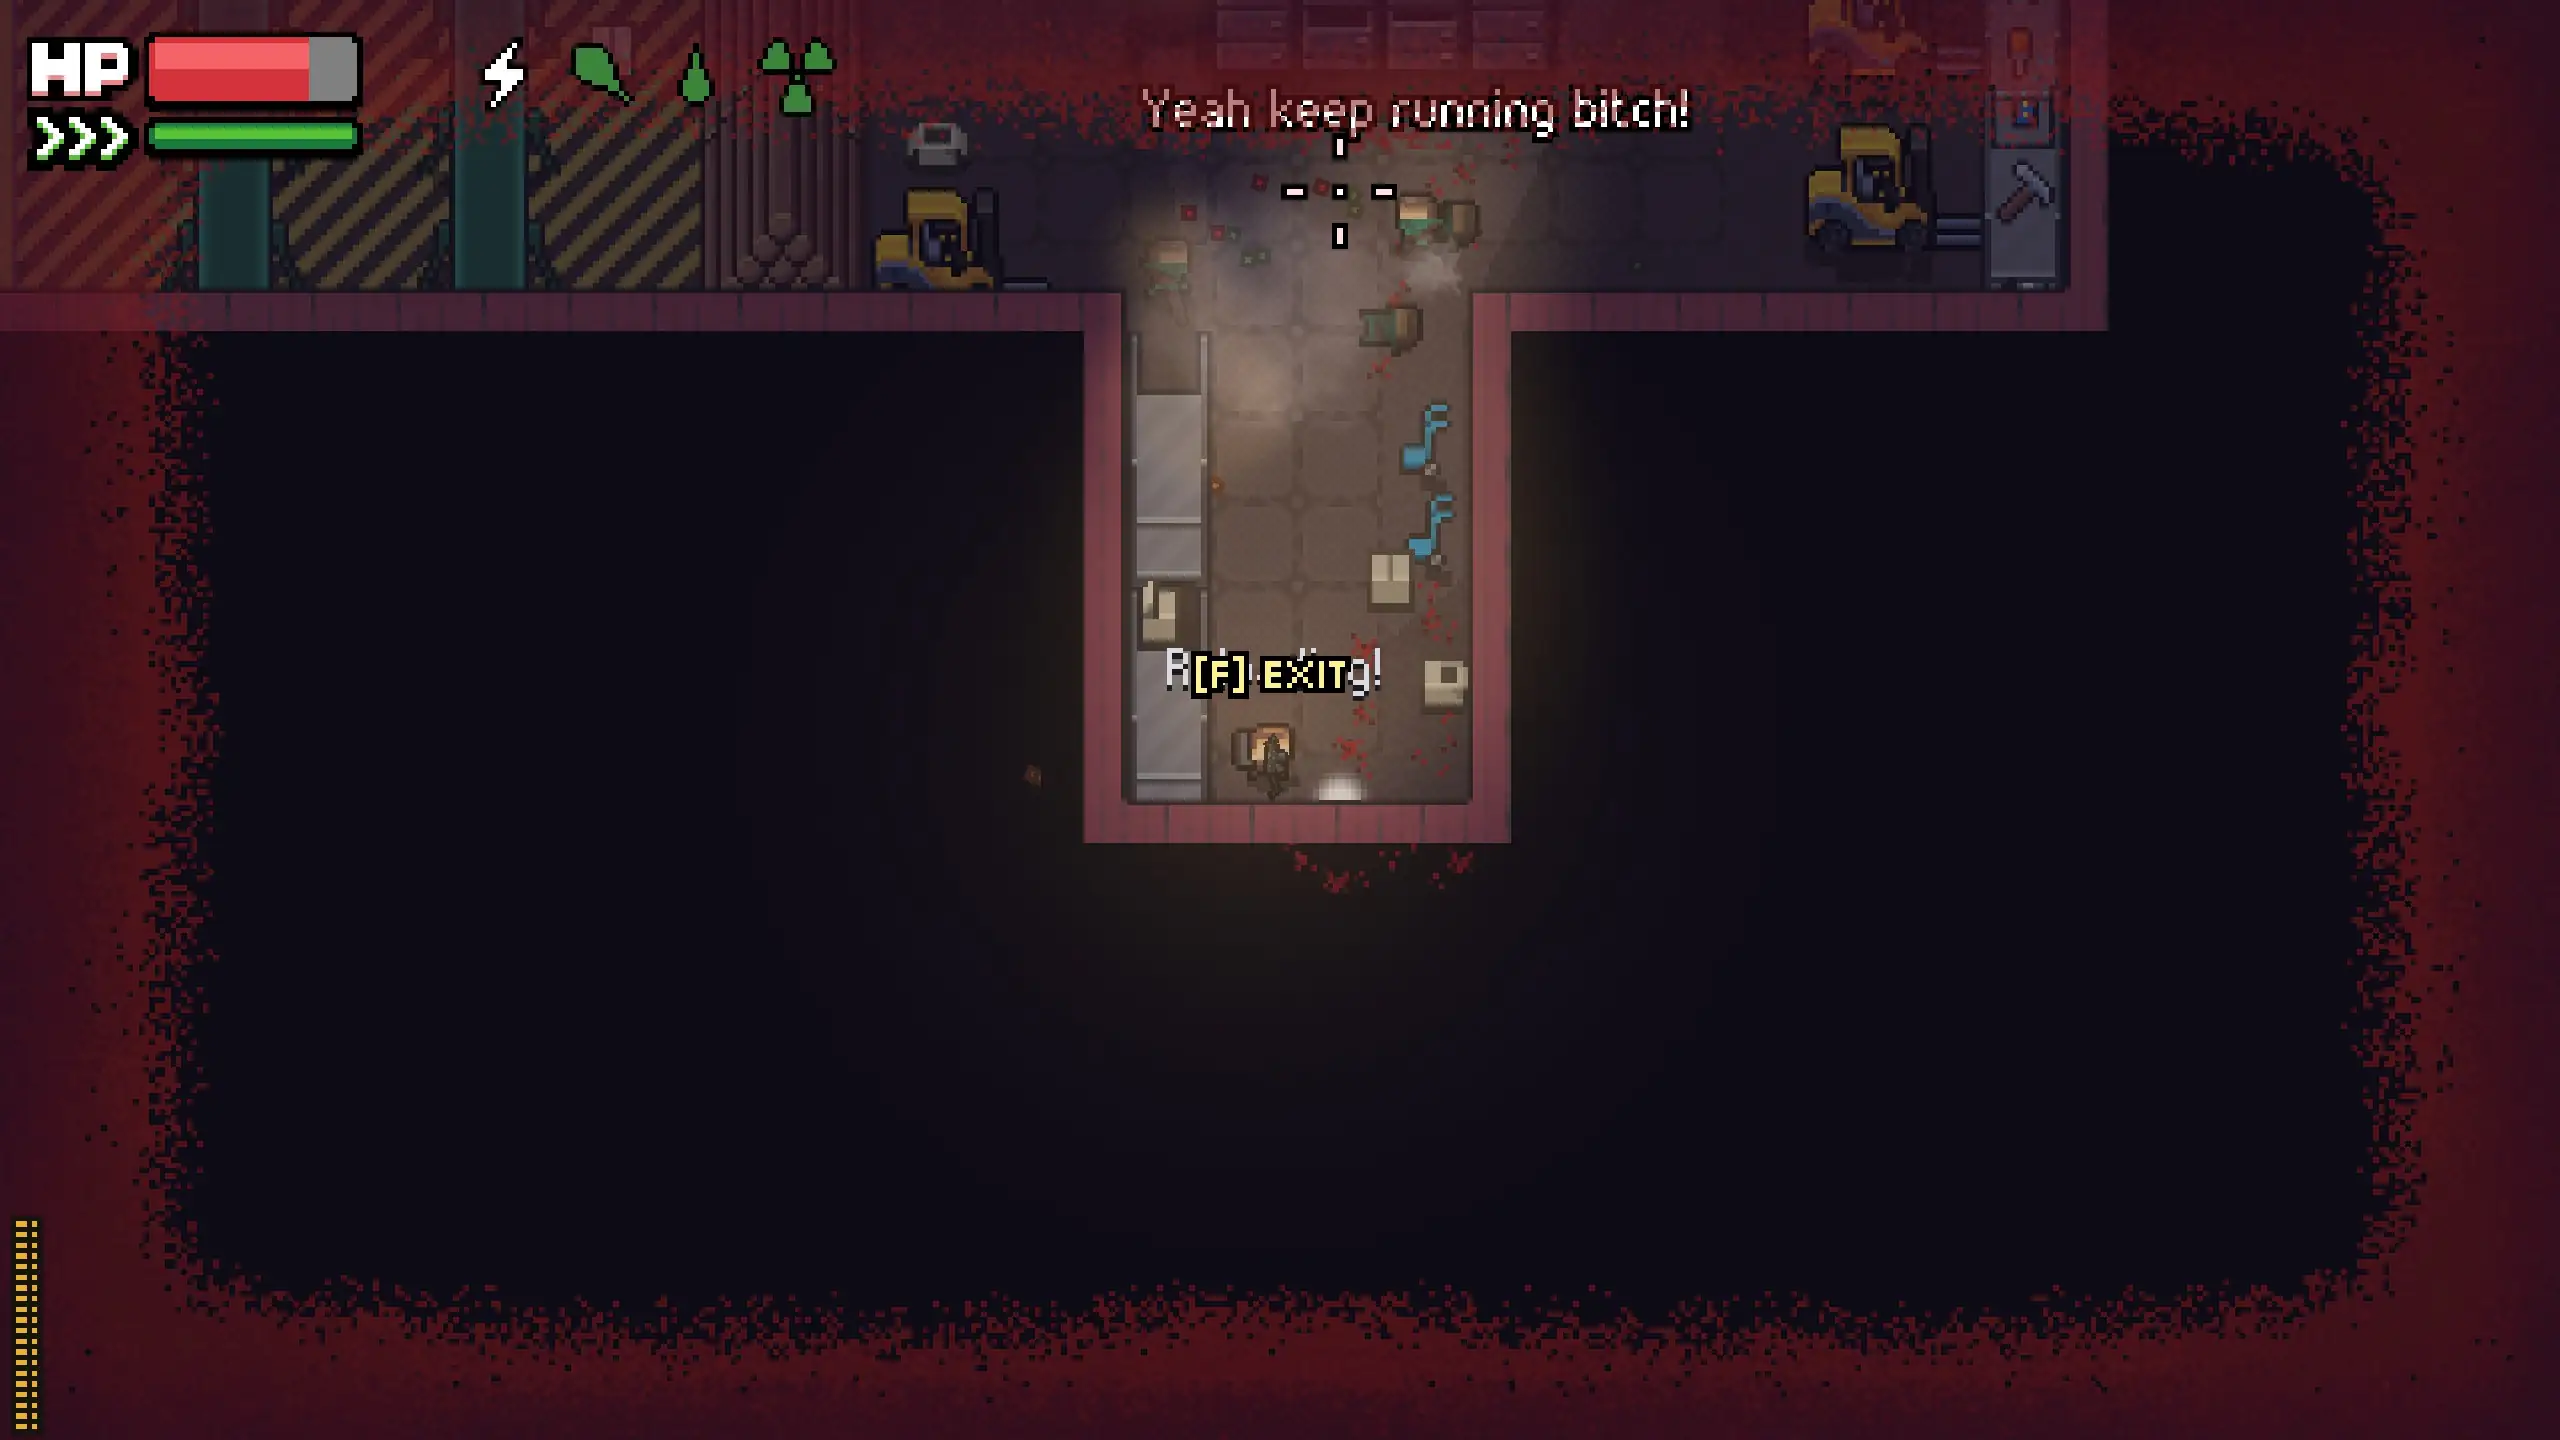
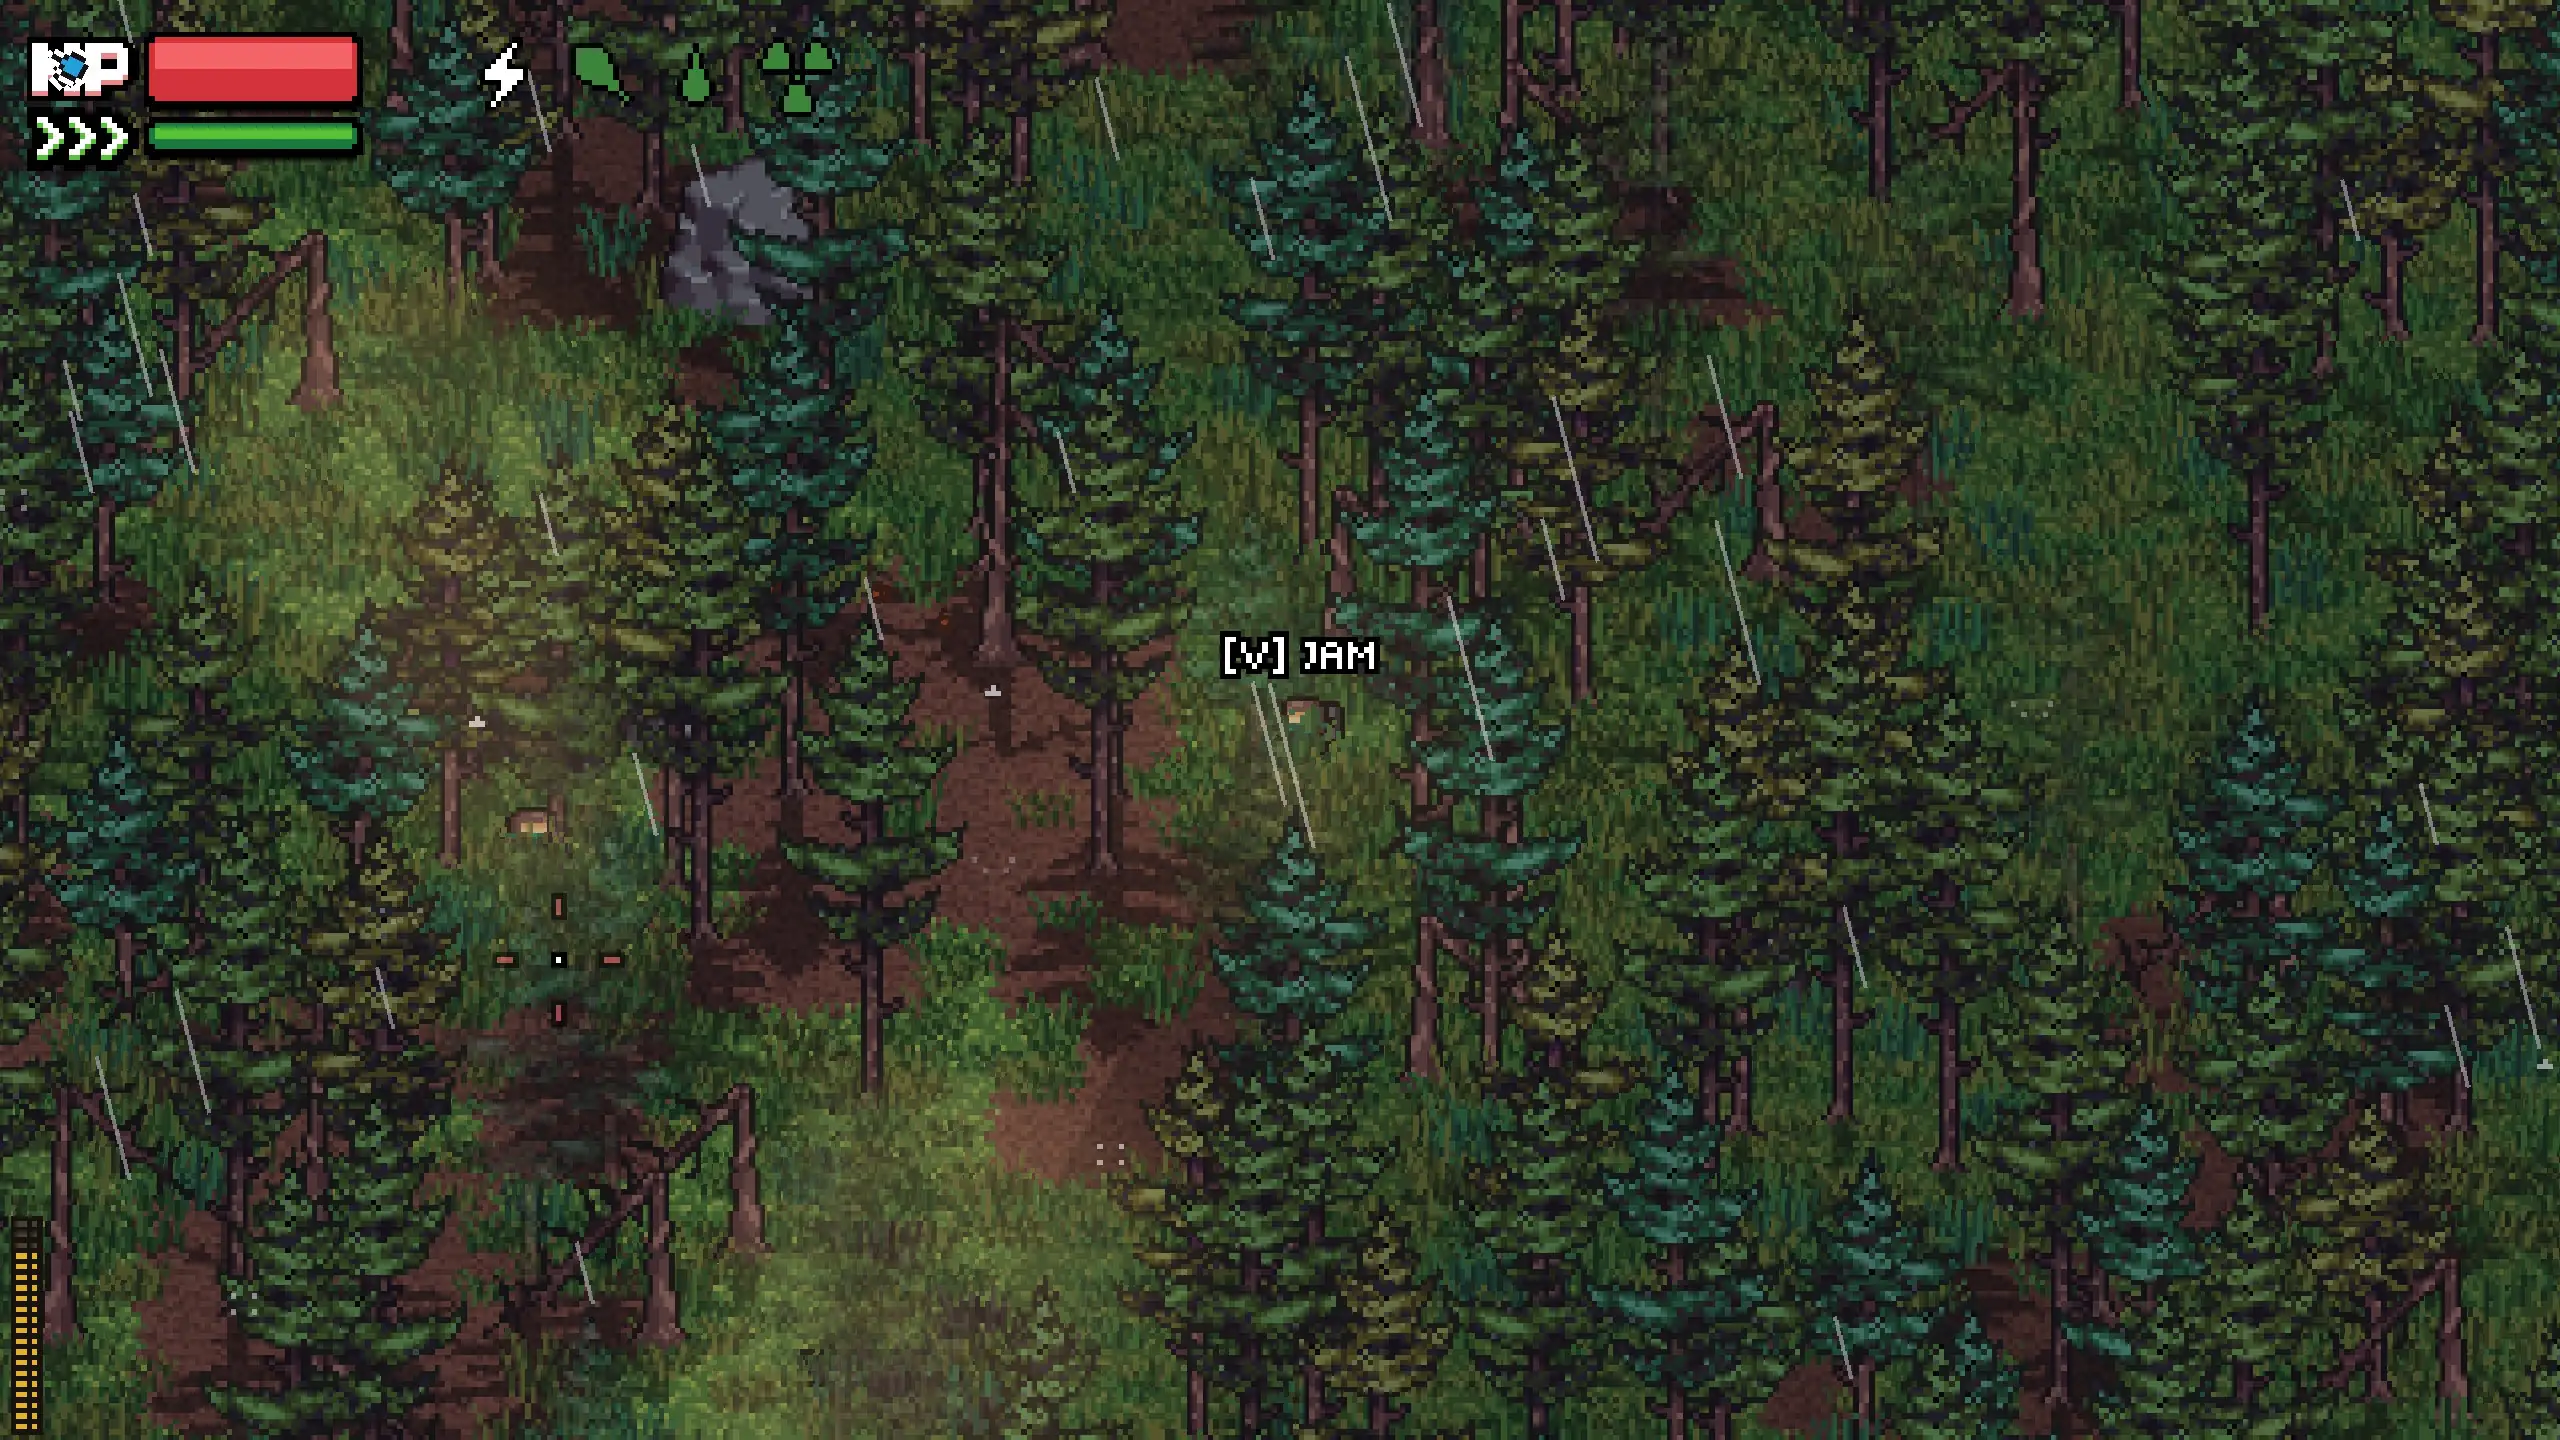
Tip 5 – Throw Bolts at Anomalies
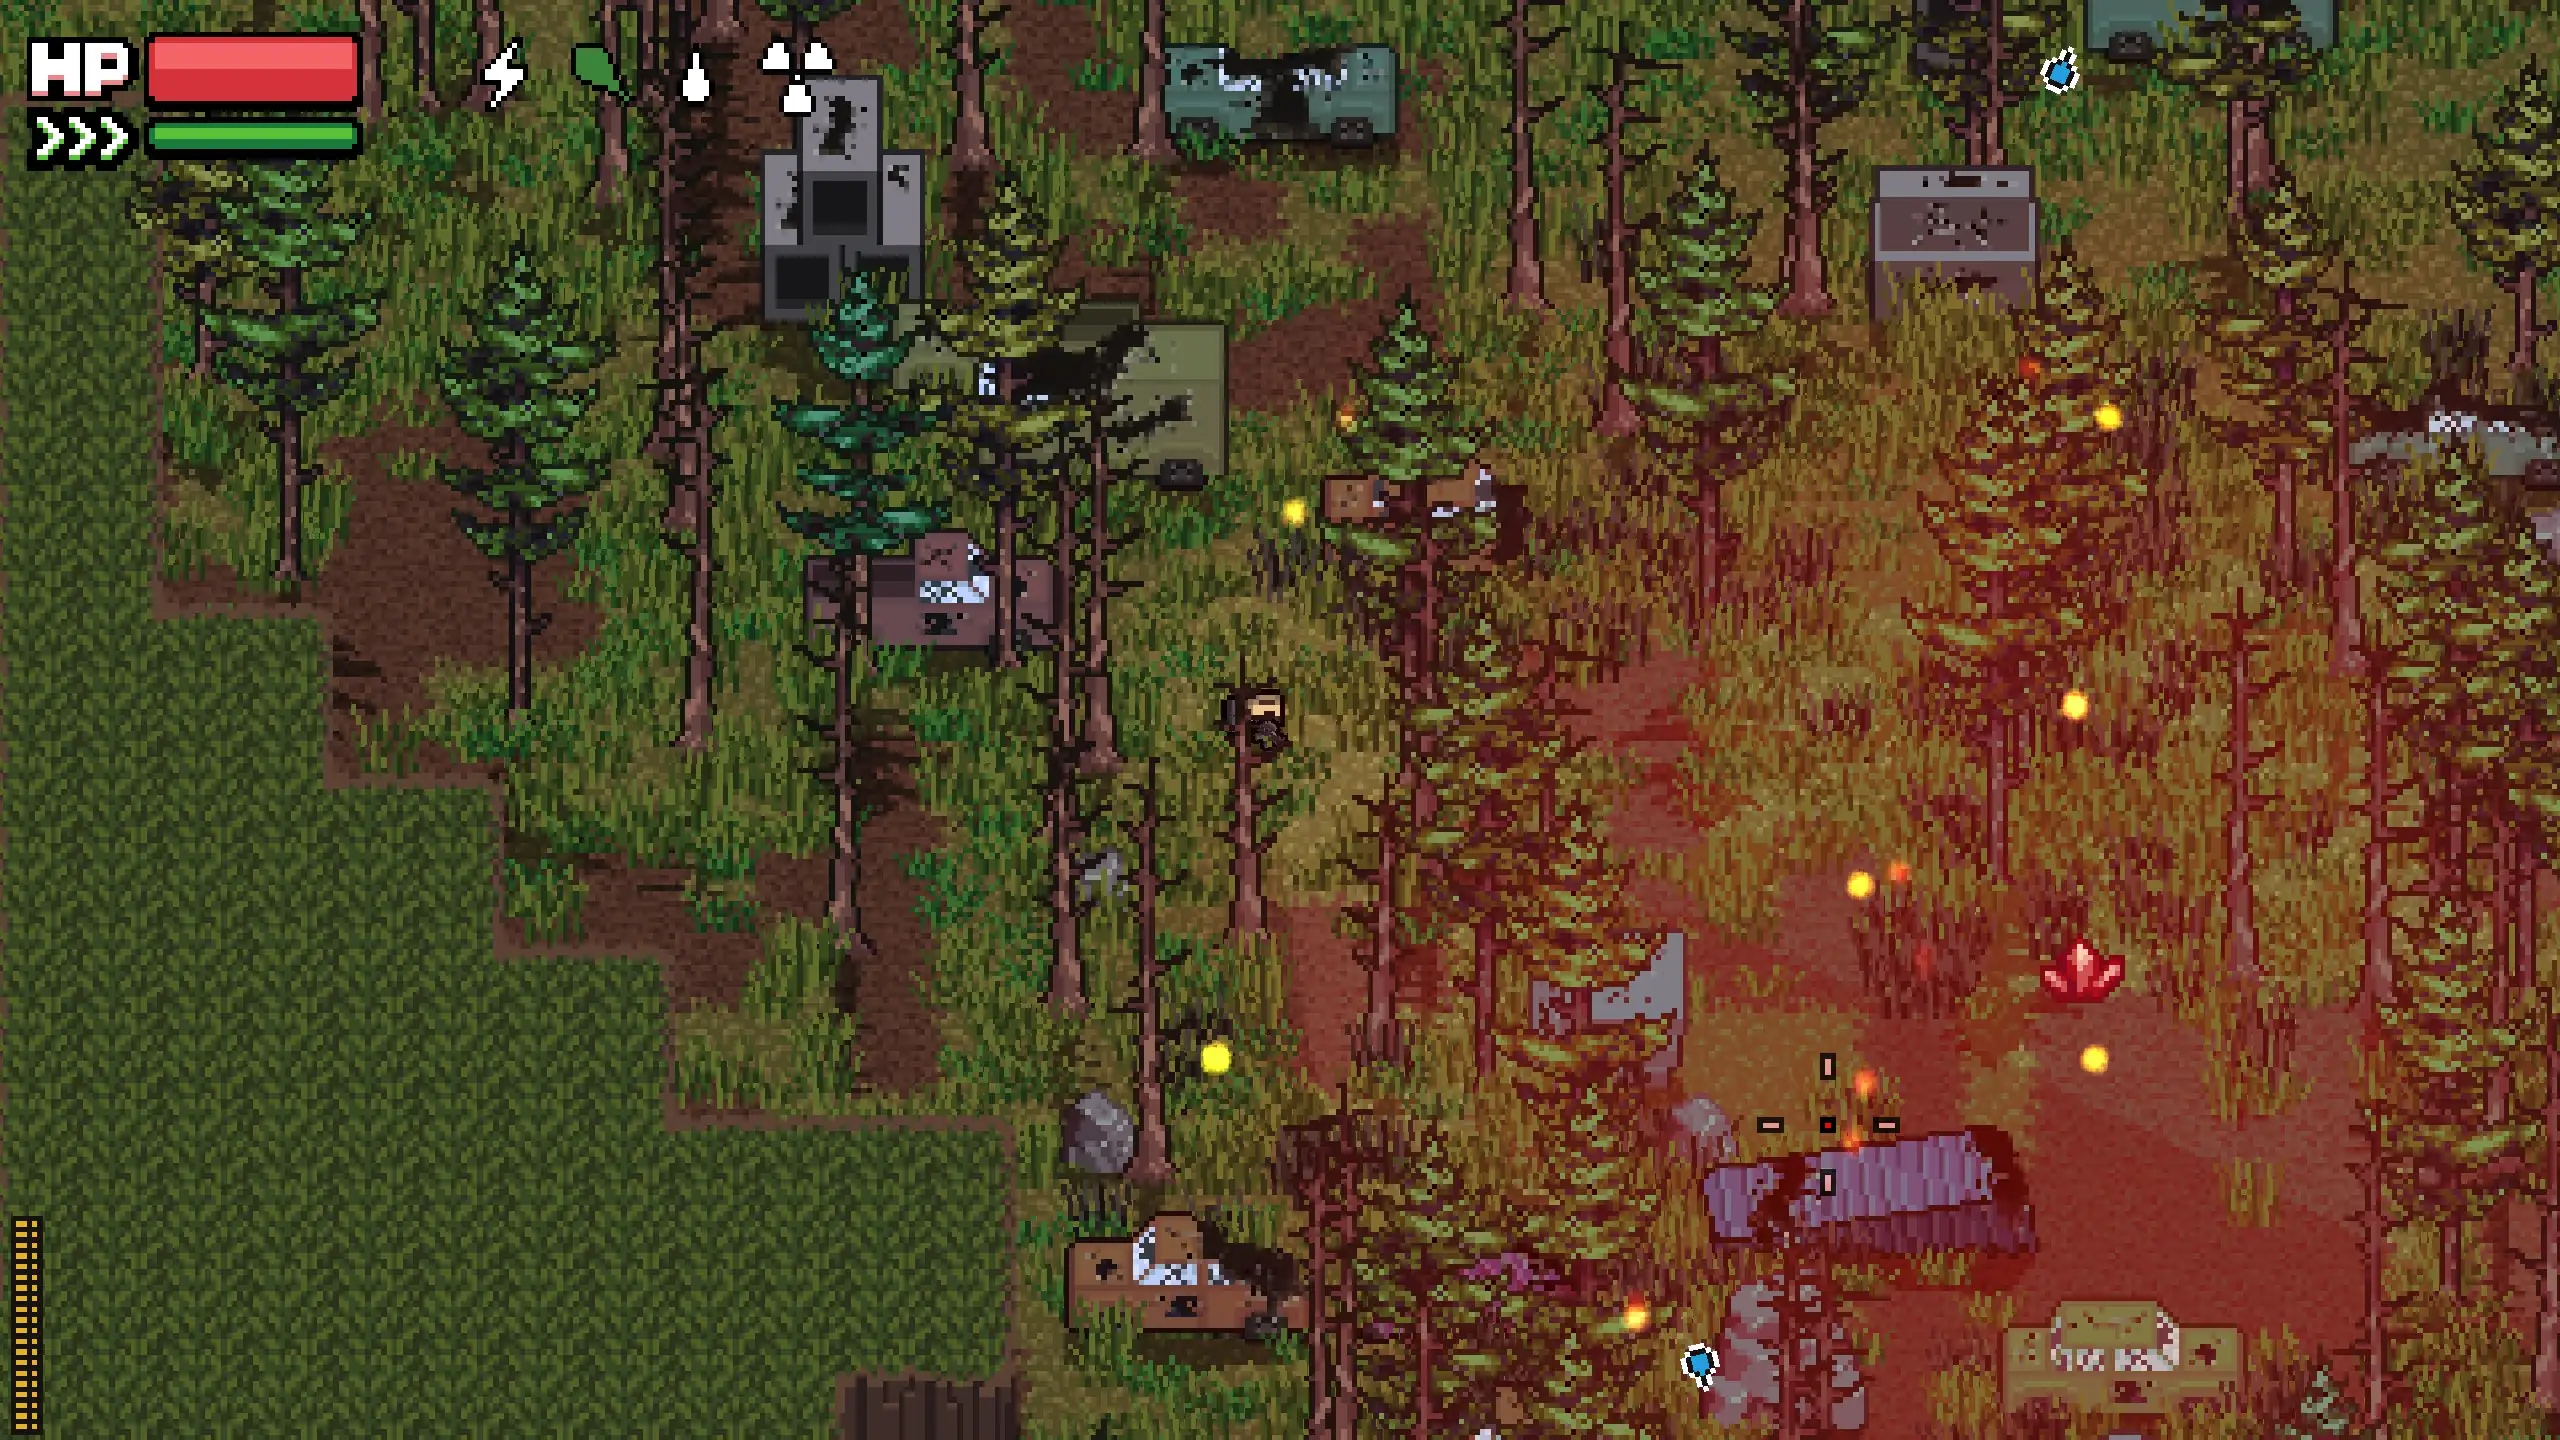
Zero Sievert may be an extraction looter but it also takes inspiration from the S.T.A.L.K.E.R. games with its’ supernatural universe. This is why you have to be careful if you come across an anomaly. Such as a geyser of fire bursting out of the ground. Once you see one, chances are there are several more nearby. But the issue is, they’ll stay hidden until you get close enough.
Fortunately, you have an infinite amount of bolts you can toss to trigger them. I tend to throw a bunch in every direction once I see an anomaly. It’s very easy to walk right into a field of them and be surrounded without realizing it. Otherwise, your raid may end prematurely quite quickly. But, anomalies usually have valuable crystals nearby that you can sell to make some money.
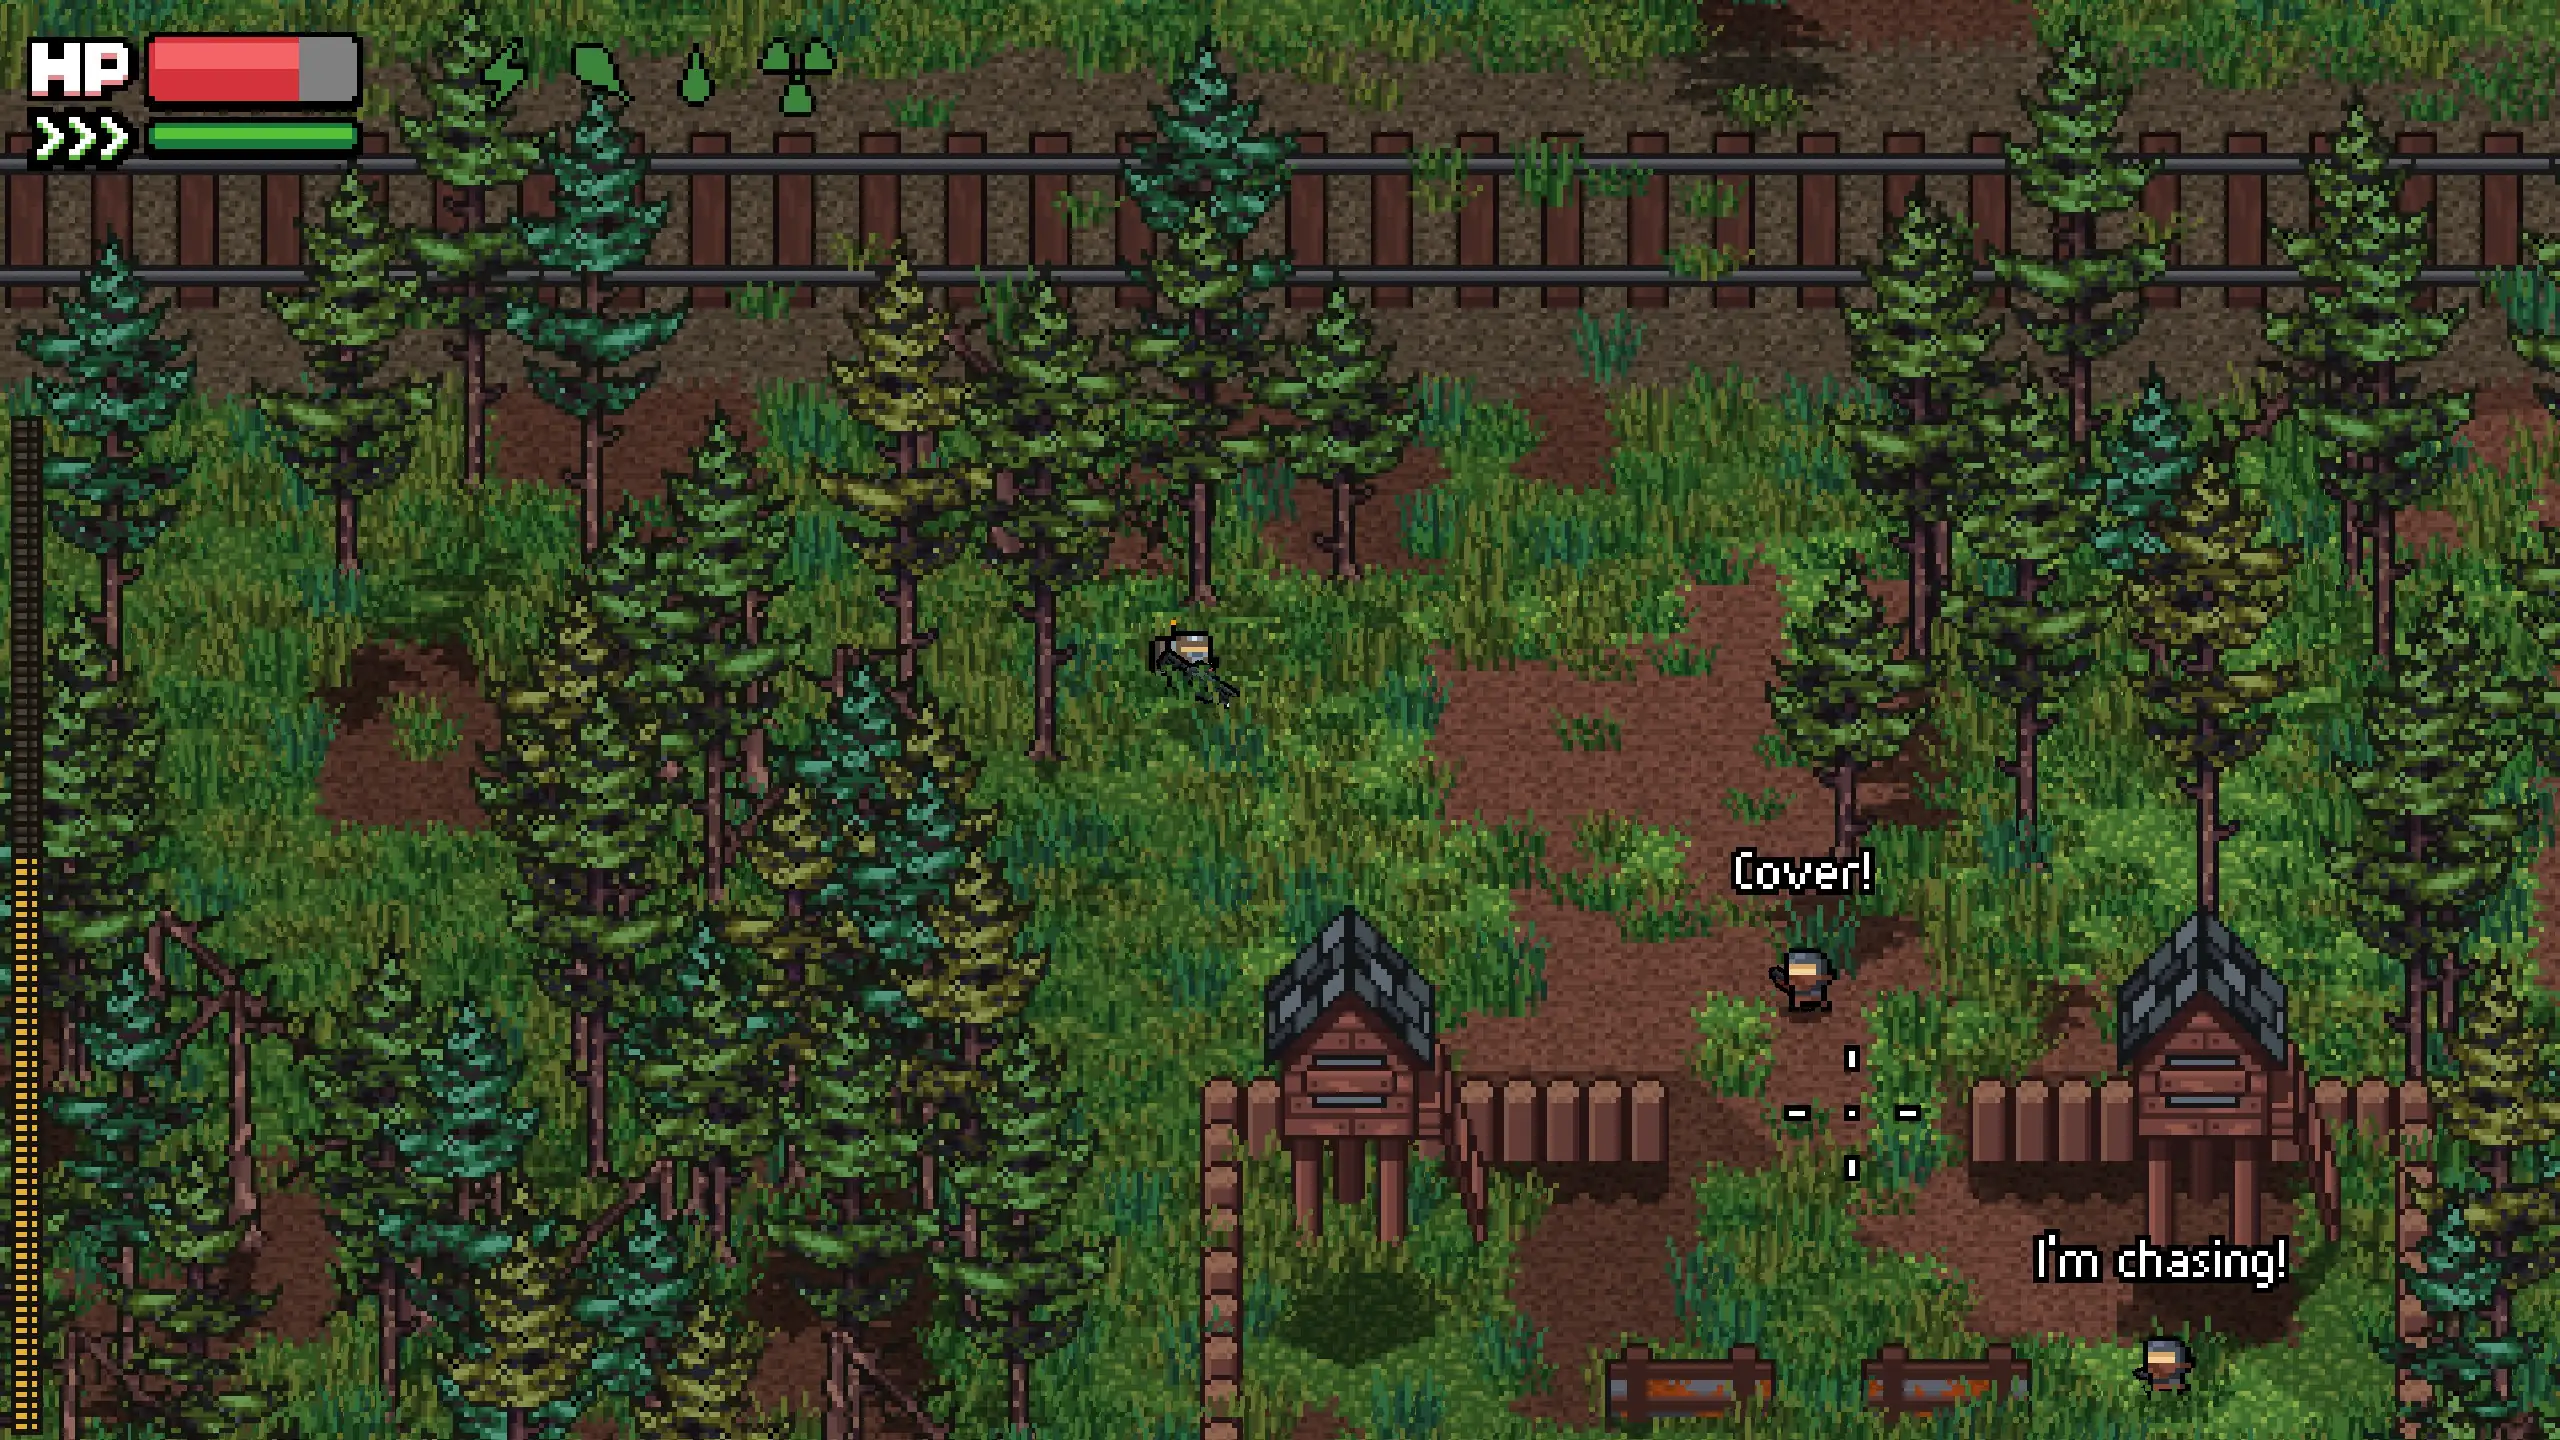
Tip 6 – Not All NPCs Are Hostile in Zero Sievert
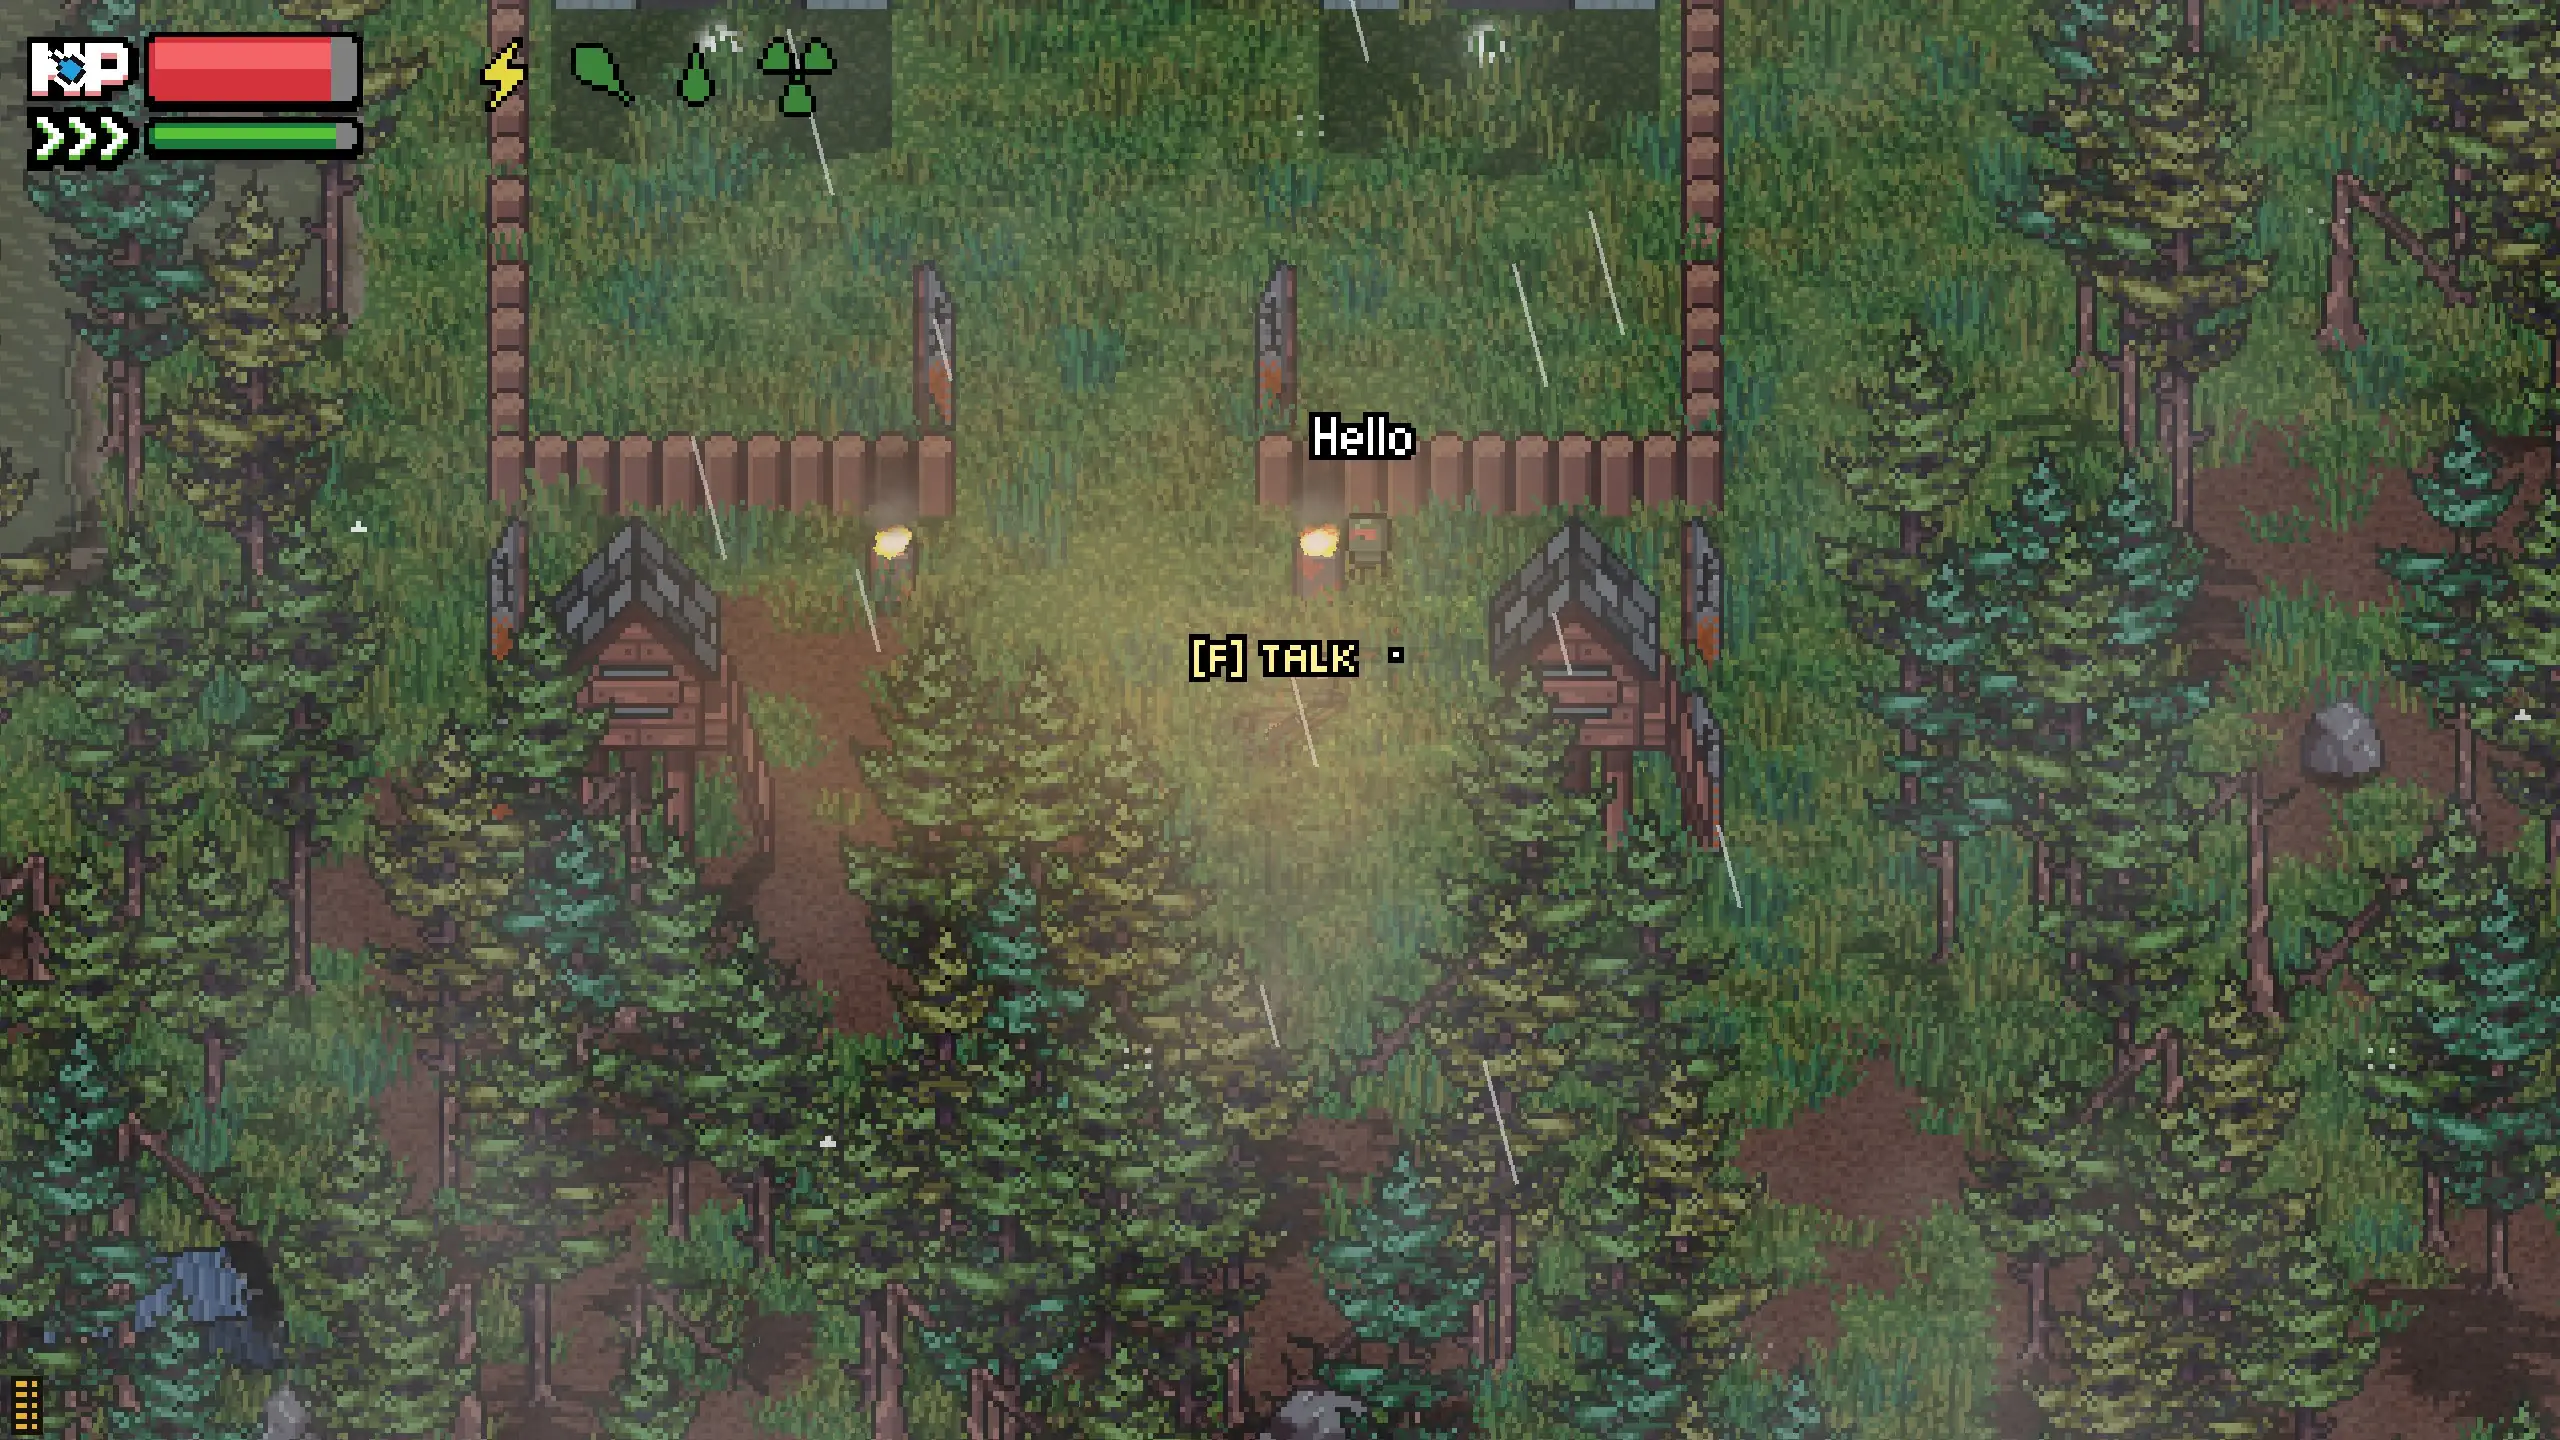
Everything is scary at first and that includes everyone you come into contact with when trying to survive. However, not everyone is out to get you and some may even help you out. The tough part about this is that it’s never easy to know for sure.
If you’re playing on a hard difficulty like Hunter, I probably wouldn’t take the chance. Otherwise, you can try getting a little close to different characters before attacking them. I can usually figure out if they’re hostile or not based on how they react. For example, lines like “I’m pushing” or “I’m taking cover” are usually aggressive. Whereas friendly NPCs are more likely to say watch where you point your weapon.
Tip 7 – Level Up Skills to Unlock Specializations
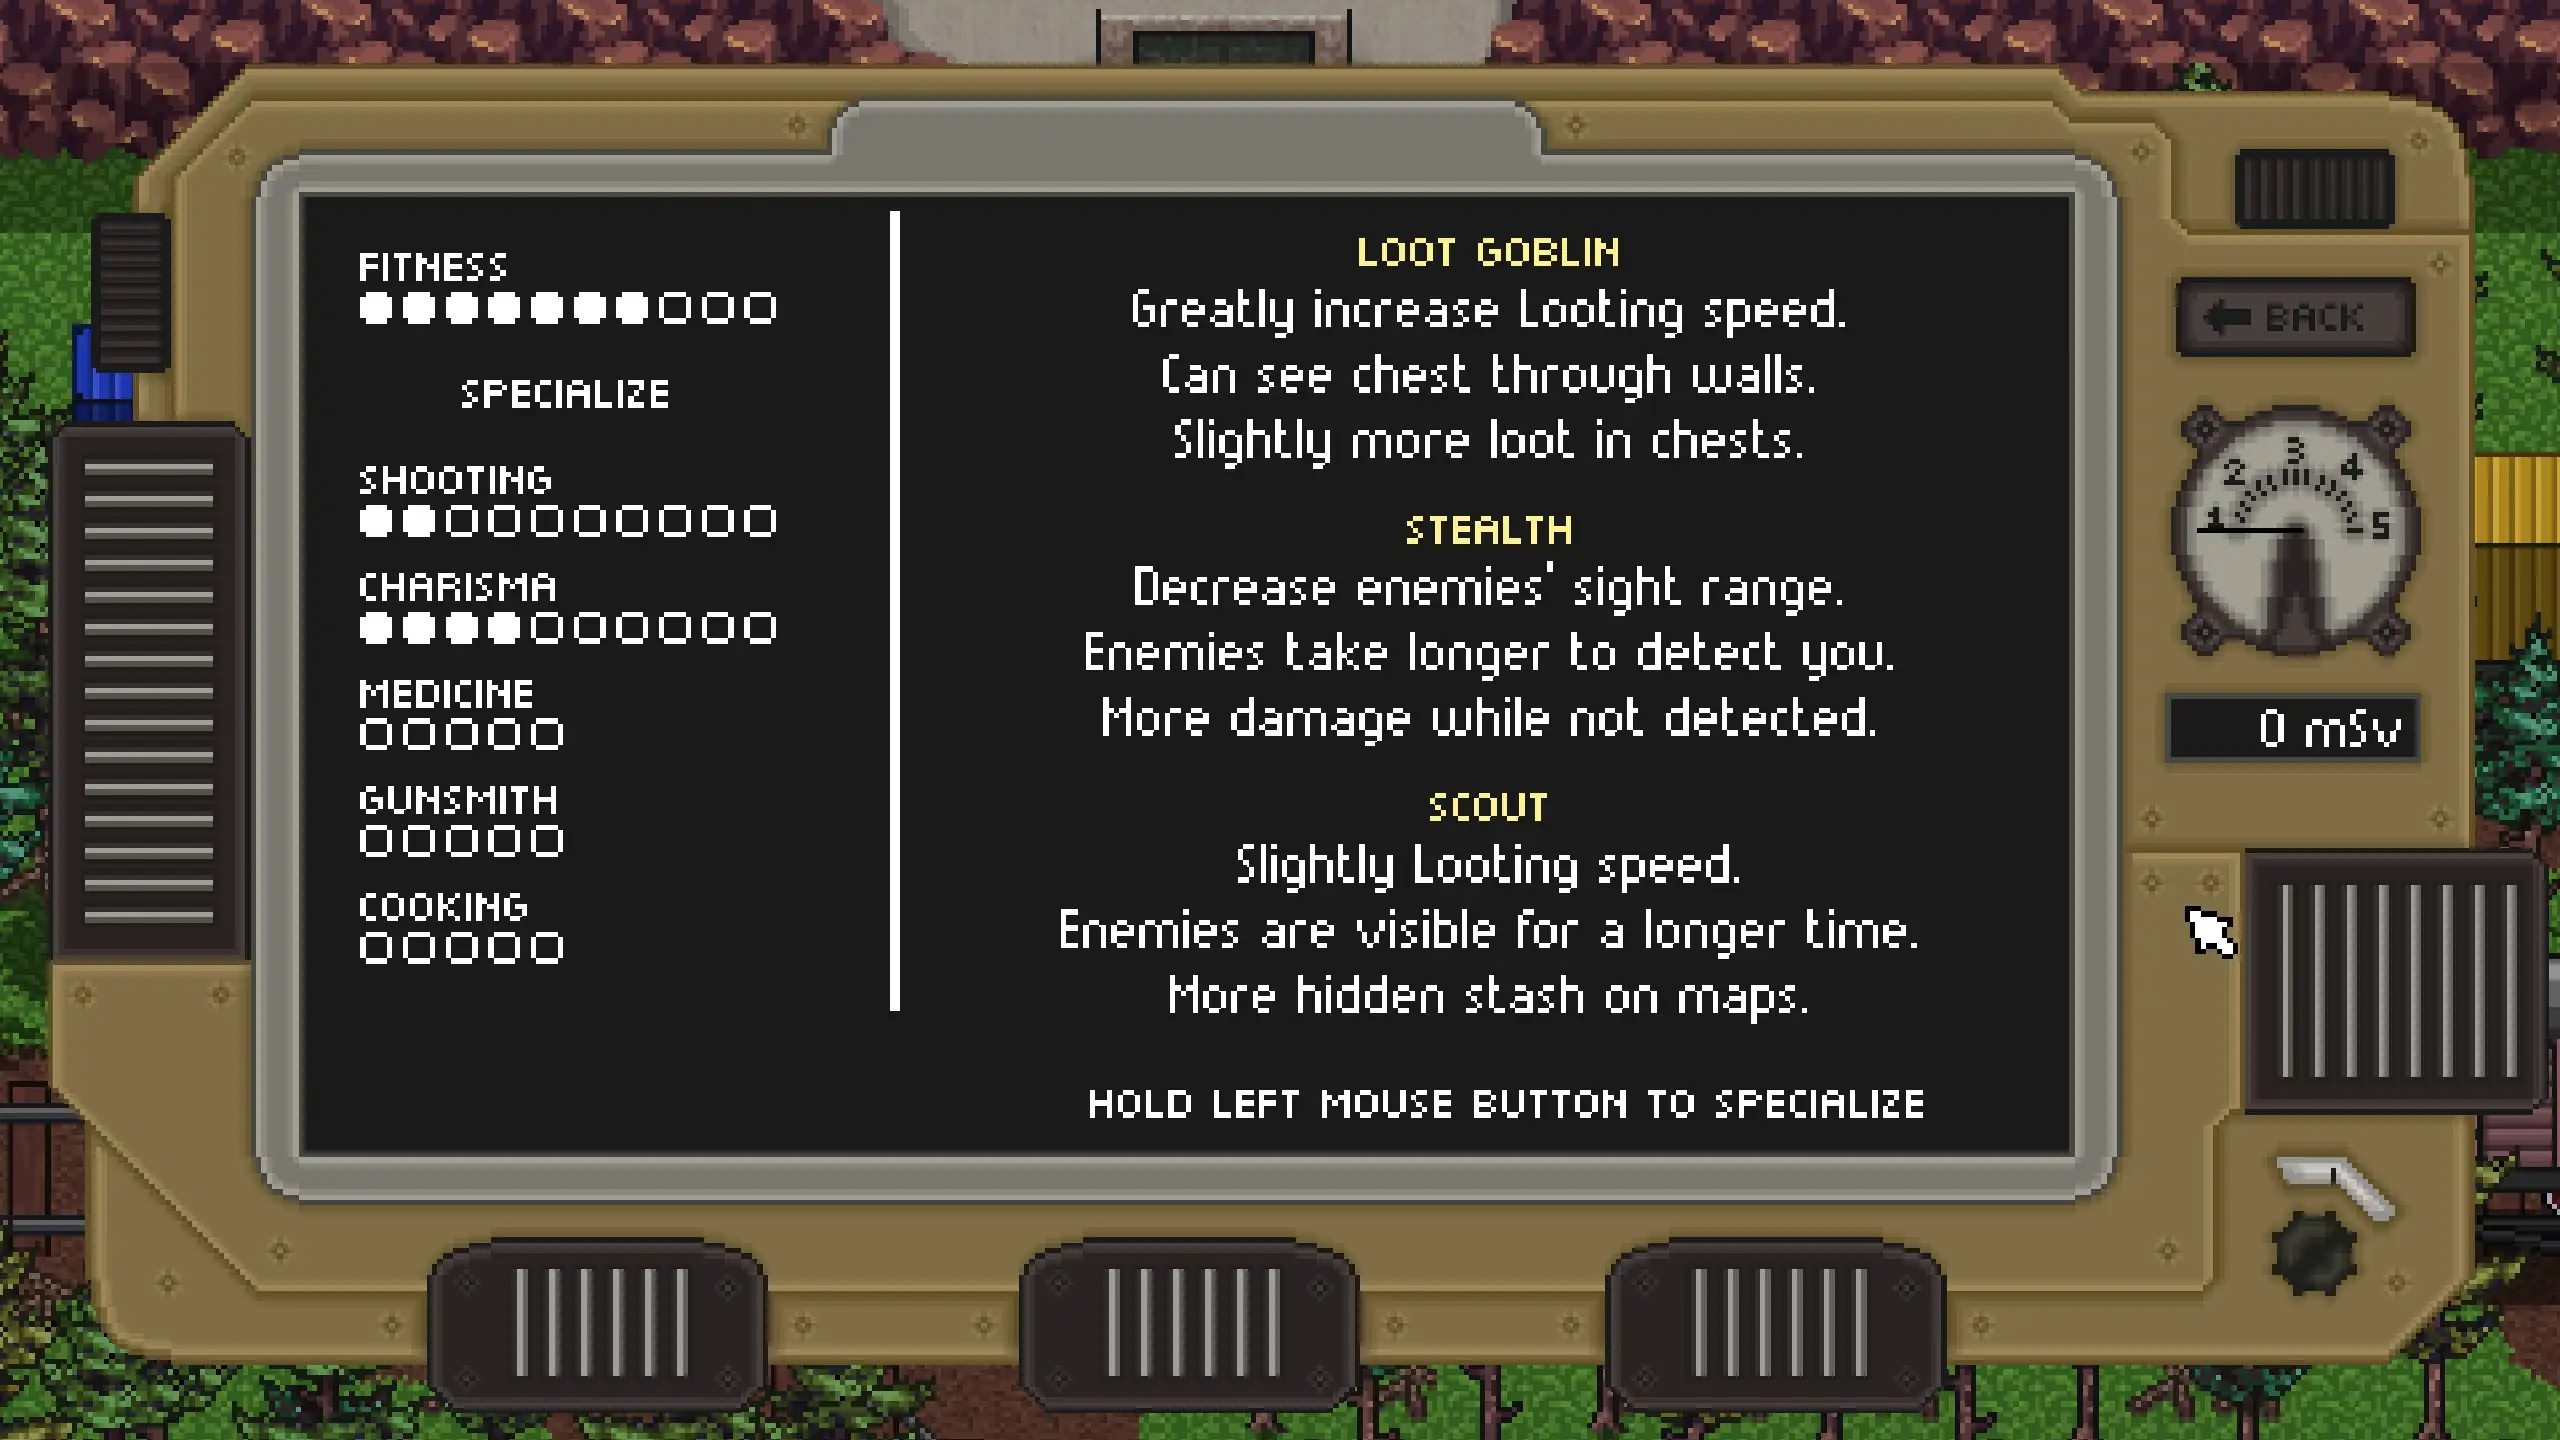
Upon reaching the max level for a skill you can unlock a specialization for useful buffs. Afterward, you can continue leveling up that specialization to make it better. Each one caters to a different playstyle even though some are more effective than others.
For example, leveling up the Style skill will increase your looting speed. Considering how slow looting is in Zero Sievert, you’ll probably want to pick Loot Goblin. Otherwise, Stealth can be good too if you want the extra damage instead.
Tip 8 – Understanding the Different Statuses
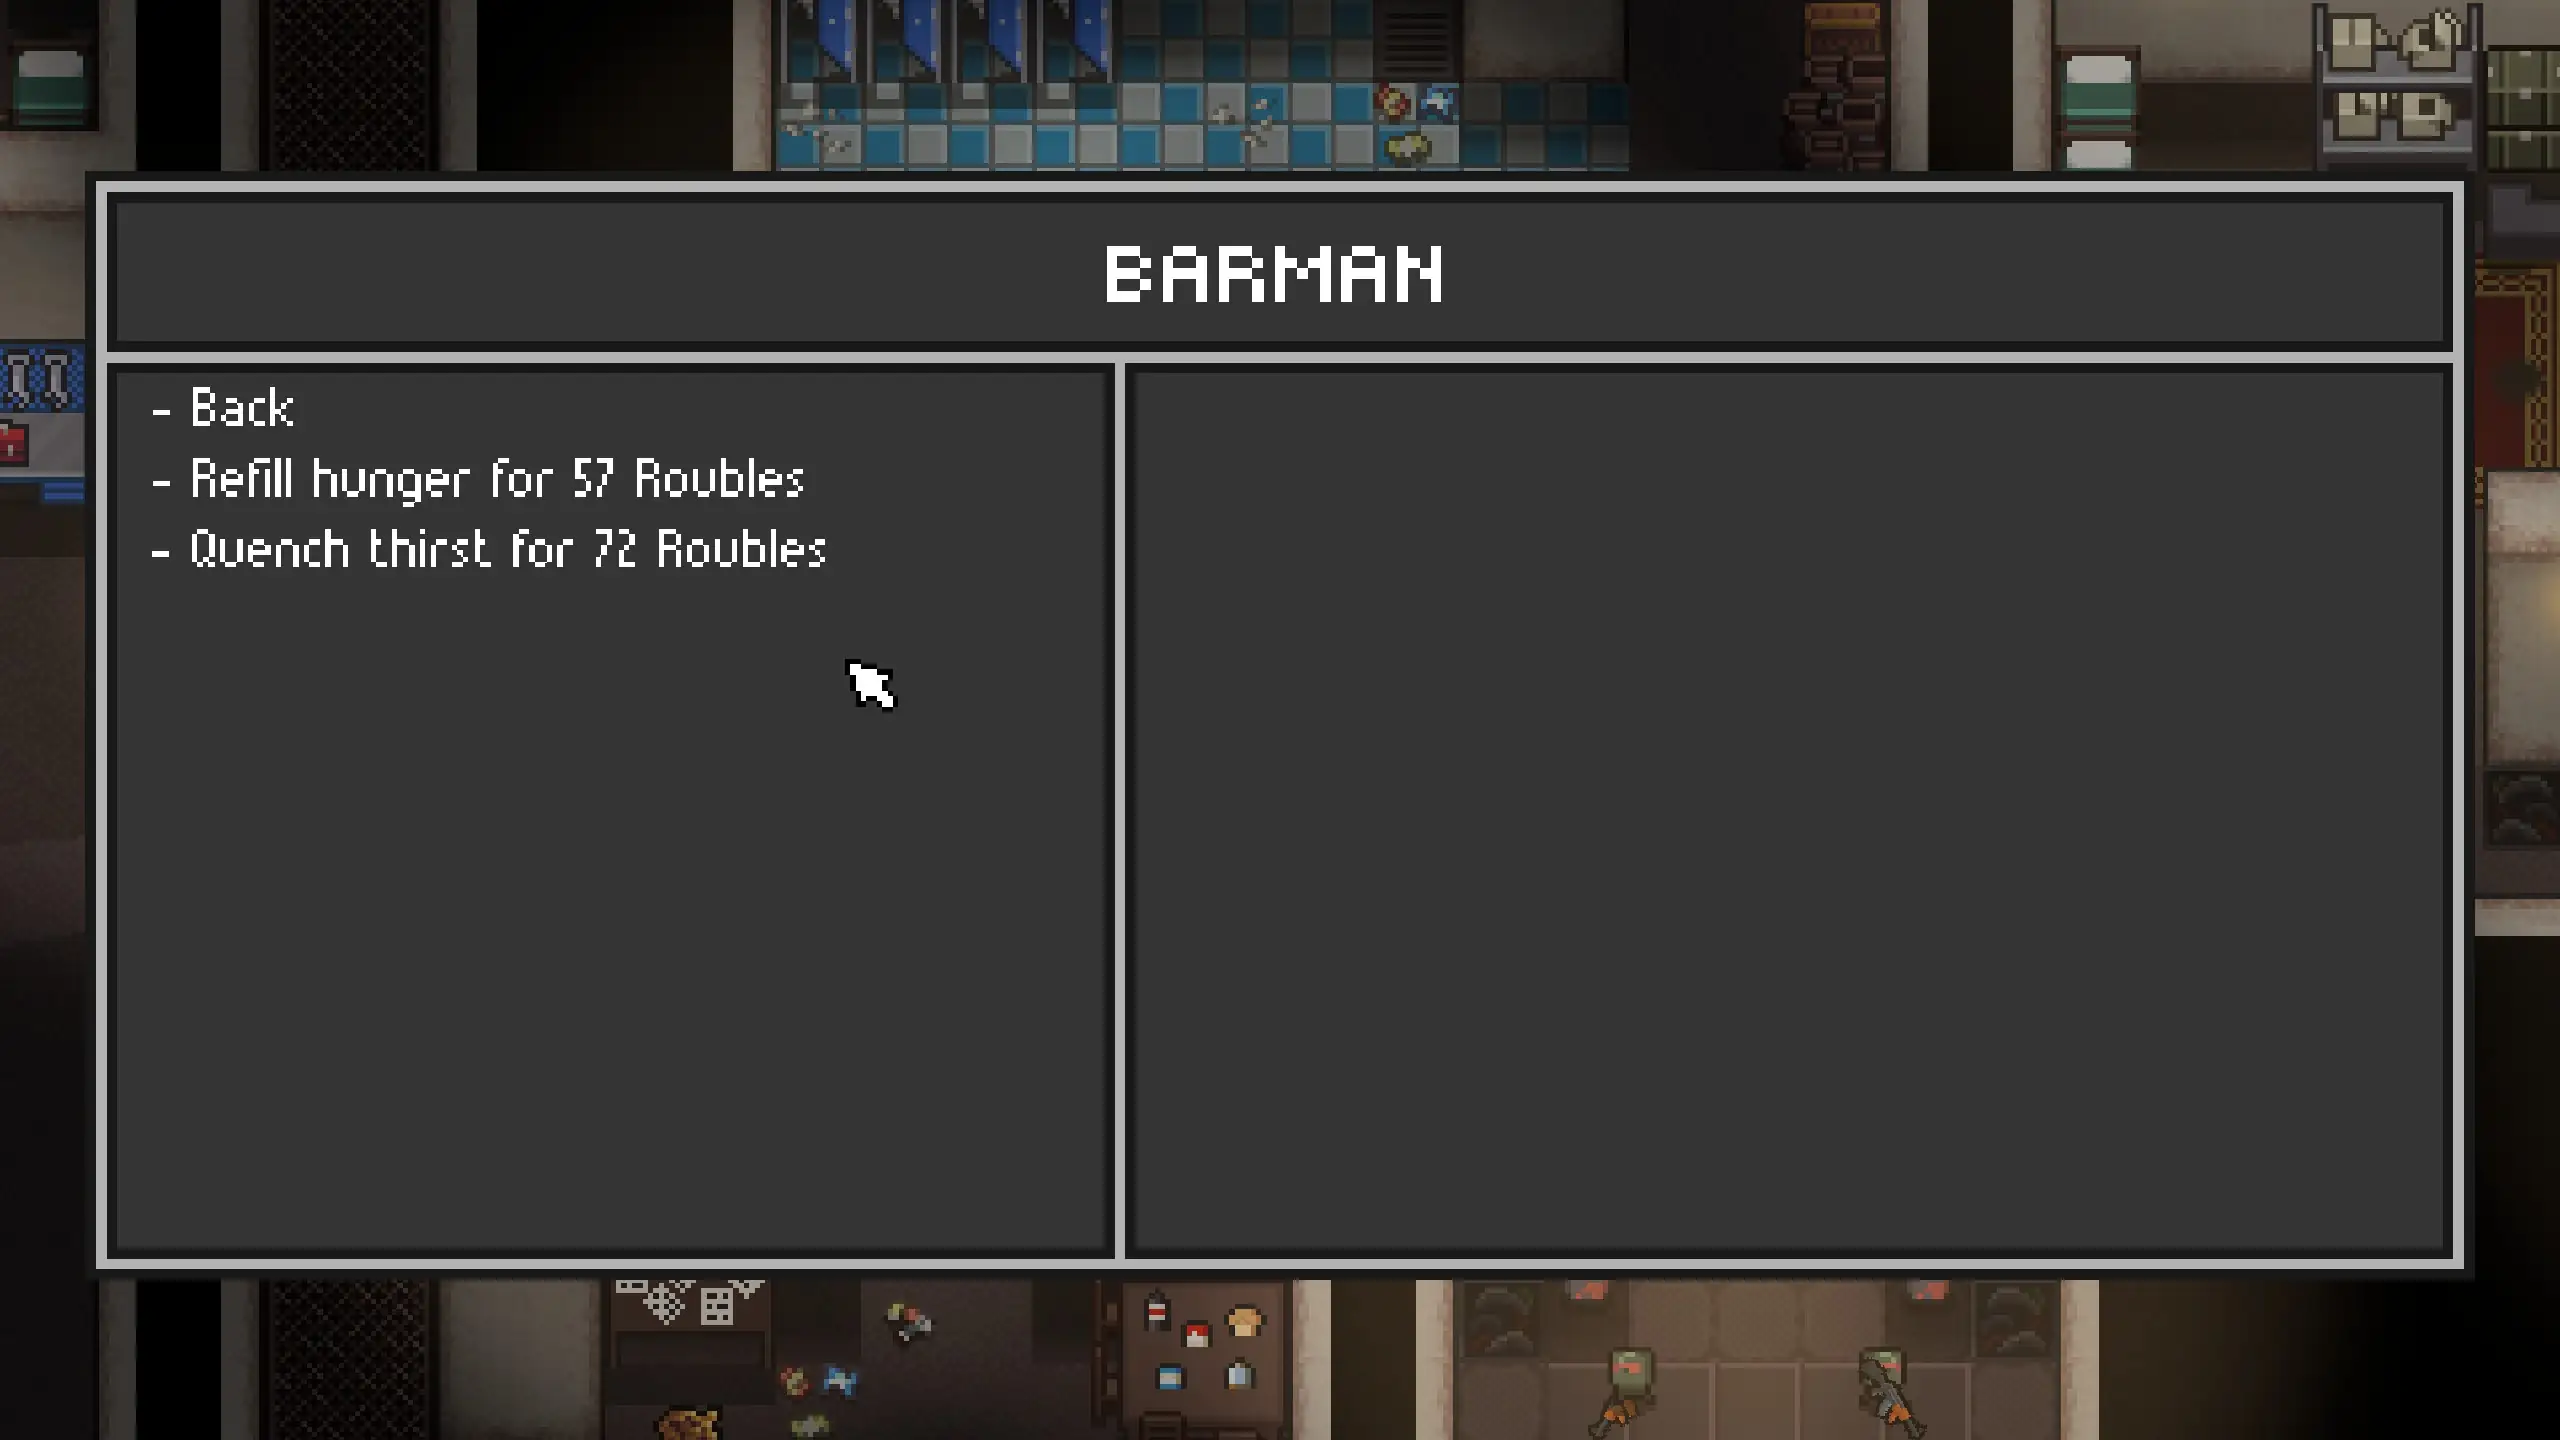
You can eat all sorts of food during a raid but the Barman is by far the cheapest way to fill back up.
Try not to forget about keeping up with your character’s overall health. You’ll need to sleep at the bunker to keep your energy up, eat food, drink water, and avoid becoming too radiated. If you take care of each status, you’ll gain buffs like increased stamina regeneration and increased max weight. This can help with getting that little bit of extra loot or just a couple of heavy items.
If you don’t take care of each status, you’ll start to gain penalties instead of buffs. Instead of having increased max weight, you’ll start to lose weight. And the last thing you want when running to an extract is to suddenly become extremely slow. This can be a disaster unless you’re intentionally trying to extract while over-encumbered. However, the worst one is your radiation which leads to bleeding randomly if it gets too high.
Tip 9 – Complete Missions to Unlock New Areas
Don’t ignore the quests you can get from the bunker NPCs. Aside from giving you little bits of story, you’ll also unlock new areas to explore. There’s nothing wrong with running the Forest zone several times, but the other areas have new content too.
The quest rewards vary heavily from useful modifications to items you may need for room modules as well. Sometimes I’ll just grab meds that I’m low on like the Anti-Rad Pills. Early on in Zero Sievert, the main missions you can get are from the Barman and Doctor. Otherwise, you can grab quests from the Networker that don’t tend to progress the story.
Tip 10 – Low Durability Weapons Can Jam
Equipping new weapons you get from enemies can be tempting to try, but they can also jam. This revolves around its durability so it’s important to check that first. Unless you’re in a bad situation and don’t have ammo for your main weapon. Then, by all means, go for it, just be careful. You may have a jam at a bad moment. I’ve had weapon jams ruin my run when fighting against supernatural creatures.
Similar to picking up low-durability weapons, I wouldn’t rely on enemy armor either. Chances are likely it’ll be heavily damaged from you shooting at them. However, even 20% durability is better than nothing if yours is broken. Unfortunately, the costs to repair armor at the Doctor can add up fast. This is usually where a lot of my money goes when I don’t have the resources to repair it.
Tip 11 – Raids Don’t Have Time Limits
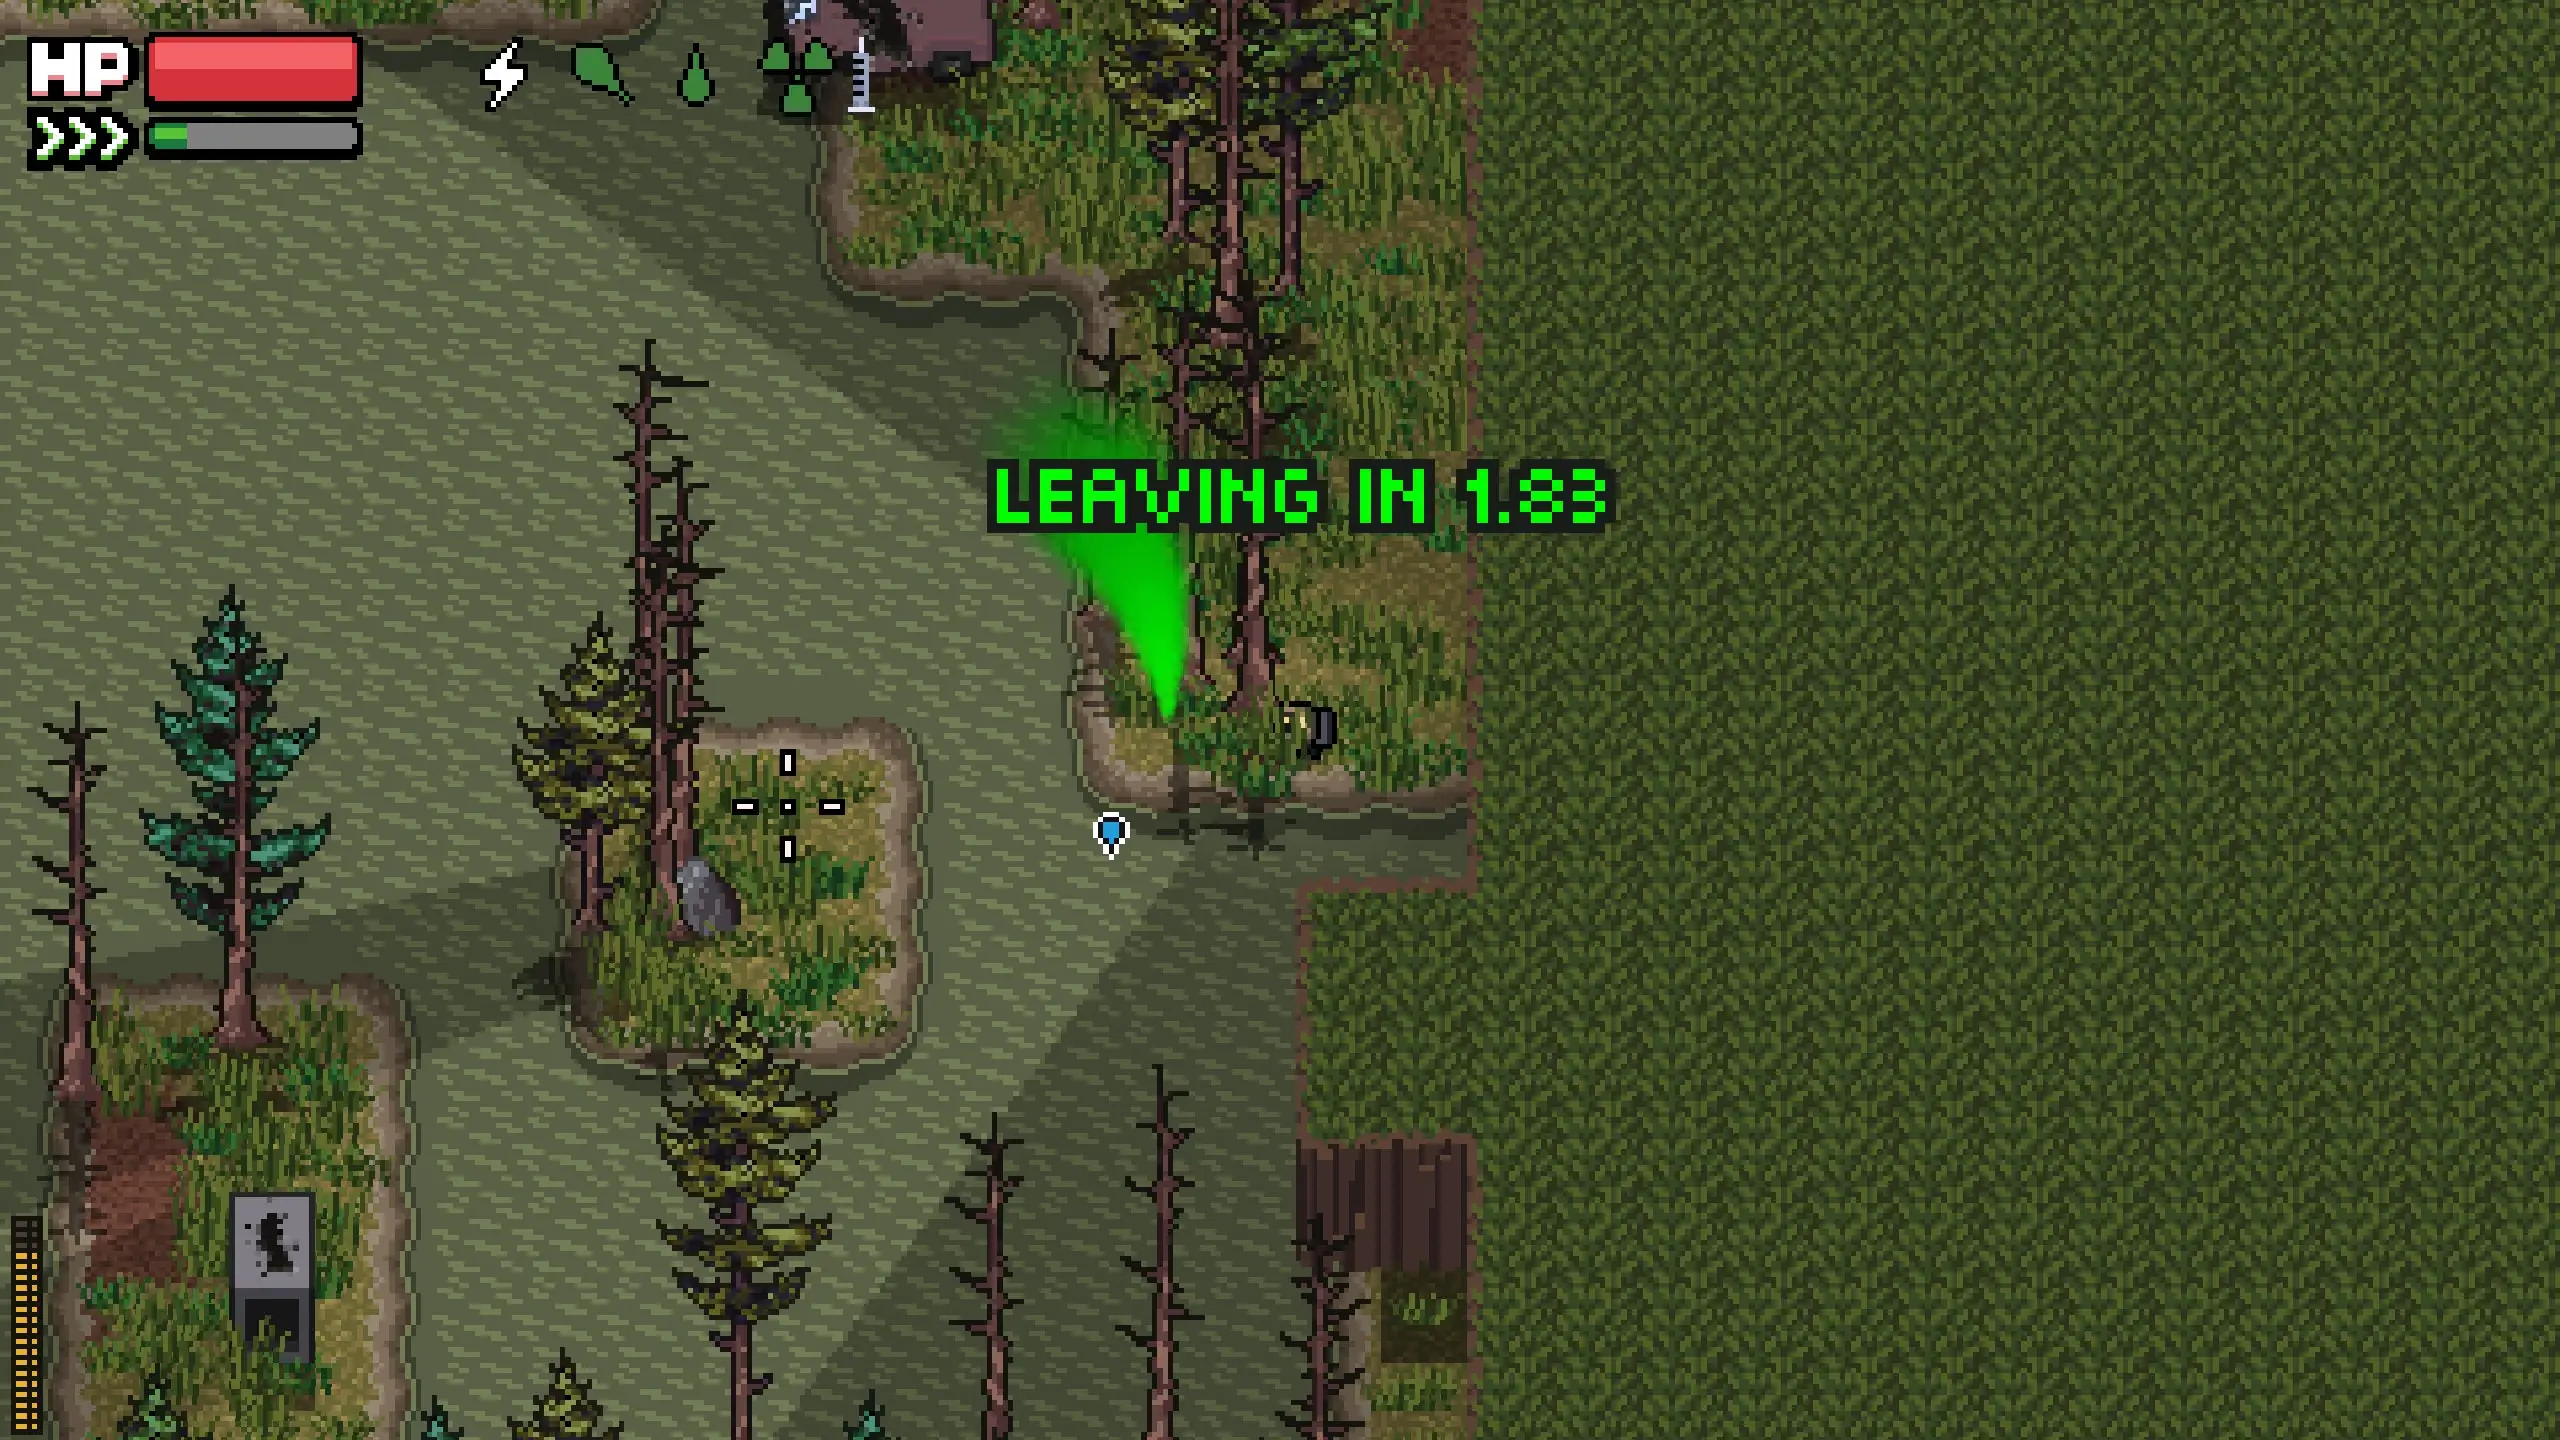
Escape from Tarkov players trying Zero Sievert are used to annoying time limits. This is a big change coming over to Zero Sievert where you’re not rushing to leave. As long as you keep up with your statuses, you can stay in a raid for as long as you need to. Just make sure you don’t stay too long and lose it all.
The other thing to be careful of is the day and night cycle. Time continues moving regardless of whether you’re at the bunker base or in the middle of a raid. So you may go underground and then appear several minutes later when it’s suddenly dark. If you’re not prepared for the night, you’re not likely to survive. Make sure to buy a headlamp from the Barman or night vision goggles from the Green Army later.
Tip 12 – Get a Better Backpack and Upgrade Your Stash
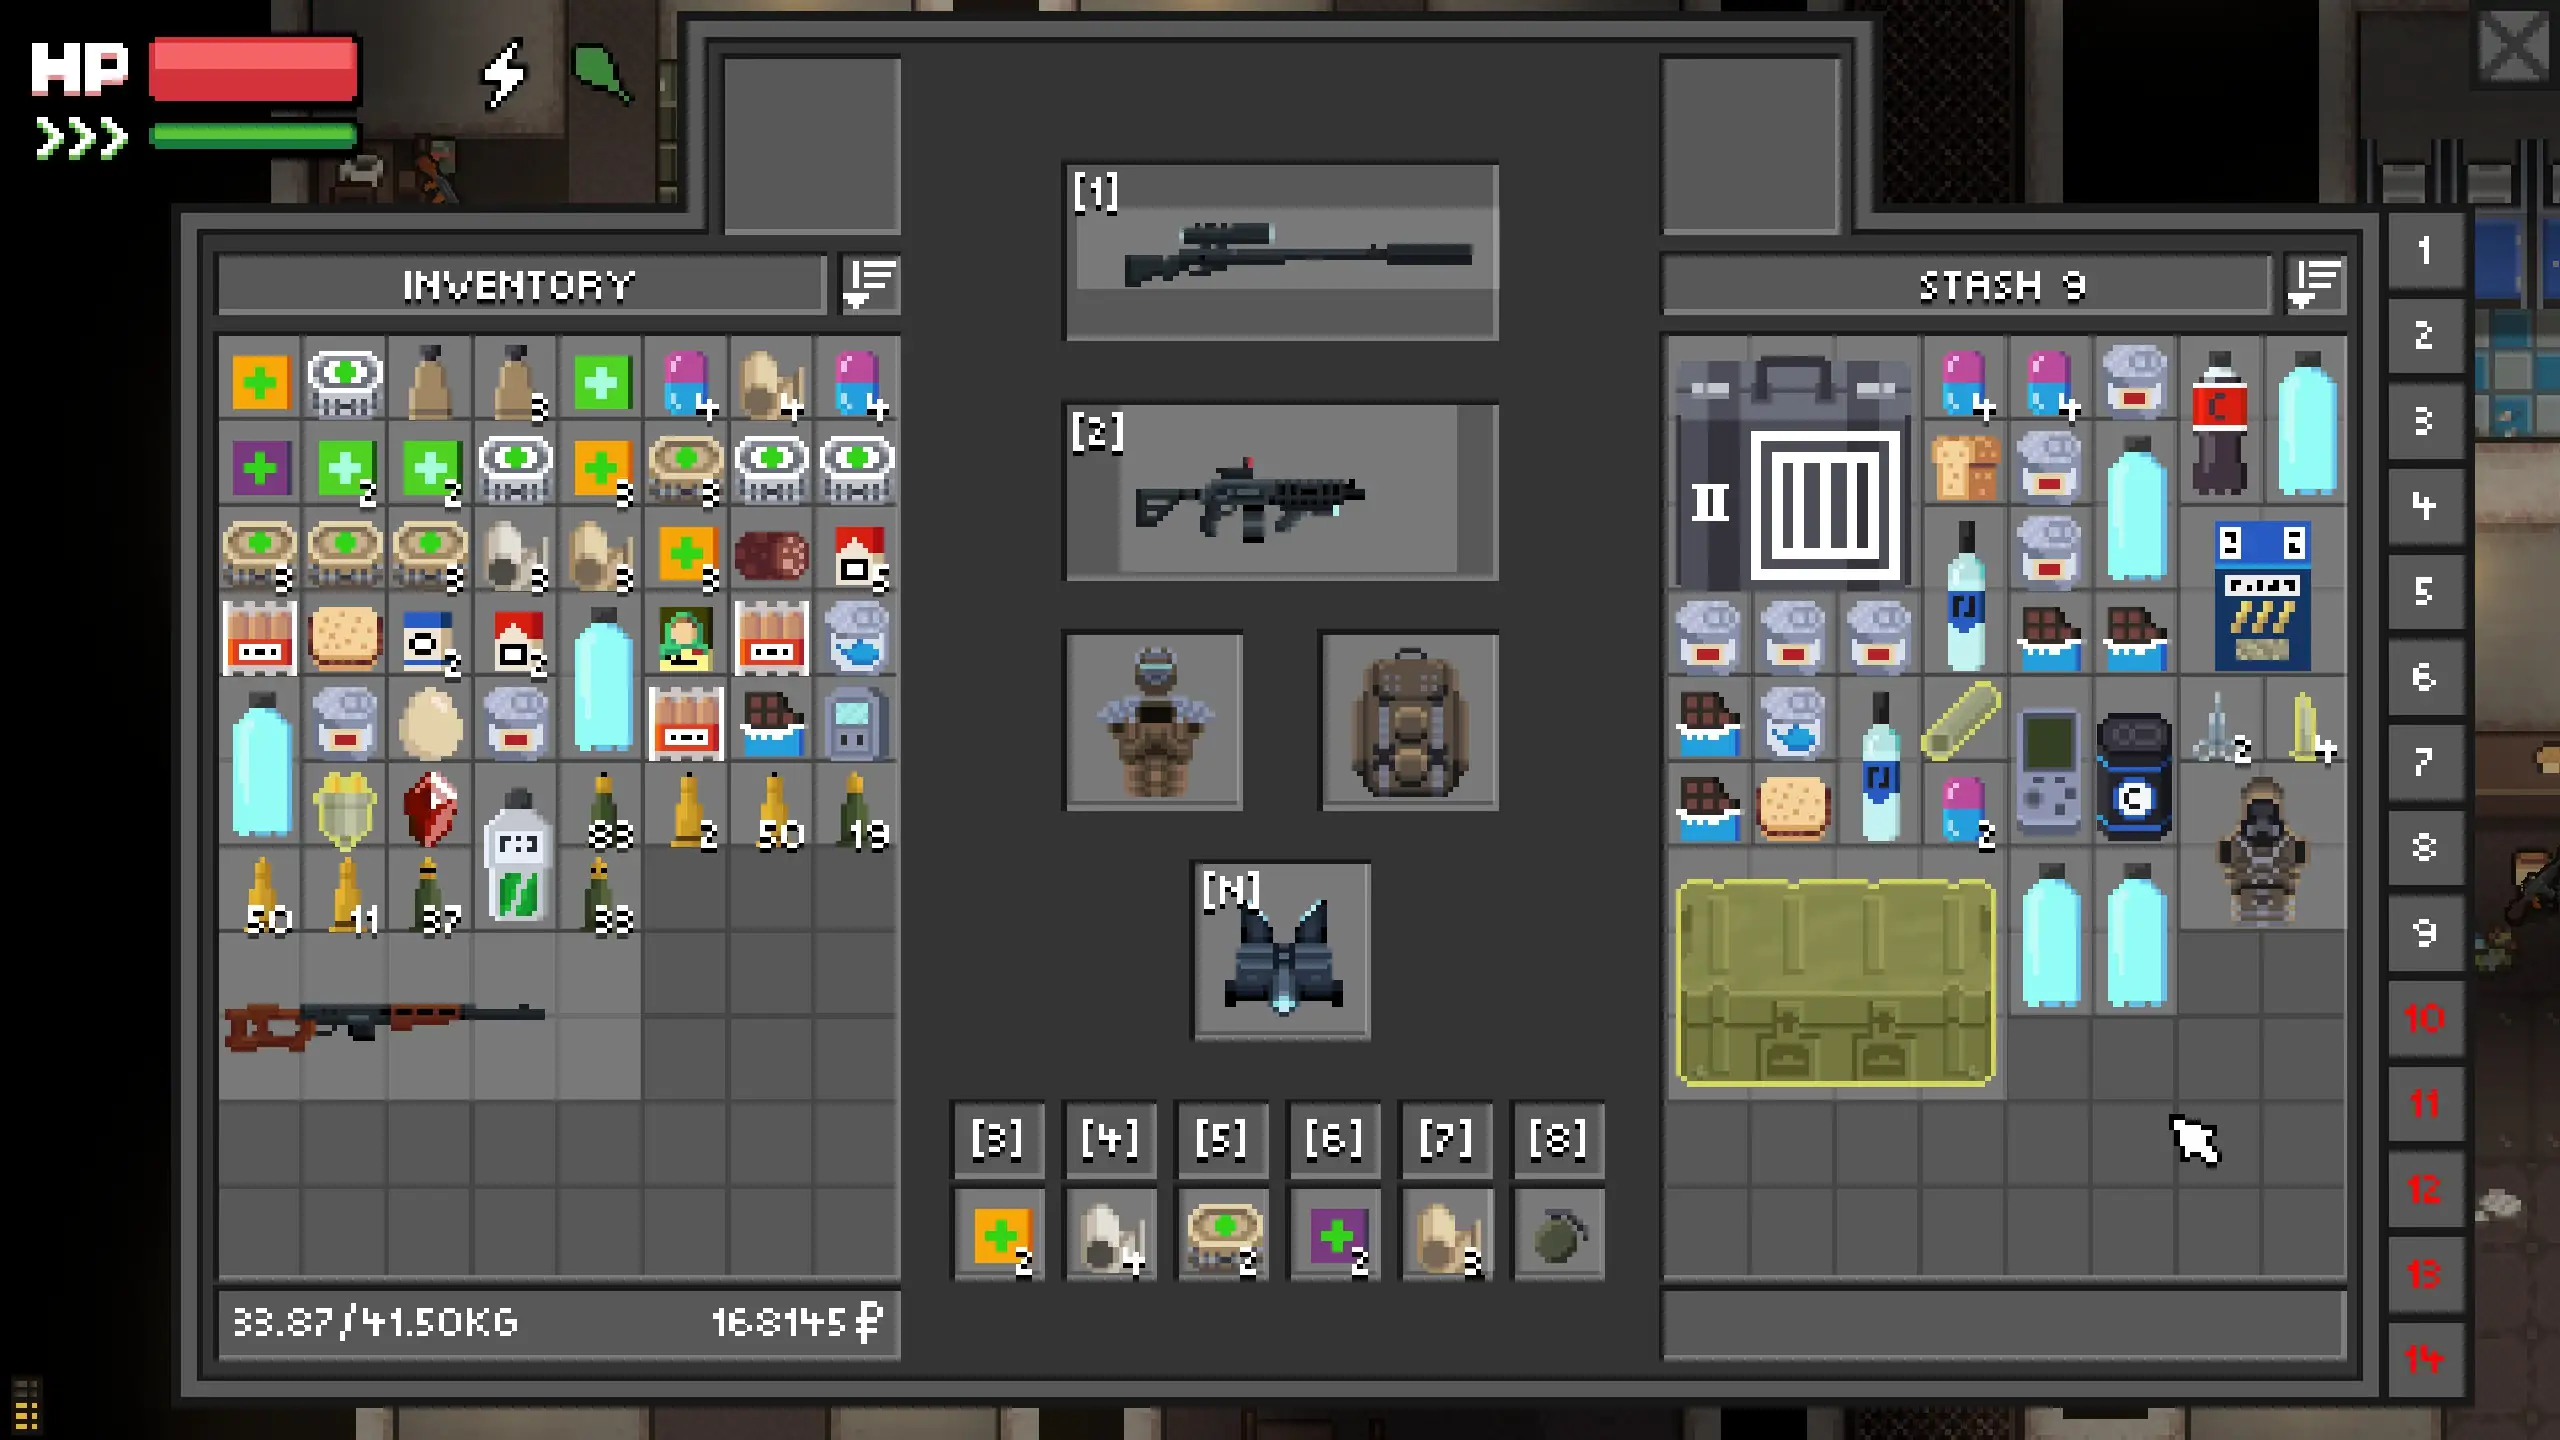
Storage is a pain regardless of whether it’s for your inventory or your bunker stash. First, I’d recommend getting a better backpack from the Barman or Doctor. Afterward, you can look into upgrading your stash which is a bit more involved. This is because you’ll need to scavenge for a bunch of random materials. Like Scrap Material, Duct tape, a Hammer, Nails, e.g. And for whatever reason installing modules in Zero Sievert is a bit confusing so I made a guide.
You’ll appreciate having the extra stash space more than anything even though it can quickly get chaotic. This is why I try to keep certain items on each stash page but it’s still a hassle when you loot a lot. In addition to that, you can track module recipes via your workbench. This makes it so the items you need are highlighted. Which makes it easier to not just loot everything without knowing if you need it.
That’s all there is to this long guide filled with some of the best Zero Sievert tips and tricks to get you started. It can be a tough and intimidating game at first if you don’t know what to expect. Especially if it’s your first extraction looter. Hopefully these tips set you on the right path.


Jeff is a journalist with over 10 years of experience writing, streaming, and making content about video games. With an associate degree in journalism, he’s a sucker for RPGs, survival games, roguelikes, and more.