
The Mount & Blade 2: Bannerlord War Sails quest, Capture the Merchant Crusas, begins right as we sail near the Skatria Islands. It’s time to hunt down Purig’s buddy Crusas after learning about his mining operation in the previous quest, Go to the Skatria Islands. During this quest, you’ll deal with Sea Hounds Patrols and a floating fortress of ships.
If you’re looking for other quests in our War Sails walkthrough, be sure to check out the walkthrough hub.
Defeat the Two Sea Hound Patrols

Once you’re within reach of the Skatria Islands, Gunnar will point out that the foe is near. By now, you’ll likely notice two different Sea Hound Patrols with 38 troops each. You can attack them separately without having to worry about them joining up together. Since there isn’t a troop advantage to either ship, it doesn’t really matter which one you target first.
As goes with many basic sea battles in the War Sails expansion, your strategy is often similar. With that said, I’ve provided some tips and tricks below that you may have seen in the rest of our walkthrough:
- Only use your sail if you have the wind working with you. You can tell based on where the needle is near the bottom right corner.
- You’re better off using just one ship in this fight due to troop limits. Otherwise, you’ll only be able to fill each ship to about half.
- Since this ship isn’t equipped with a ram, you can try boarding the enemy ship immediately. You’ll have a good chance of winning simply from having more troops.
- If you’re running an underleveled character, you can rely on ranged weapons instead of charging in.
- Since there is only one enemy ship, you won’t have to worry about cutting the ropes and sailing after another one.
Upon defeating the first Sea Hounds Patrol, the second ship will try to escape. If you still have a good amount of troops after the previous battle, charge after them. Otherwise, you can head to a nearby port town and pick the “Gather Reinforcements” option. This will refill your ship with troops for free. Either way, once you’re ready, take out the second patrol similar to the first.
Attack Salautas Crusas’ Party at Sea
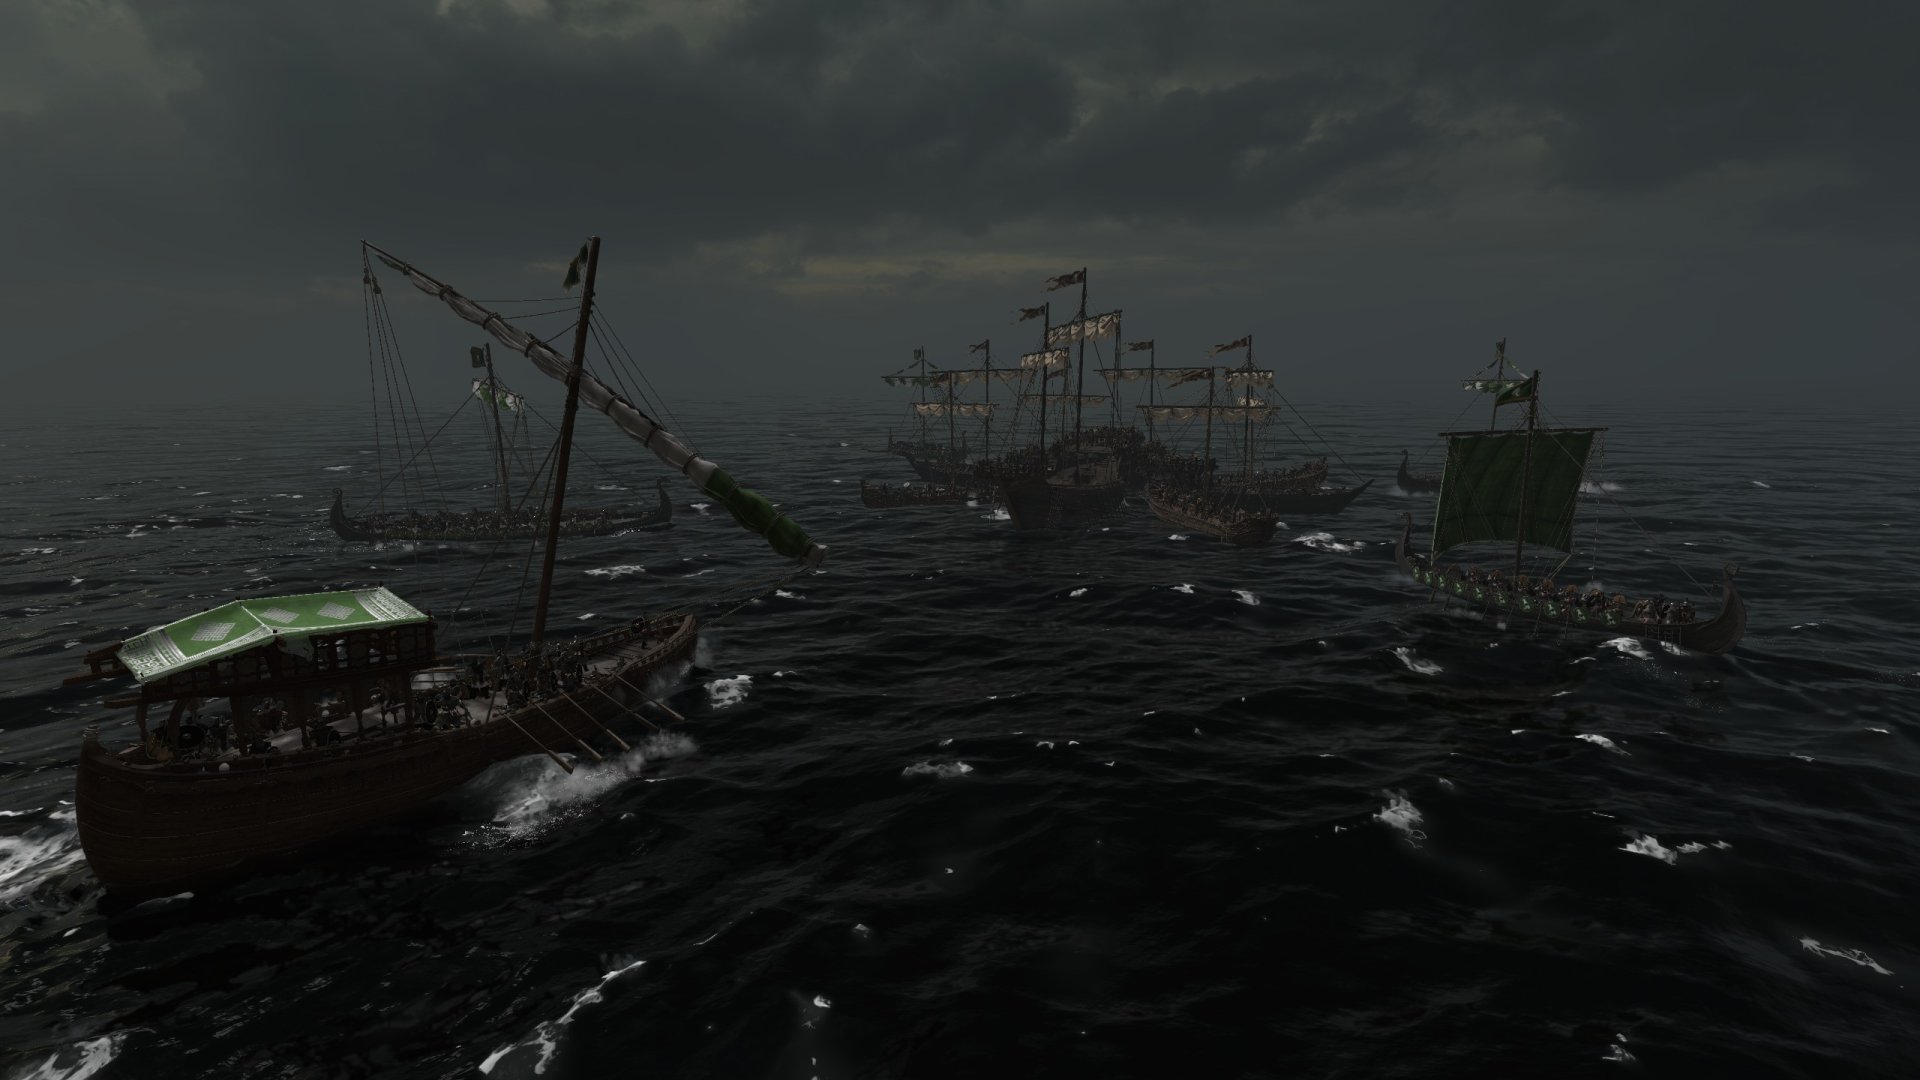
After taking out both Sea Hounds Patrols, the Salautas Crusas’ Party will appear nearby. Unlike the other two fleets with 38 troops each, this one has an enormous 160. This can be intimidating, but don’t worry, as long as your party is full. While this next part can be difficult, it’s not due to the large party size. When the time comes, you’ll have help in taking them out.
Upon attacking Crusas’ party, a conversation will trigger with Bjolgur. He’ll explain how Crusas lashes his ships together to essentially create a floating fortress. In addition to this, he also arms them with mangonels to fling flaming pitch through the air. To deal with those mangonels, we’ll need to stay far away and use our new ballista.
Before charging into battle, you’ll have an option to captain the ballista ship or ask that Bjolgur does. I didn’t verify what happens if you try to ask him to, and whether or not it works. In my playthrough, I chose to do it and, as such, used the ballista in the upcoming battle.
Destroy the Four Mangonels

This part is difficult since you’ll need to stay far away from the fortress of ships while also aiming at little targets. As the headline above notes, there are four different mangonels, each with a yellow exclamation point above them. Each one’s silhouette is also outlined, which can help see where they are. However, it can simultaneously make it difficult to realize you don’t have a line of sight.
During this part, you’ll have 30 ballista bolts to use before running out and failing the quest. Fortunately, even if you run out and fail, you can retry from the beginning. This is why it’s not the end of the world if you need a little practice to get those shots in. That aside, it only takes two bolts to destroy a mangonel, even though the damage varies slightly on each hit. Here are some tips for destroying them:
- Take advantage of the zooming button, similar to when using siege equipment or ranged weapons. This is the Shift key on PC.
- Try to watch for where each bolt lands if possible, so you can adjust accordingly.
- You can experiment with how close you can be before they’ll attack you, since you’re able to take a few hits as long as they’re spread out. This can help make landing those ballista shots a little easier.
- You can still sail your boat while using the ballista. This works well for moving away from incoming attacks and/or stopping in between them to shoot back.
- After destroying a couple of mangonels on one side, you can move in closer since the others won’t have an angle on you. But you’ll still take incoming fire from archers.
Board Crusas’ Fortress With Your Allies
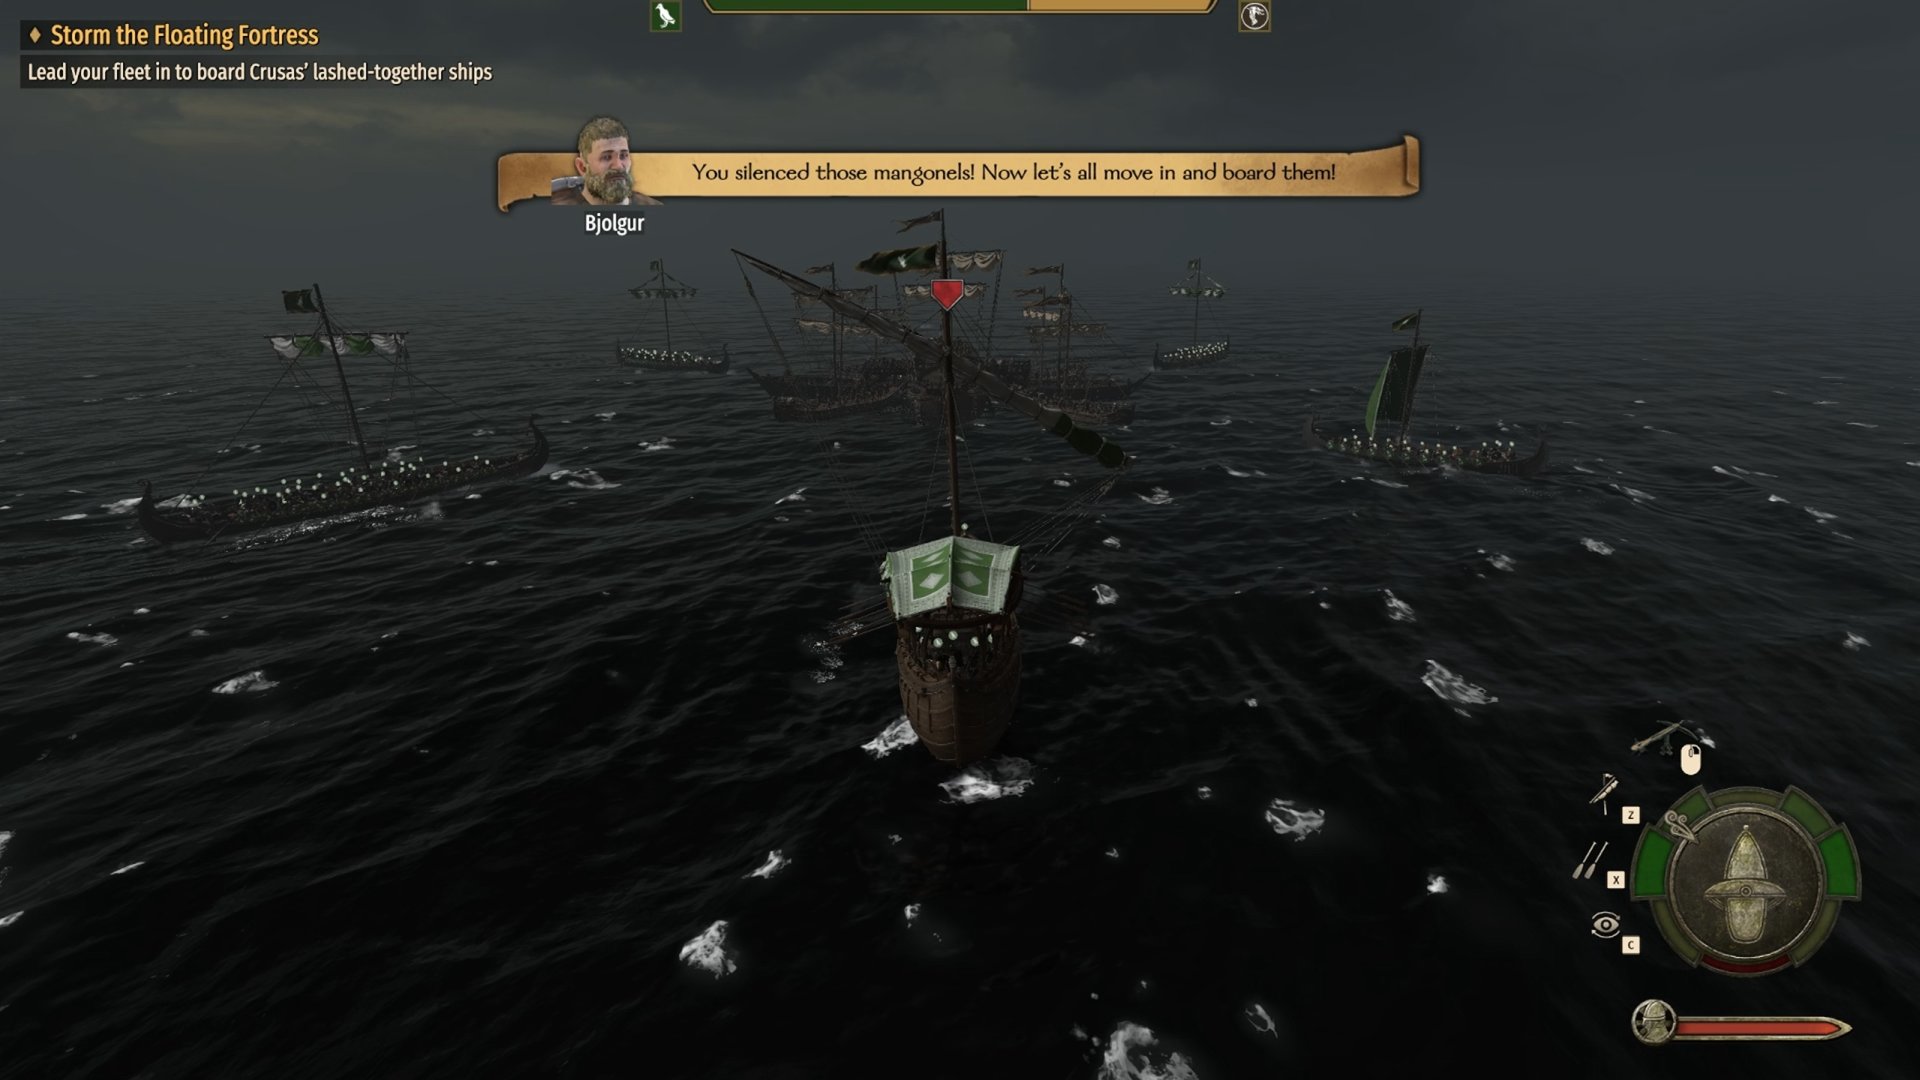
Once you’ve destroyed all four mangonels, Bjolgur will show up with his fleet to support your push toward the fortress. This turns into a large onslaught where you can use the ballista as you sail forward. Once you get close enough to the fleet of ships, board as usual and defeat all enemy troops here.
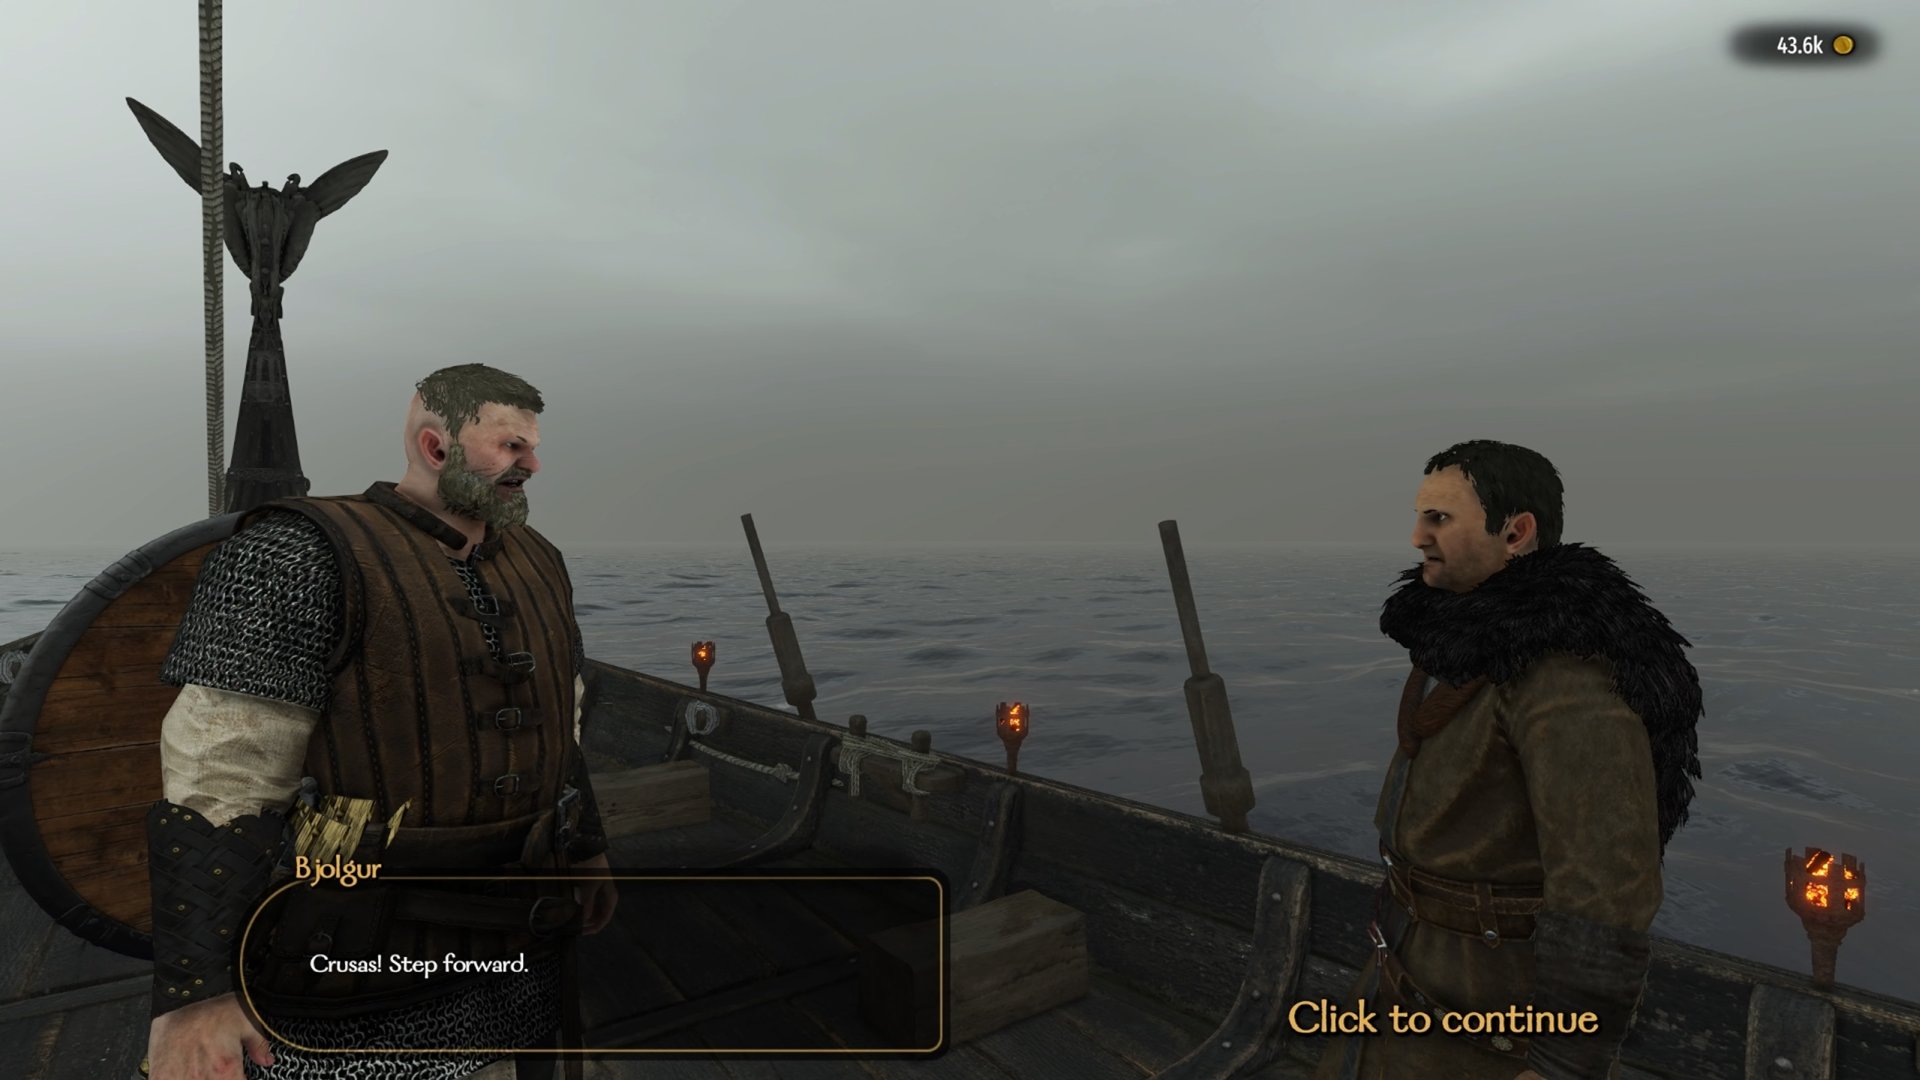
After winning your battle, a conversation will trigger where Bjolgur introduces Crusas to you. Similar to when we captured Emira al Fahda, Crusas is already threatening us. Which is goofy, just like before, since we slaughtered his entire fleet. Regardless, you can use this conversation to learn more about his mining operation and where our sister may be.
As the conversation continues, he offers to tell us where Purig is likely holding our sister in exchange for being spared. This sends us off to Angranfjord, where Purig is allegedly conducting business. Gunnar interjects his way into the conversation to suggest using Crusas’ ship to disguise ourselves and get up close. Before we’re finished speaking with Crusas, we get a decision that impacts our reputation:
- If you don’t play us false, we’ll have mercy on you. (+50 Honor Bonus)
- I will make you no promises. (+50 Calculating Bonus)
Once the conversation is over, you’ll have completed the quest, Capture the Merchant Crusas. Afterward, you’ll have a window appear, as often does, to teleport back to Ostican. Here you can speak with Gunnar to start the next quest when ready: Free the Sea Hounds’ Captives.


Jeff is a journalist with over 10 years of experience writing, streaming, and making content about video games. With an associate degree in journalism, he’s a sucker for RPGs, survival games, roguelikes, and more.